We may receive a portion of sales if you purchase a product through a link in this article.
My camera roll contains multitudes. I scroll through photos of my kids’ toothy grins, peachy sunsets, and delightful coffee dates and experience joy, wonder, and nostalgia. But lurking there on the other side is guilt, dread, and overwhelm. What am I going to do with all these photos? How do I organize photos so that they’re easily accessible for me and my family members? And what if the cyber-apocalypse hits and I lose all my photosâya know, on top of every other end-of-the-world problem?
I’ll be honest. I pitched this story because I thought I’d finally figured it outâlet me be your hero, baby! But I soon discovered that the more I know, the less I understand. So, I decided to take these questions that keep me up at night to the professionals. And wowâdid they deliver. Spoiler alert: I’m on a brand-new photo organization protocol that weaves seamlessly within my routine (thank you, habit stacking). And best of all, it works. I’m more organized AND I’m sleeping better knowing that my kids won’t rely on junky old iPhones to re-live their very well-documented childhood.
Ahead, find out how to organize photos with practical steps, including the single tool that made my photo organization experience truly enjoyableâaka, how it should be.
The Challenge
If you’re like me, you’ve avoided organizing your photos for one of three reasons: the sheer volume is overwhelming, digital clutter is easier to ignore than actual clutter, and lack of time, resources, and knowledge makes the process feel like a mountain you’d rather not climb. (Hand raised if it’s all three.)
And then there’s the emotional weight to consider. It’s not easy to ruthlessly delete when you’re making a million daily decisions. Sometimes scrolling through photos can bring up emotions or memories we’d rather not face. This is certainly a task that requires the right frame of mind. One that is well-rested and can both stroll down memory lane and make objective choices. It’s not easy, but the benefits of a well-organized photo collection can slowly release some of that mental load.
Professional photo organizer Casey von Stein, aka Miss Freddy, understands the overwhelm. âPeople often feel ashamed by the number of photos in their camera roll. We have forgotten that photos are supposed to bring us JOY! They represent all the blessings in our lives we have decided to document.â And the biggest benefit of a well-organized photo collection? âIt restores the FUN of photosâusing them in exciting ways like making photo books, creating custom videos, easily ordering photo gifts, and more.â
Casey von Stein, aka Miss Freddy
Casey von Stein, aka Miss Freddy, is a certified Professional Photo Organizer in Golden, Colorado. After 10 years as a professional photographer, she realized that what people really needed was HELP organizing and enjoying their photos. She offers remote organizing services for clients worldwide and self-paced online courses for those who want to tackle their photo mess on their own.
Preparing for Organization
The way to get it done for real this time? Take that mountain and make it a hillâyou’ve got to start small.
When I think of organizing my photos, I think of cleaning up my camera roll. But thanks to professionals like Miss Freddy, Iâve come to understand that itâs so much more. We have photos on our smartphones, computers, memory cards, digital cameras, old Facebook albums, and, letâs not forget (though we may try) those physical prints packed away deep in the closest.
People often feel ashamed by the number of photos in their camera roll. We have forgotten that photos are supposed to bring us JOY!
Step One: Assess Your Physical and Digital Photo Collection
First, consider anywhere and everywhere your images currently live. âIâve noticed everyoneâs first instinct when organizing their photos is to delete junk on their camera roll like screenshots and blurry photos,â Stein notes. âBut where does that get you? Exhausted after deleting a thousand items and feeling no more organized, right?â
Thatâs why the first step to organizing photos is creating one âhubâ for all your memories to live. âOnce everything is gathered into one hub, you can more easily get your arms around it and use tech to simplify the organizing work!â
Step Two: Set Realistic Goals and Timelines
Pull out your calendar and make a date with yourself to organize all your images into one hub. If itâs on the calendar, itâs happening. Highly encourage romanticizing your time with good music, nourishing snacks, and something to sip on. Remember, photos are meant to bring us joyâlean into it!
From there, assign time to organize your photos within the hub. You can either start backward by giving yourself a goal date or work forward, penciling in half-hour working blocks at a time until the task is complete.
Step Three: Grab Your Tools
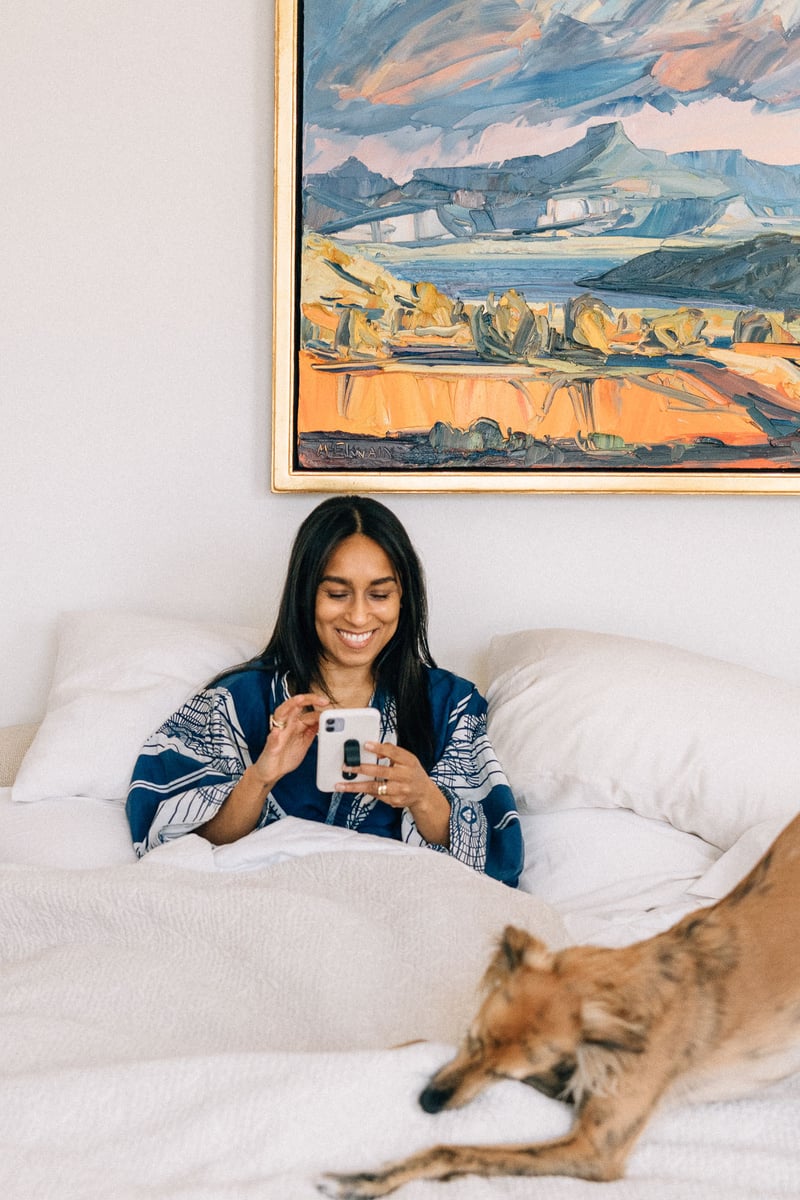
First, you need a photo storage system to get your hub in working condition. Michelle Nash, photographer and Executive Producer here at Camille Styles, turns to Dropbox or Google Photos. âGoogle Photos is the best web-based program for photo organization, in my opinion. They were one of the first companies to implement smart search where you could find specific people.â Search âdog in bandanaâ or âVenice Beach 2021,â for example, to find exactly what youâre looking for.
Miss Freddy suggests that your photos live in three places to ensure ultimate peace of mind and security. Your phone can be one of the places, in addition to your digital storage system, and finally, an external hard drive. Backing up your photo collection on an external hard drive is the most secure way to prevent loss. Michelle recommends this smaller hard drive as a working drive thatâs easy to travel with and this 10TB external hard drive for storing your entire collection.
Sorting and Categorizing
Now that youâre ready to put all your photos into one main hub, itâs time to sort and categorize. If youâre using Google Photos to back up your camera roll, images will automatically be sorted by date. If youâve got a backlog of photos from other sources, youâre best off creating a system.
Create a System for Sorting Photos
First things first: you need to get everything on your computer. Upload from hard drives, digitize physical copies, sort through USBsâjust get âem all on there. (Note: if your computer doesnât have the space, you can always work from an external hard drive.)
Next, it’s time to sort. When youâre organizing photos on your computer, it helps to change the filename so theyâre easy to find. âJust like how we used to write âMichelle’s Birthday 1998â on an envelope filled with physical photos, it helps to rename your files digitally.â For example, Michelle generally uses a format like âsubjectmatter_location_date.â
Michelle shared her exact process:
Keep a master folder for every year (ex: 2024)
Create subfolders for each month
Create specific subfolders within each month (ex: âMichelleâs 30th Birthdayâ)
Within these subfolders, get as specific as you want to and organize into âscenesâ (ex: âOpening Presentsâ and âCakeâ)
At this point, you can backup the images on your computer to a program like Google Photos and then sync a backup with your phoneâs camera rollâyour hub is now complete and ready to be organized.
How to Categorize Photos in a Fun and Useful Way
Miss Freddy relies heavily on creating digital albums to categorize and highlight events or people. And while itâs a common misconception that albums take up more space in an already sprawling collection, the truth is that theyâre highly underutilized. âPeople think theyâre creating duplicates and making a bigger mess of their collection, but thatâs not true at all! Albums do NOT create copies of your photos, they reference the original in your library.â
She uses albums as a way to categorize photos that matter most. âI use âBest Ofâ albums to earmark my favorite photos of every family member (including the dog!), travel albums to highlight favorite photos from trips, project albums to gather photos for projects like slideshows or photo books, and much more!â
Utilize Technology for Efficient Digital Sorting
I took Michelleâs advice and turned to Google Photos for my personal photo library and one of my favorite features is how the technology sorts everything for me. It highlighted frequent faces so that all I had to do was go in and give them a name. From there, I can simply type my sonâs name and a place in the search bar (ex: âAvery at Disneyland 2019â) to use facial recognition and metadata to find exactly what Iâm looking for.
Dealing with Duplicate Photos and Low-Quality Images
Up to now, weâve only covered the photos we want to keep forever and lock âem away in a vault for our great-great-great grandkids to remember us by. But what about all those images you really, truly do not want? The screenshots are easy enough to delete, but what about when youâre faced with two (or two hundred…) photos of the same thing (I’m talking about selfies) with a slight difference from one to the next? Ah, the freedom and the cage of carrying a camera in our back pockets.
I asked Michelle how to just make the decision already and delete the photos. She offered sound advice: âI think the main gut check before you delete an image is just asking yourself: is this an image that myself or someone else would want to revisit sometime in the future? If the answer is no, then deleteâand no regrets! If you have even an inkling of a yes, keep the image and store it where it belongs.â
Hereâs a handy list if youâre hovering between yay and nay.
Keepers:
Favorite moments, people, locations
Moments that might feel mundane or unimportant now but you will appreciate or laugh at later
Trips, special occasions, friends and family, pets
Reminders
Deleters:
Duplicates
Fuzzy/out-of-focus images
Accidental images
Screenshots youâll never revisit
Information you no longer need
Create a Maintenance Plan (aka The Daily Habit That Will Change Your Life)
By this point, youâre at a place where all the images you ever loved are safe and sound in your hub. And perhaps also by this point, youâre too tired and overwhelmed to go through and clean it all up. Even if you know what you want to delete, it would be nearly impossible to do it all in one sitting. Enter, the daily habit that changed my life and the way I came to know about Miss Freddy in the first place: the Daily Delete.
How to Do the Daily Delete
âNo matter how many photos are in your hub (the average size for my clients is about 70k), it feels way too big to tackle cleaning it up. The Daily Delete makes it smaller. One day at a time.â Hereâs how it works:
Type in todayâs date in your search bar without the year. (Note: You can do this on your camera roll or download the Google Photos appâjust remember, if youâre organizing within your camera roll youâll need to pause auto-sync so that your hub reflects your updates.)
Look through all the photos and videos from this date back through time and delete the ones you donât need.
I loved the idea of the Daily Delete because of its practicality. It made my HUGE problem into something small. However, I didnât anticipate the added bonus of genuinely enjoying my photos. I used to habit-stack it while I was breastfeeding, but those days are gone. Now, I set an alarm for 8 p.m. every night and enjoy five-ish daily minutes of looking back on memories from the past while also tackling a task that used to feel insurmountable. The Daily Delete allows you to interact with photos for the exact reason you took them in the first place: to enjoy them.
Set Up Reminders and Routines
The thing about photos is that we keep taking them. This means that photo organization is an ongoing task. And because we love a ritual and a routine around here, itâs fairly seamless to make it a regular event. I have my Daily Delete routine and a monthly check-in to both tweak my Google Photos (maybe add a new name to a face or update some Best Of albums) and back up my hub to my external hard drive.
Yes, organizing your photos is a big project, but it is such valuable work […] you can ultimately start enjoying your photos again.
Preserving and Sharing Memories
Finally, we get to the best part. Itâs no use keeping a collection of photos if we canât use them! I became most motivated to organize my photos so that my kids could actually interact with them in a way that was not me passing my phone over and letting them scroll away. Find your whyâthen get creative.
Creative Ways to Display and Showcase Photos
Thereâs no shortage of print options for photosâthatâs a whole other article in and of itself. If youâre having trouble narrowing it down, here are a few fun ideas to get started:
Create an Annual: Just like your high school days, collect all your favorite images from the year (grab from your âBest Ofâ photo albums!), and drop them into a single photo book.
Print a Family Calendar: Steal this fun idea from Michelleâs familyâeveryone contributes to a photo stream throughout the year to be used to create an extended family calendar.
Add Photos to Your Vision Board: This is the perfect place to utilize photos from trips or just general dreamy moments you want to continue to tap into throughout the year.
Turn on the TV Screensaver: Drop in some of your favorite photos to play on a loop when youâre not bingeing away.
Create a Shared Photo Stream: A shared photo stream is a great way to share memories and stories in the caption, especially if you’ve got family members far away. Bonus: when your kids grow up youâll have a digital scrapbook to share.
How to Select Images for a Photo Book
Weâre fans of Artifact Uprising for creating photo projects, from photo books to coasters to giant prints. If you’re going to the photo book route, a new kind of overwhelm often comes with where to start. I tapped the pros at Artifact Uprising to get their tips:
Start by setting a clear focus or theme for your book. Artifact Uprising values the idea of storytelling so we recommend starting by identifying the main story or narrative you want to convey and then choosing images that capture the essence of that story.
Limit yourself to a specific number of photos per page or spread to avoid overcrowding the book. And remember, it’s okay to let go of the notion that every photo has to be included.
Select the images that are most meaningful and impactful to tell your story beautifully.
The Takeaways
To recap: first, you’ve got to create one photo collection hub where all your memories live. Back it up on an external hard drive for safekeeping. Then, sort and organize your photos using tools like the Daily Delete and regular appointments with yourself. Finally, use your photos! Print them, share them, and enjoy them.
Miss Freddy wraps it up well: âYes, organizing your photos is a big project, but it is such valuable work. Once you get your photos into one place, you can more easily create backups you trust so you can finally stop worrying about losing everything, you can use tech to help make it easier like automatically identifying duplicates, and you can ultimately start enjoying your photos again.â
Here’s to the enjoyment part, folks!
Additional Resources
If youâve read through this whole article and are still like, âI just caaanât,â Miss Freddyâs Backup Bootcamp⢠course has helped thousands of students enjoy their photos again with step-by-step video tutorials.
Growing up, my family and I used to play games almost every night after dinner. There were countless Monopoly marathons, Uno matches that would rival competitive sports, and more than a few domino games that included âfriendly wagers.â And while admittedly, I needed a long break before I could eagerly jump back into the game night frenzy, as an adult, Iâm happy to keep the tradition going. To help you do the same, Iâve rounded up my favorite game night games that are guaranteed to keep you laughing well into the night. Donât say we didnât warn you!
The Best Game Night Games
Before you scroll through, here are a few tips to take game night from an obligatory commitment to something everyone will look forward to. I love making a special but stress-free meal (or putting together a varied spread of appetizers), popping open a bottle of wine, and setting the scene with a curated playlist that has something for everyone.
Not one for competition? No worries. While you can certainly catch me *aggressively* engaging in all of the games below, when you get down to it, Iâm simply happy to be surrounded by my favorite people without any screens among us. And, of course, we certainly donât need excuses to make that happen. If weâve learned anything from the past two years (and my goodness, weâve certainly learned a lot), itâs this: Coming together, connecting, and offering up your presence alone is always enough.
But with that being said, after the greetings and hugs are given, itâs always good to have an activity or two thatâll help you further facilitate the fun. Whether youâre a player whoâs all about strategy or someone who loves leaning into their luck, youâll have your pick of all the best game night games below.
More and more games are coming out that are dedicated to inspiring thoughtful conversations. They allow you to go deep with other players, even if youâve only just met. Weâre Not Really Strangers is all of this and more (thereâs a reason the game took social media by storm!).
In this game, crafting a full-blown, beautiful patchwork blanket is the goal. Itâs great for players who moonlight as puzzle fanatics (so⦠everyone) and even lets you indulge in a little strategic thinking.
You need at least seven people to play Werewolf, making it a great option for game night. Every player gets a character card (1 Moderator, 1 Seer, 1 Doctor, and 2 Werewolves) and the Werewolves work together to select a victim. Accusations and lies ensueâbut donât worry, itâs just a game.
While I love getting competitive, sometimes a cooperative game is more my speed. Just One is the perfect blend of Catch Phrase and Monikers (keep scrolling for those recs below). Players work together to give their teammates clues that help them guess the mystery words.
It’s not game night without the mother of all game night games. Cards Against Humanity is a ridiculous, adult-themed take on the card game Apples to Apples, and it’s quickly worked its way to the No. 1 best-selling spot in the toys and games department.
When The New York Times calls something âThe perfect party game,â you believe it. Itâs simple to play. In three rounds, players give clues and try to get their team to guess as many of the names as possible from the deck. Round one: Say whatever you need to get your team to guess the name on each card (without, of course, using the name itself). Round two is a little more challenging. Using the same cards from the first round, you can only offer up one word as your hint. Round three? Charades, my friends.
If memory serves me correctly, I believe this easy, but strategic (and wildly fun) card game came into my life on my sixth birthdayâand Iâve played at least a monthly round of Rat-A-Tat-Cat ever since. While itâs simple enough for young children to enjoy, thereâs plenty of skill and intuition packed in. Each player is dealt four cards kept face-down. Cards are numbered one through nine, and with every turn, players draw a card from the deck trying to end up with the lowest score.
Whether itâs a reunion, holiday, or really any time my family finds ourselves together, you can bet weâll be playing Mille Bornes. French for a thousand milestones, Mille Bornes is the classic, mid-century card game that has players racing head-to-head.
Want to get to know your friends better? Then you have to play the Hot Seat card game, which will help you find out who your friends really areâyou may even discover a few things you didn’t want to know!
Admittedly, because of my proud cat lady status, I was initially turned off by the name. But because of Exploding Kittensâ popularity, the Russian Roulette-style game piqued my curiosity and found its way into my game night rotation. Contrary to what you might think, itâs a family-friendly option thatâs fun for kids and adults alike. And while I love welcoming almost any game into my life, my patience wanes when I have to leaf through ten pages of instructions.
5 Second Rule is a simple, yet incredibly fun game where you are challenged to name three of whatever topic is on the cardâsometimes you’ll be able to name them in three seconds and other times your mind will go completely blank!
Only serious game players are allowed! There are two spymasters and each spymaster is trying to get their team to guess which word or picture cards are theirs by only saying one very strategic word.
I recently played this game on vacation and it was way more fun than I remembered (it helps that I kept winning!). Sorry! is proof that sometimes, the best games are the ones we loved but haven’t played since childhood. All the more reason to break out your favorite, classic game night games.
Catch Phrase is definitely an oldie, but a goodie. If you haven’t played, you try to get your teammates to guess the word or phrase that appears, but you can’t say any of the words on the screen.
In this cross-country train adventure game, you and your friends will collect cards and grow your railway across America. If you can connect two cities and have the longest railway, you’re the winner. If you want your array of game night games to keep the party going all night long, this is a great pick to include.
Some might write it off as being only for kids, but not a family holiday goes by without my sisters and I breaking out the Sleeping Queens box. The game is fast-moving and requires some quick thinking on every playerâs part. The game ends when the player who wakes the most queens wins.
Bananagrams is simple: build your own crossword with the tiles you’re dealt with, and the first player to complete their grid is the winner. Honestly, though, this is one of the few games where I forget all about the competition, rewrite the rules, (hey, itâs my game night), and throw the timer away. Instead, I love focusing on trying to use up the whole bag of letters and seeing all the creative combos people can come up with.
I. Love. Scattergories. End of story. Itâs one of my favorite game night games for a reason. While Scattergories has been around for years, it never gets old. The classic, category-based game puts your creativity to the test. Each round only takes about three minutes to complete, so you can fill your game night full of Scattergories.
While this is less about competition and more a game meant to inspire meaningful conversations, it nonetheless gets to the heart of game night: connecting and coming together with family and friends.
Okay, everyone is familiar with this game since it’s been around since the ’60s, but we think it has been unjustly forgotten over time. The great thing about Twister is that it is just as appropriate at an eight-year-old birthday party as at a grown-up party. Because after all, the greatest game night games can be enjoyed by players of all ages.
If memes crack you up, you’ll seriously love this game. Think Cards Against Humanity, but with meme captions as the playing cards to make the best photo/text combo.
Was trivia night at your local bar the highlight of your week? Bring the fun home with Smart Ass, a game where you have to shout out the answer to each who, what, or where question first to win the round.
This all-rounder game is played in teams and forces players to use different kinds of creative intelligence, hence the name. Teams try to complete tasks by doing all kinds of thingsâgetting your teammates to guess what you’re making out of clay, solving a puzzle, acting out a scene, or spelling words backward, for example.
Like Catan, but different (and IMOâbetter). With 2-5 players and a bit of strategy in your back pocket, your goal is to place tiles to construct the landscape around the medieval French city of Carcassonne. Build, create, and claim roads, fields, and monasteries with your followers to win the game. When it comes to the best game night games, you’ll want to be sure you have this one on hand.
This April 22nd, people all around the world will celebrate Earth Day. It’s a time to celebrate our precious planet, and consider how we can care for her better. Rooted in a legacy of environmental activism, this special day invites us to unite in honoring Mother Earth. Growing up in California, Earth Day was more than just a date on the calendar for meâit was woven into the fabric of my childhood and shaped by my mom’s deep reverence for nature. Now, as a parent, passing on these values to my own children feels like a sacred duty. If you’re wondering how to celebrate Earth Day with your little ones, join me on a journey filled with wonder, learning, and love for our planet.
How to Celebrate Earth Day: 5 Ideas to Inspire a Meaningful Celebration
Historically, Earth Day has come and gone for many of us without an acknowledgment of its importance. Until climate change became a growing concern for society on a global levelâmuch of this awareness due to shifting weather patterns and warmer tempsâwe were met with messages to use less, recycle more, and maybe volunteer to plant a tree. But thankfully, things are shifting, and we understand how closely planetary health and community wellness are tied. Many people feel this responsibility and want to pass down a respect for the Earth to their children.
That said, it can be hard to know how to celebrate Earth Day in a meaningful, resonant way. For parents and caregivers looking for answers, I hope the following ideas spark inspiration and action.
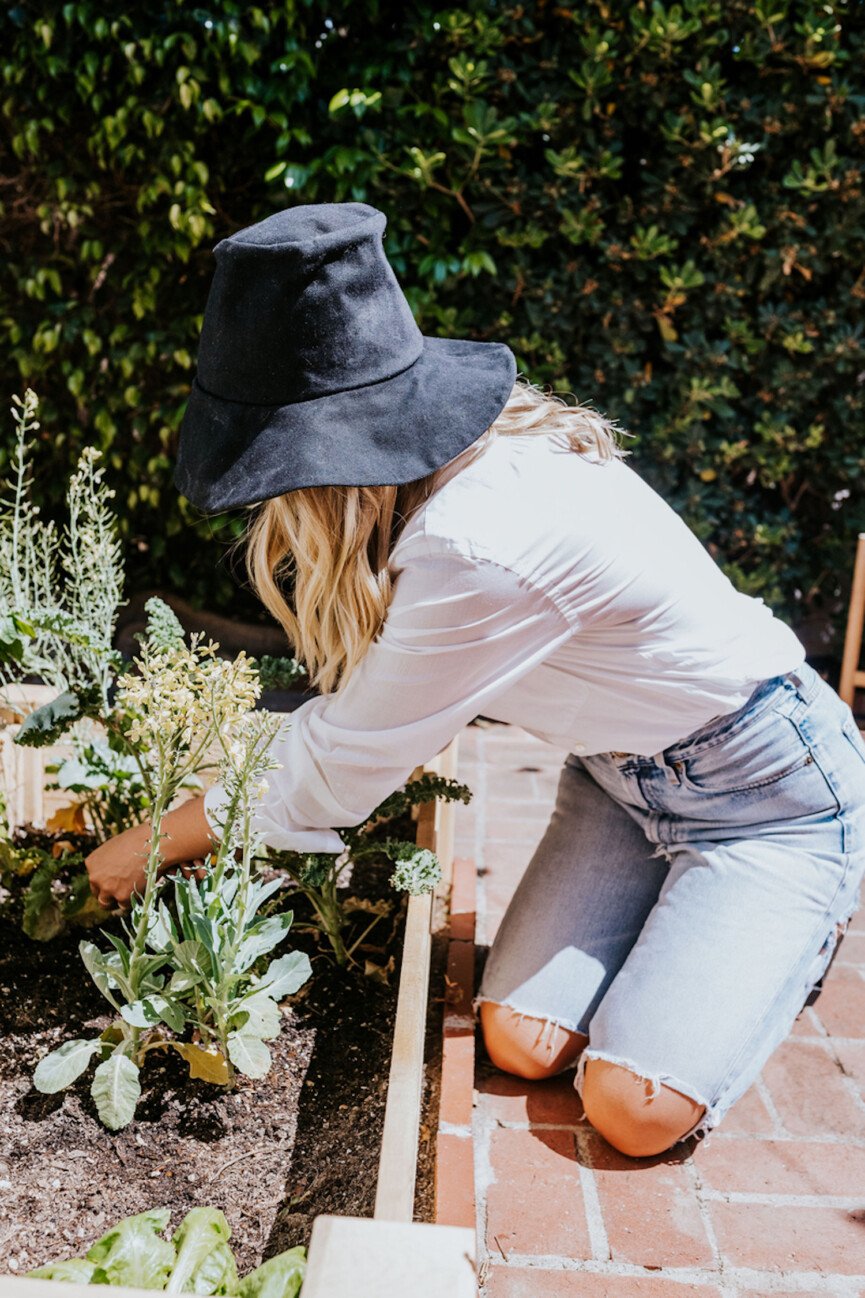
Growing Gardens and Cultivating Connections
Planting a garden is more than just digging in the dirt. It’s a labor of love that yields countless rewards. My family has nurtured seeds into sprouts, tended to the soil with care, and celebrated in the bountiful mini harvests. Through this hands-on experience, my children have learned invaluable lessons about patience, stewardship, and the interconnectedness of all living things.
Whether it’s a backyard plot or a shared community garden, cultivating green spaces fosters not only a love for nature but also a sense of belonging and community spirit. Harlem Grown is a great book that speaks to the shared love of gardening.
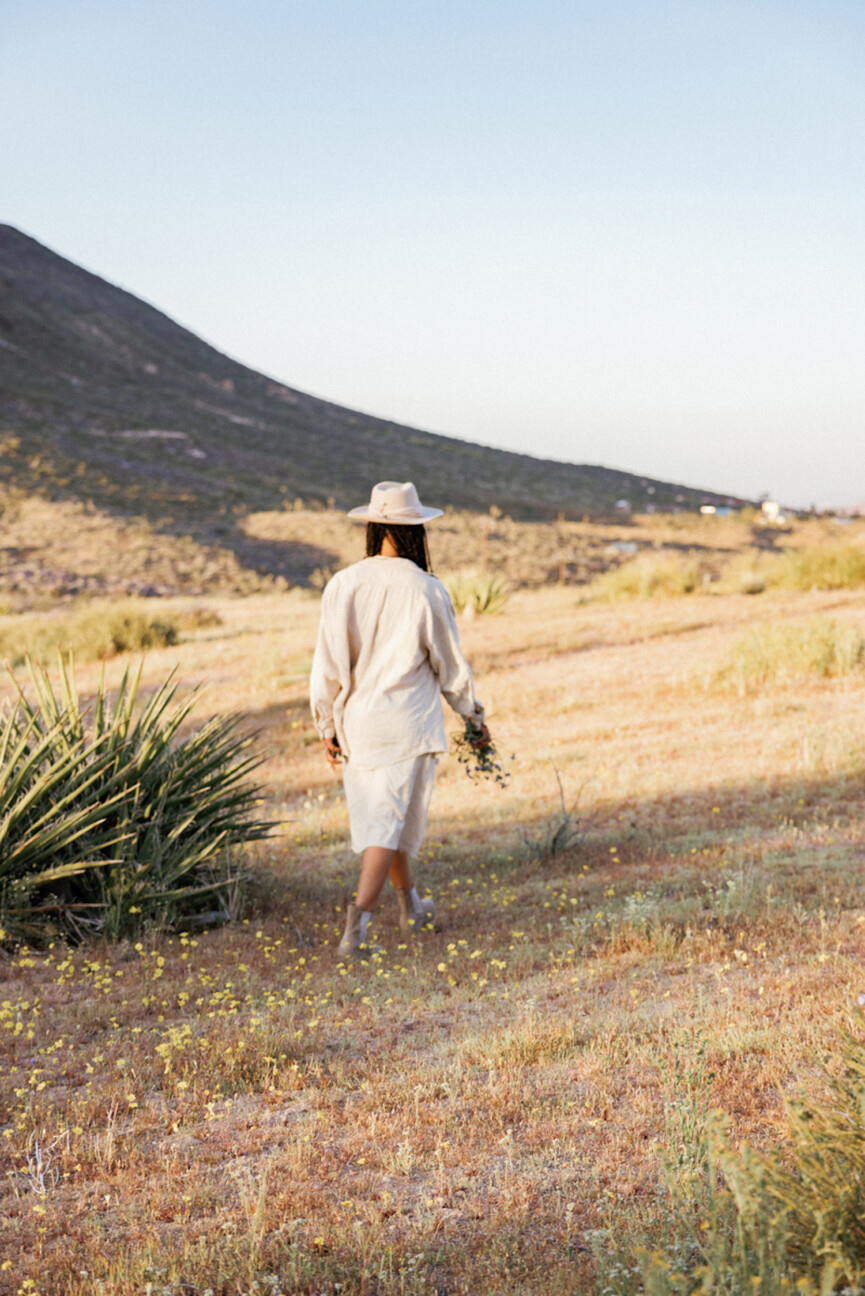
Chasing Sunsets and Cherishing Moments
Few things rival the enchantment of a sunset. It’s a natural phenomenon and fleeting masterpiece that paints itself across the sky. Whether we’re nestled in a blanket at the park or strolling along the pier, witnessing the sun’s descent always fills us with wonder. Watching the golden hues dance across the horizon can be an opportunity to express gratitude. For the warmth on our bodies, the light it extends, and its fascinating movements. I remind my children of our planet’s beauty and fragility, nurturing a sense of love and awe for the natural world that surrounds us.
Coastal Clean-up and Bonding by the Water
There’s something magical about being near water. It’s soothing for the soul and brings families closer together. Recently, a parent organized a beach clean-up with my daughter’s school friends. We armed ourselves with grabbers, gloves, and trash bags. As we combed the shoreline, picking up litter and sharing stories, I witnessed firsthand the power of collective action and environmental education. Remember, you don’t need an ocean to make a difference. A local park or trail can serve as a canvas for teaching your children about the importance of conservation and community care.
Stargazing Adventures and Eco-Lessons
Picture this: a warm evening, a telescope poised for exploration, and eager little faces reflecting the awe of the cosmos. My children’s fascination with the planets and solar system, ignited by a recent eclipse, has opened the door to meaningful conversations about pollution and light pollution. Together, we’ve peered into the night sky, marveling at distant stars while discussing the importance of preserving our skies for future generations.
This Earth Day, grab a telescope, and let the wonders of the universe spark curiosity and environmental consciousness in your own little astronomers.
Reducing, Reusing, and Sparking Creativity
In a world dominated by consumption, teaching our children the importance of reducing waste and reusing resources is paramount. One of our favorite activities is reading This Is Not a Box. It’s a delightful book that ignites their imaginations and prompts them to see an everyday item in a new way. By encouraging creativity and resourcefulness, we not only minimize our environmental footprint but also cultivate a mindset of mindful consumption. It’s a gift I know will serve my children well throughout their lives.
The Takeaway
As Earth Day approaches, let’s seize the opportunity to celebrate our planet with our children. It’s a day where we can weave together moments of wonder, learning, and connection. Through stargazing adventures, coastal clean-ups, sunset chases, creative reuse projects, and gardening endeavors, we can instill in them a deep appreciation for the natural world and a commitment to protecting it for generations to come. Let’s embark on a journey of love and stewardship, nurturing a brighter, greener future for all.
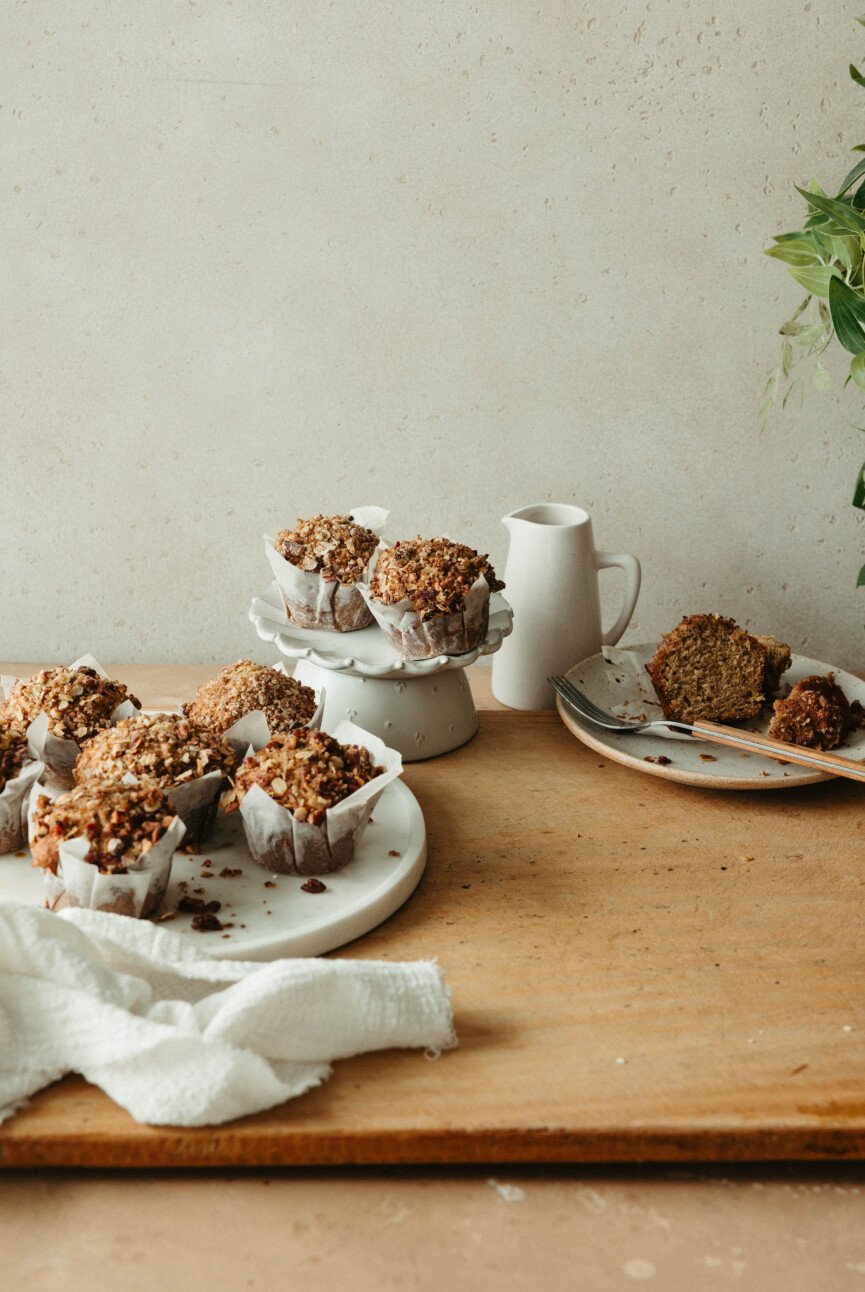
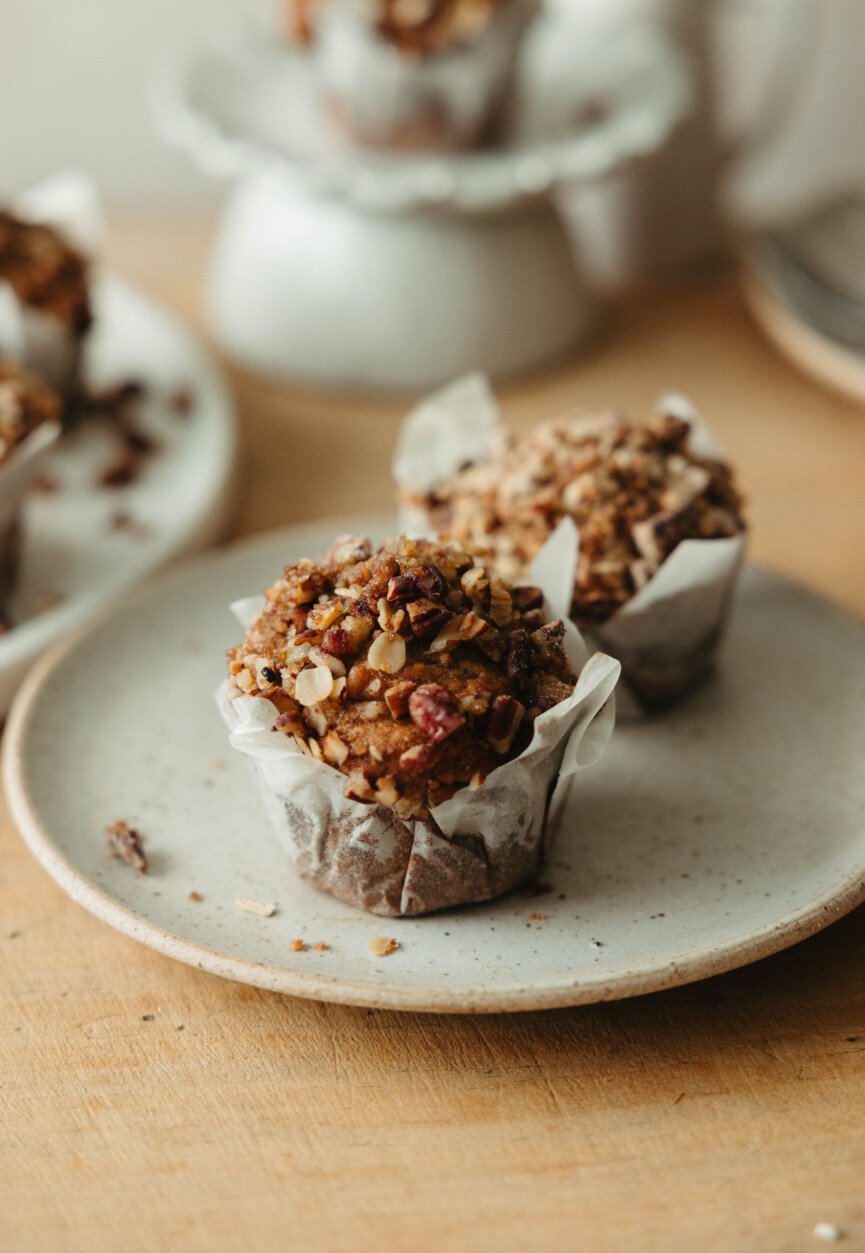
As someone who regularly tests recipes and also happens to live alone, I often find myself with the dilemma of having lots of extras. This isn’t a bad thing, of course. I’ve made friends with neighbors and always have treats to bring to the office. But sometimes, I just want to make something that’s not left hanging around my house for weeks. (When I developed this recipe a few months ago, I ate it every night for seven days straight.) I know I’m not alone in the struggle, so I’ve devised the ultimate small-batch banana nut muffins recipe. That’s rightâthese make a total of six muffins. You’re welcome.
The Case for Putting Nuts in Your Muffins
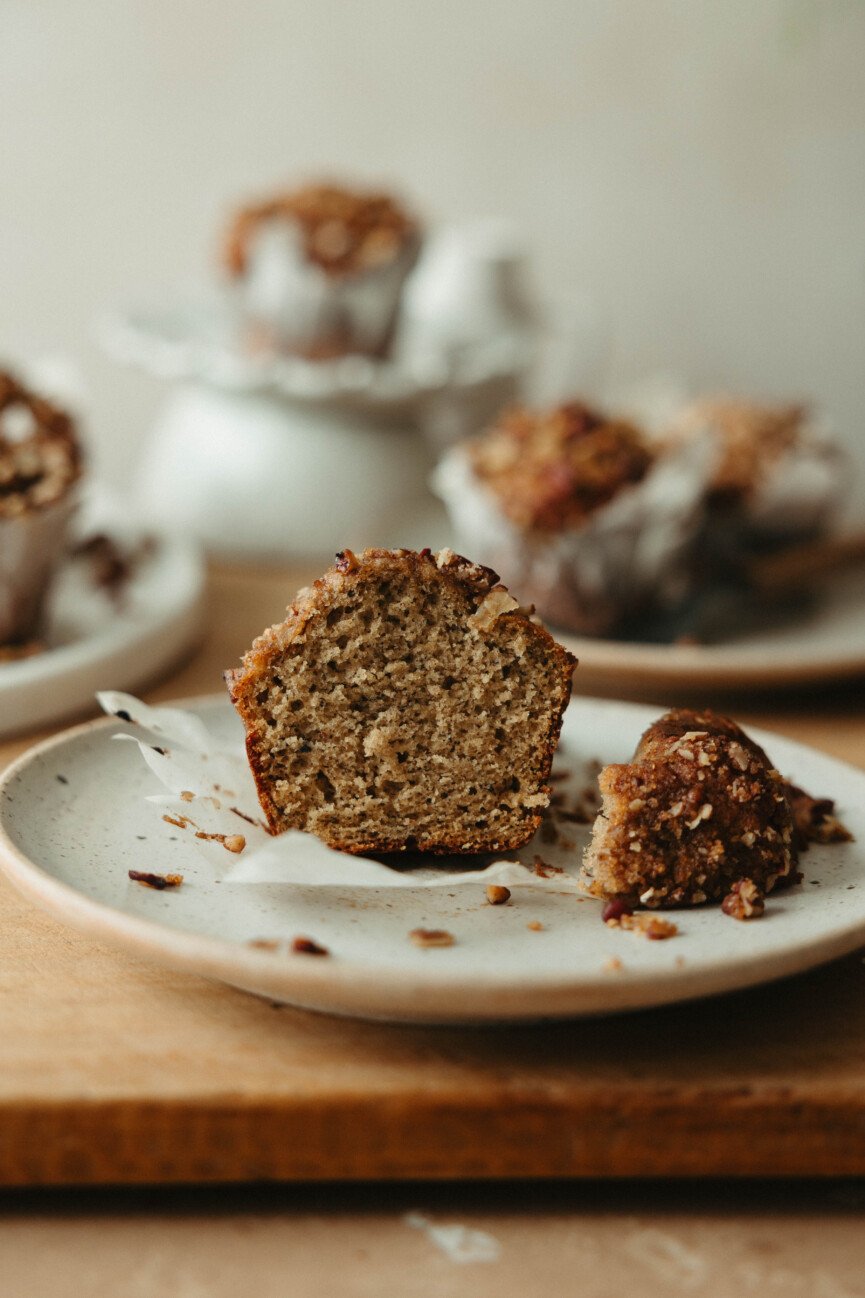
I’ve gone on record saying that I loathe nuts in my desserts. I don’t want walnuts in my brownies or chocolate chip cookies, butter pecan ice cream is a pass, andâhot takeâI can’t handle a Snickers bar. The texture feels more like a nuisance than a way to enhance a treat. Maybe you’ll say I’m being extreme, but nuts are like land mines getting in the way of a fudgy brownie or fluffy cake.
The exception to this rule is putting the nuts on top of the dessert. Garnishing a cake with slivered almonds or a nutty crumble is my preferred method of utilizing nuts in baked goods. And that’s exactly what we’ve done here with this banana nut muffins recipe. We’re taking all the best parts of the banana nut muffin and adding a few tweaks to keep the texture and flavor top-notch.
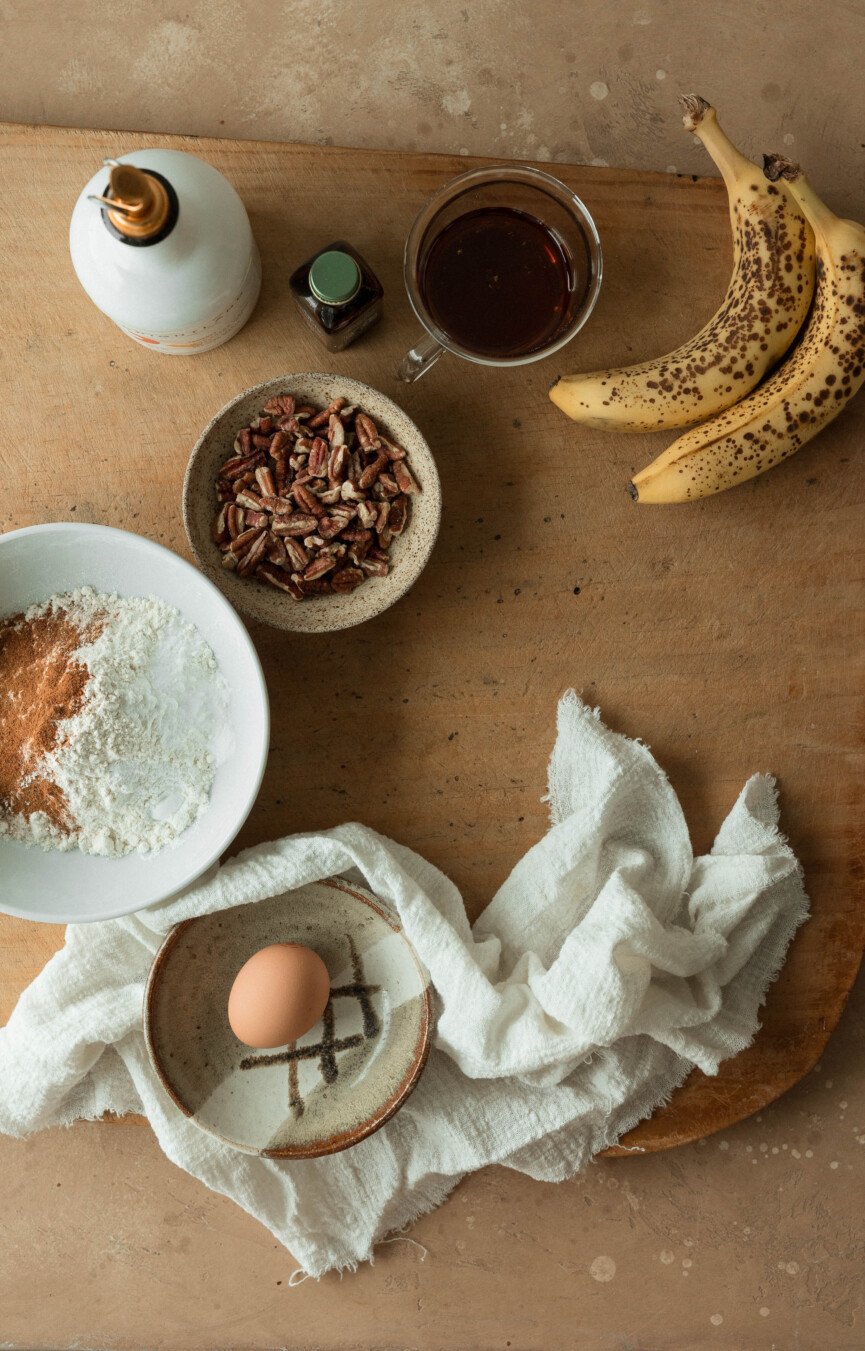
Key Ingredients for these Banana Nut Muffins
Pecans. Substitute with whatever you have on hand. Walnuts or almonds are great alternatives.
Oats. Optional, but I like playing on the slightly nutty flavor of oats for the topping.
Egg. Just one! Remember: small-batch.
Greek yogurt. Yogurt adds moisture while also helping with the leavening. If you don’t usually have yogurt on hand, freeze yogurt in ice cube trays and store the cubes in a freezer-safe bag. Simply thaw and use as needed.
Olive oil. Prioritize the good stuff in this recipeâyou’ll taste it in these muffins.
Tahini. A little untraditional, but I love the savory and slightly nutty flavor that complements this recipe’s sweeter ingredients.
Maple syrup. I’m not a fan of super sweet treats, but maple syrup adds dimension.
Miso. If you’ve caught on, I love using savory ingredients in my baking. A little miso lifts all the flavors.
Banana. One banana is all you need. That random banana sitting on your counter? It’s the perfect contestant.
Flour. All-purpose for these muffins.
Baking Soda and Powder. Both keep these muffins light and fluffy.
Salt. If you’re not salting your sweets, start yesterday.
Cinnamon and Nutmeg. These warming spices enhance the muffins’ flavor without overpowering the banana.
Vanilla. Lately, I’ve considered vanilla optional in my recipes. (It can be so expensive!) Use it if you have it, but don’t fret if you don’t!
Tips for Making Banana Nut Muffins
A few tips and tricks to ensure success.
Let ingredients come to room temperature. This will drastically impact the final result.
Mash the banana on its own, then add to the wet ingredients. Not only does this ensure an even distribution in the batter, but it also brings out the banana’s moisture.
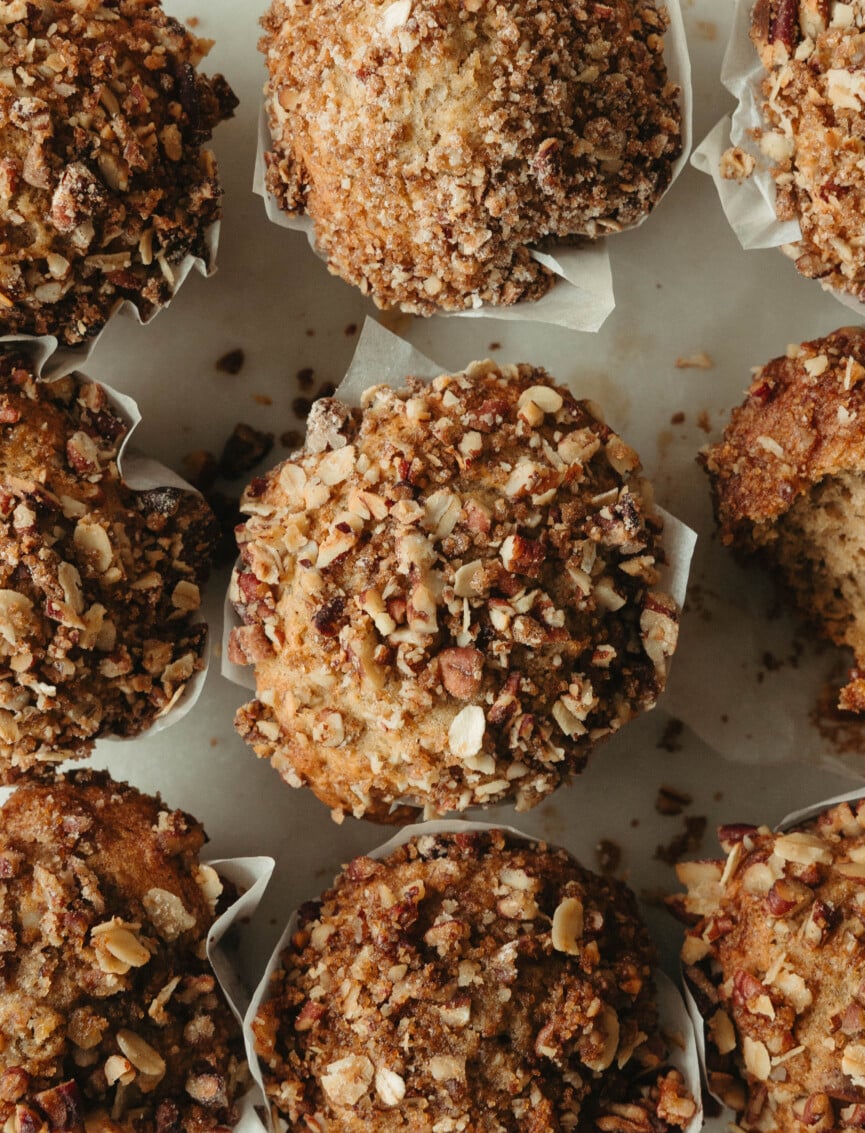
For bakery-style and domed muffins, fill your muffin tin to the top. I also recommend using parchment squares instead of regular liners as this will help create the rounded domed shape. This recipe works with regular muffin liners, but you might notice a bit more spreading on top of the muffin tin. Using large parchment squares also keeps the crumble in place.
Gently press the crumble into the top of the batter. This ensures that the crumble will stick to the muffin instead of falling off during baking.
How to Store and Freeze Leftovers
These banana nut muffins are incredibly easy to store. (That is, if you end up with leftovers at all!) After letting the muffins cool completely, wrap muffins individually in beeswax or plastic wrap, then place them into a larger freezer bag. To reheat, remove individual muffins from the freezer and keep them in the fridge overnight. Alternatively, unwrap and toss muffins in the oven to thaw at 350 F for a few minutes.
An easy, small-batch banana nut muffin recipe that yields six fluffy and moist muffins.
For the crumble:
60grams pecans, chopped (1/2 cup)
2 tablespoons brown sugar
1 tablespoon rolled oats
1 tablespoon flour
1 tablespoon olive oil
1/4 teaspoon salt
For the muffins:
1 egg, room temperature
2 tablespoons Greek yogurt
1/4cup olive oil
2 tablespoons tahini
5 tablespoons maple syrup (just over 1/4 cup, 3oz)
1 teaspoon miso
1/2 teaspoon vanilla
1 large banana (1/2 cup mashed)
120grams flour
1/2 teaspoon baking soda
1/4 teaspoon baking powder
1/4 teaspoon salt
1/4 teaspoon nutmeg
1/2 teaspoon cinnamon
Prep the crumble. Add all of the ingredients to a small bowl and toss together until everything is evenly coated in oil and distributed. Set aside.
Preheat oven to 400 F. Line a 12-cup muffin pan with six liners, evenly spacing them out.
Make the batter. In a large mixing bowl, add the egg, Greek yogurt, olive oil, tahini, maple syrup, miso, and vanilla. Whisk until thoroughly combined and smooth.
Mash the banana until very well mashed. Add to the batter.
In a small bowl, add the flour, baking soda, baking powder, salt, nutmeg, and cinnamon. Sift together to ensure everything is evenly combined, then add to the wet ingredients. Using a spatula, fold and combine the wet and dry ingredients until the batter just comes together.
Using a small cookie scoop, evenly divide the batter amongst the 6 muffin liners. You’ll want the batter to go almost to the top of the liner.
Add a tablespoon of crumble over the batter in the muffin pan and gently press the crumble into the top of the batter.
Bake at 400 F for 18-19 minutes until a toothpick comes out clean.
Remove from oven and let cool in pan for about five minutes, then finish cooling on a wire rack.