Health
Easy Crock Pot Dal (Slow Cooker Yellow Dal)

My crock pot dal recipe is an absolute staple in our house! Made with protein rich split chickpeas and a combination of rich, warm spices like turmeric, cumin, and coriander, this slow cooker yellow dal is pure and simple Indian comfort food. Ideal for anyone looking to make a flavor-packed one-pot dinner, or a make-ahead meal!
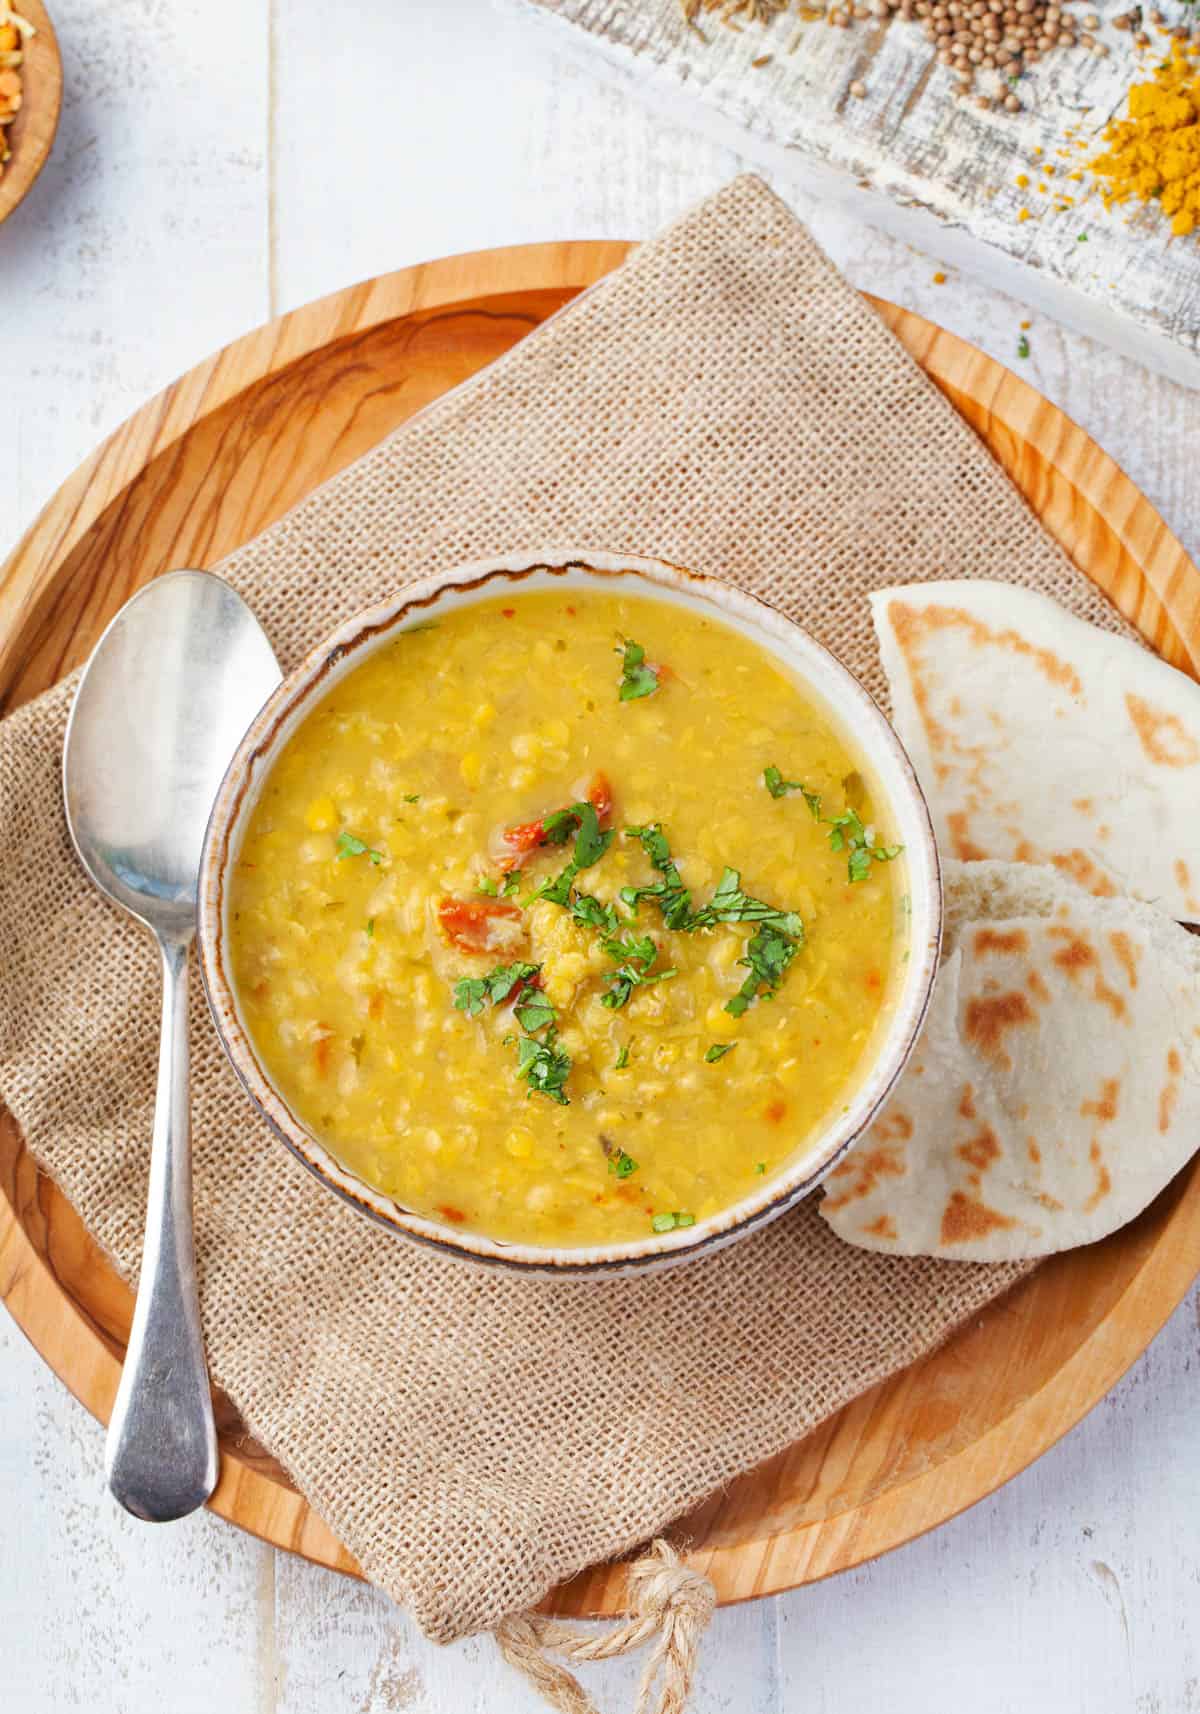

My husband and kids love it when I make my crockpot dal recipe. Rich, warm spices like turmeric, cumin, and coriander fill my kitchen with the most amazing aroma when I’m cooking dal.
Essentially, dal is a spiced lentil stew made with just about any type of lentil. I like using split chickpeas – or “chana dal” because of their flavor and texture. But I’ve made my crock pot dal with red lentils, small black lentils, even black eyed peas. You can use the same spice combo and switch out your legume and it still works great.
When I make chana dal in the slow cooker, I usually serve it with some sort of “sabji” or stir-fried veggies with Indian spices. But oftentimes I’ll throw veggies like kale or sweet potato straight into the dal and eat it as a one-pot dish like in this sweet potato dahl.
My slow cooker dal recipe is totally delicious! With layers of flavor from the fragrant Indian spices and a creamy, comforting texture, it’s a satisfying and hearty dish that my whole family loves, including my kids.
It tastes like Indian comfort food, but also happens to be pretty good for you too. Split chickpeas are packed with protein and fiber, making it a wholesome meal that keeps you full and energized. Plus, slow cooker chana dal is naturally vegetarian, vegan, and gluten-free.
Crock pot dal is simple and affordable to make. You can cook the lentils in the slow cooker and just add the spice mixture at the end, so your “active” time is only 15 minutes! If you don’t have a slow cooker, you can also simmer the lentils on the stovetop until they’re cooked through, but then you’ll have to watch it and stir it occasionally. Which is why I love the slow cooker – so I can “set and forget” it and come back to it when I’m ready to serve!
I also really enjoy customizing this recipe based on my mood or preferences that day. It’s so easy to mix things up. I have used different types of lentils, spices, and sometimes I add in my favorite veggies. Whether you are looking for a one-pot meal or want to serve it with sides, it’s easy to make my crockpot dahl recipe your own.
To top it all off, it stores well in the fridge and freezer. You can make a big batch of slow cooker yellow dal and enjoy it throughout the week, or freeze portions for a quick and easy meal on busy days.
Latest Recipe Video!
🥘 Ingredients
My slow cooker chana dal recipe doesn’t require any fancy ingredients. You can find all of them at most grocery stores or online. Scroll down to the recipe card at the bottom of the post for the exact amounts and nutritional information.
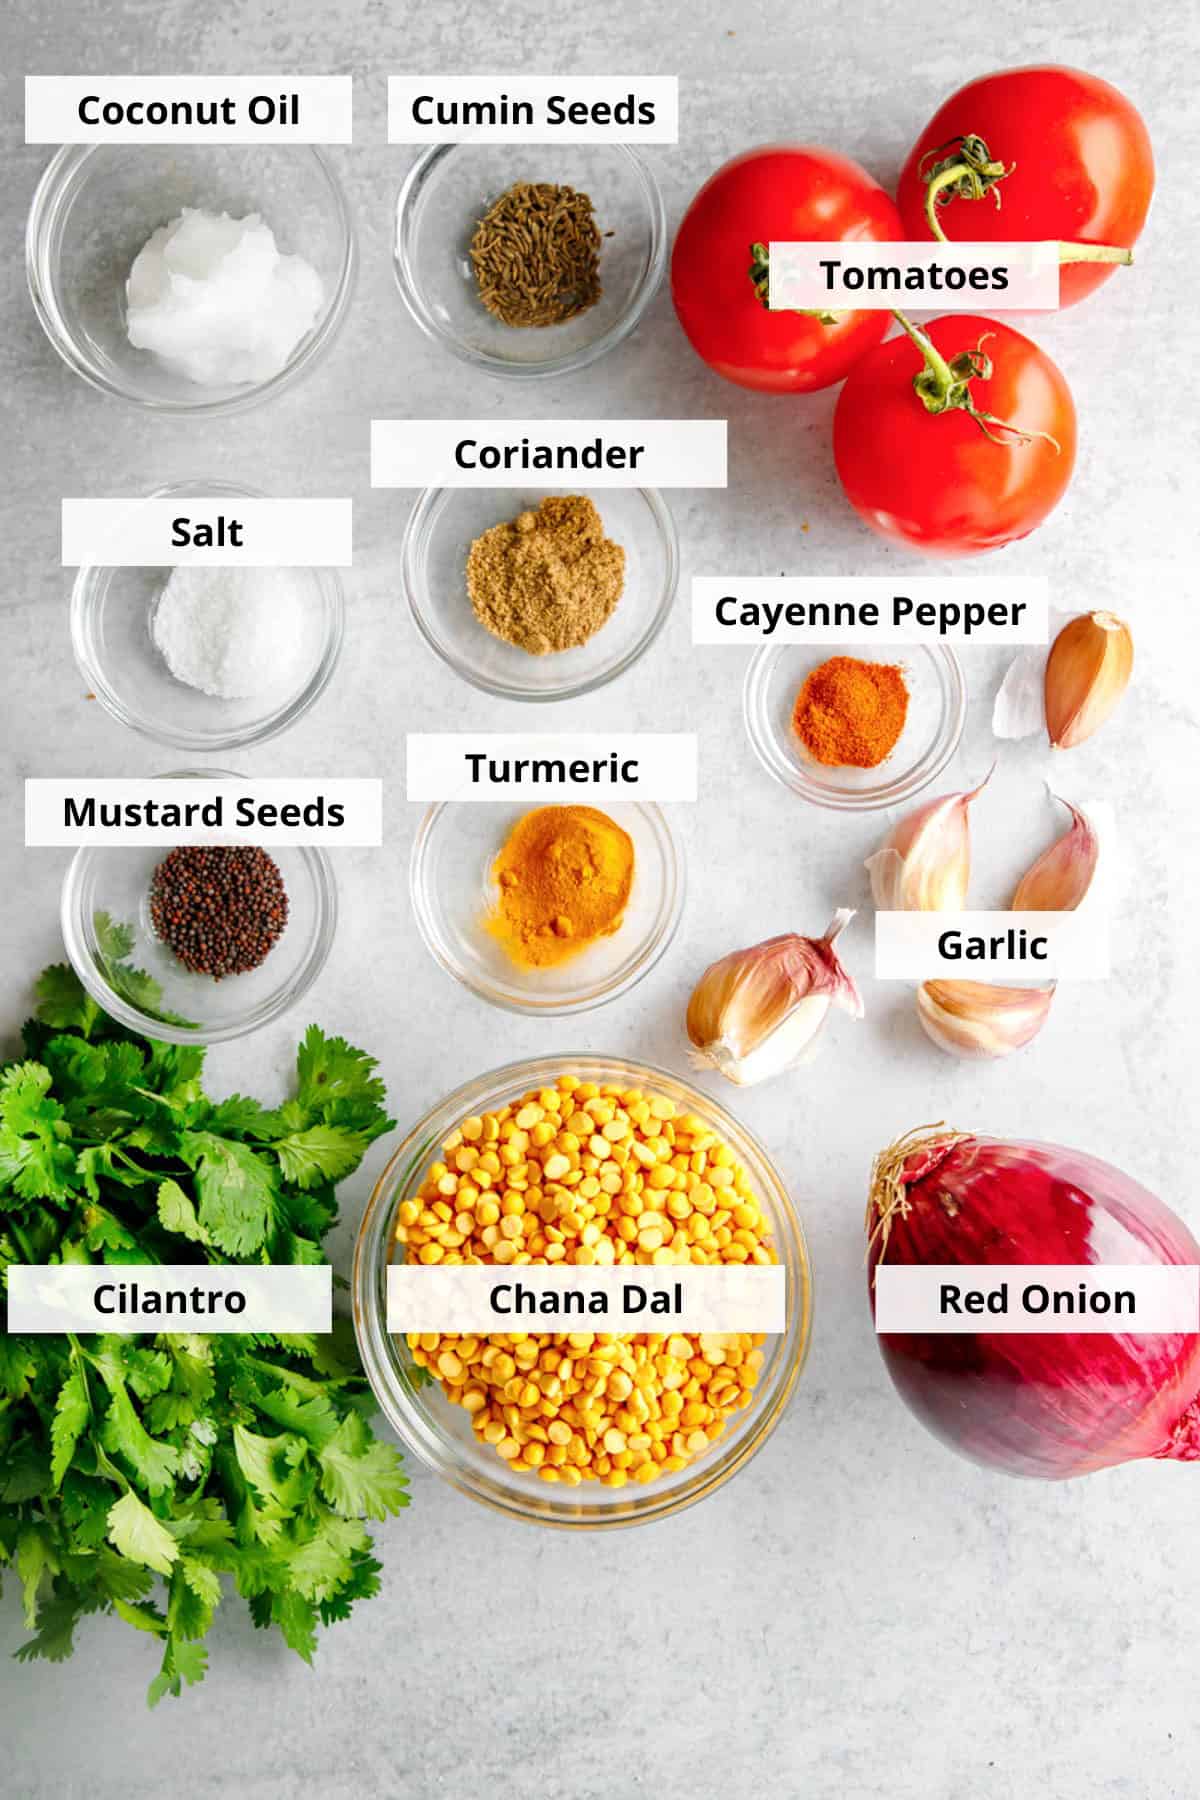

Split Chickpeas (Chana Dal): These legumes form the hearty base of my slow cooker daal. Chana dal has a rich, nutty taste and a firm texture that holds up well during the slow cooking process. Yellow split peas are a good substitute.
Water: Essential for cooking the lentils to the perfect tender consistency.
Tomatoes: Diced fresh tomatoes add a vibrant, tangy flavor that balances the earthy spices. Canned diced tomatoes can be used in a pinch.
Extra Virgin Coconut Oil: Used for sautéing the spices and vegetables. I love the subtle flavor and richness that coconut oil adds to the dish, and it has a high smoke point which works well for toasting the cumin and mustard seeds until they pop. You can use ghee if not vegan.
Red Onion & Garlic: Finely chopped red onions and thinly sliced garlic add depth of flavor. I like the subtle sweetness of red onions, but yellow or white onions can also be used.
Spices: I use a mix of ground turmeric, ground coriander seeds, and cayenne pepper to give the dal its warm, earthy, and slightly spicy flavor. I toast the whole cumin seeds and black mustard seeds in the oil at the beginning, which releases their amazing aromas and adds a lot of depth and complexity to the dish.
Fresh Cilantro & Salt: Freshly minced cilantro leaves add a burst of freshness and a herbal finish to the dal. I add it at the end to preserve its bright flavor and vibrant green color. Salt is so important to the flavor profile of this dish! It helps to bring out the natural flavors of the ingredients, making my slow cooker yellow dal that much more savory and delicious.
🔪 How To Make Crock Pot Dal
Learning how to make dal in the slow cooker is so easy it’s sure to become your new favorite dish! Just follow my simple 3 step process, and you’ll have a meal on the table with very little effort.
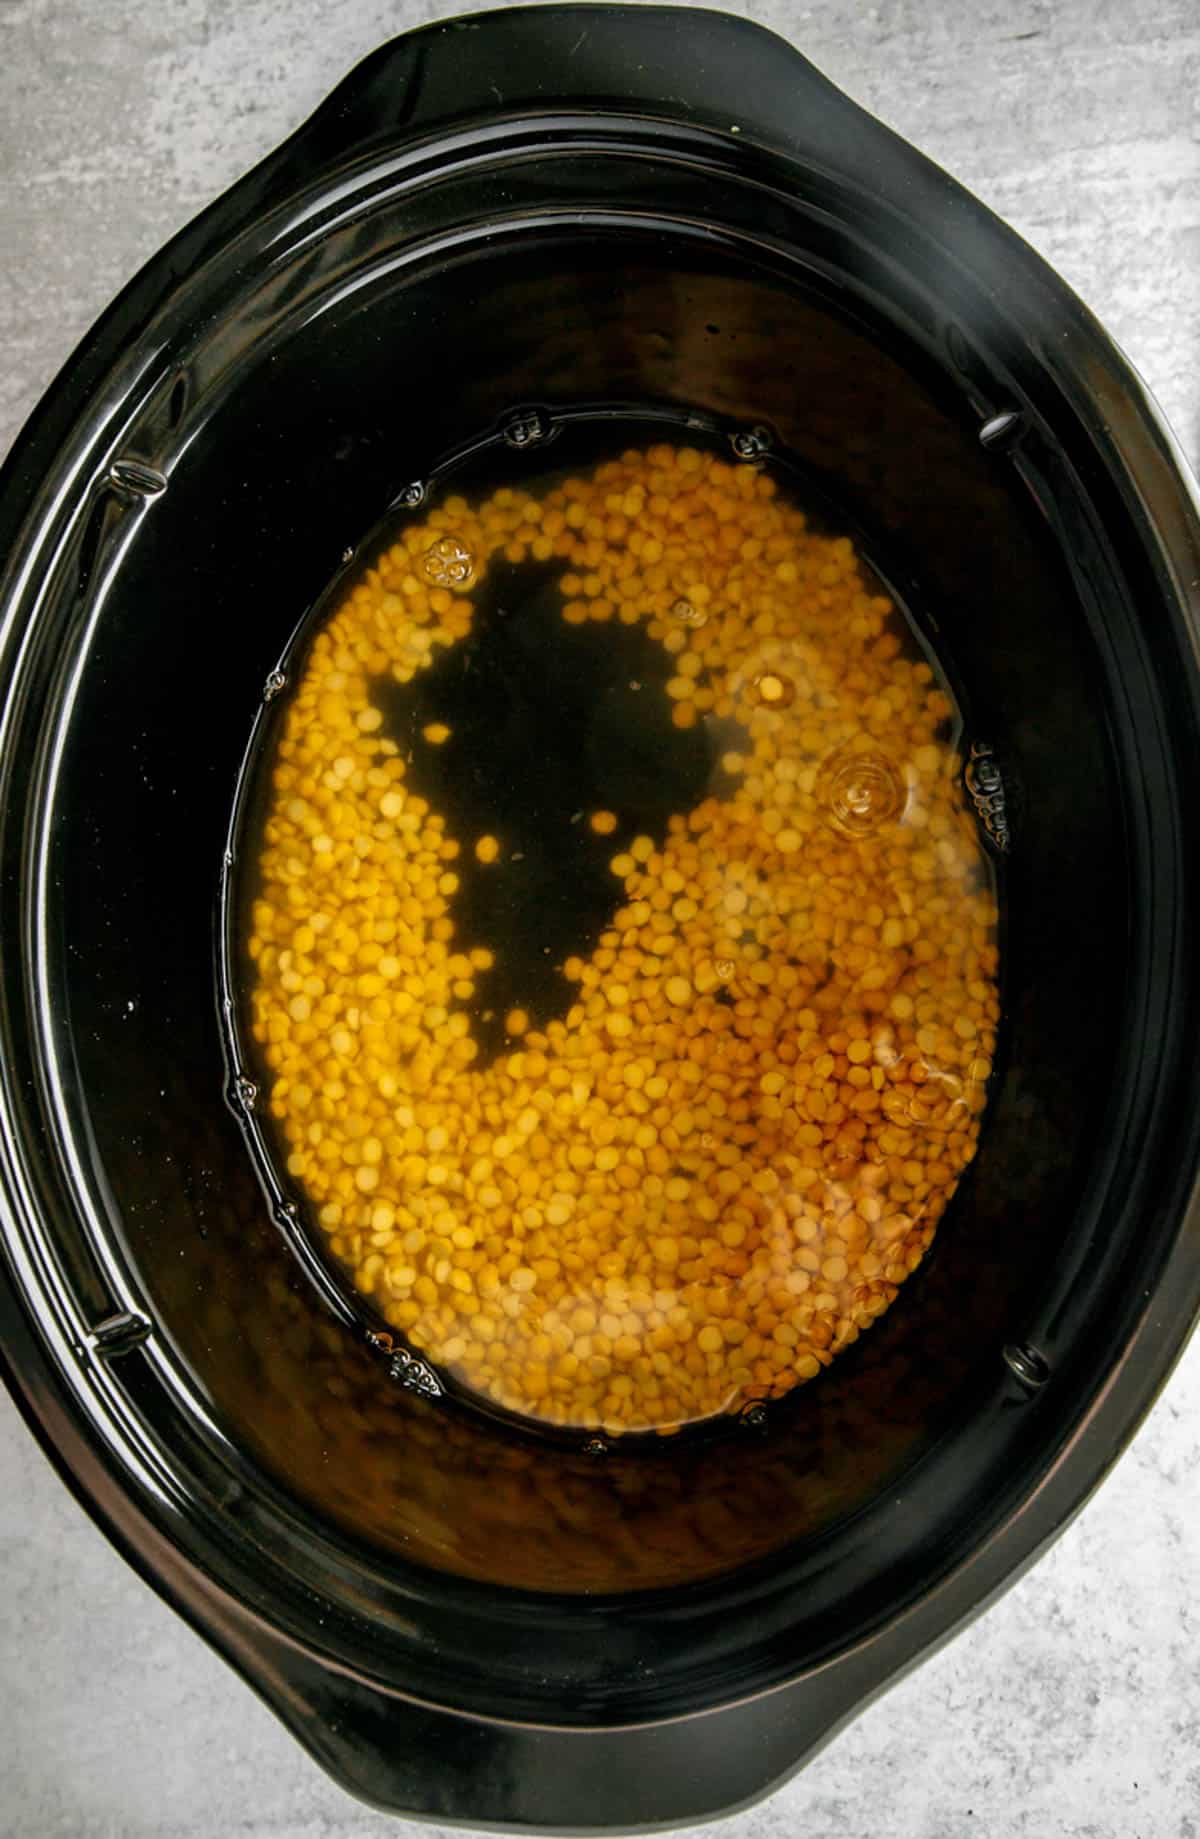
Cook The Lentils: To begin, I add the lentils, salt, and 3 cups of water to my slow cooker. Then I let them cook on high for 4-6 hours.

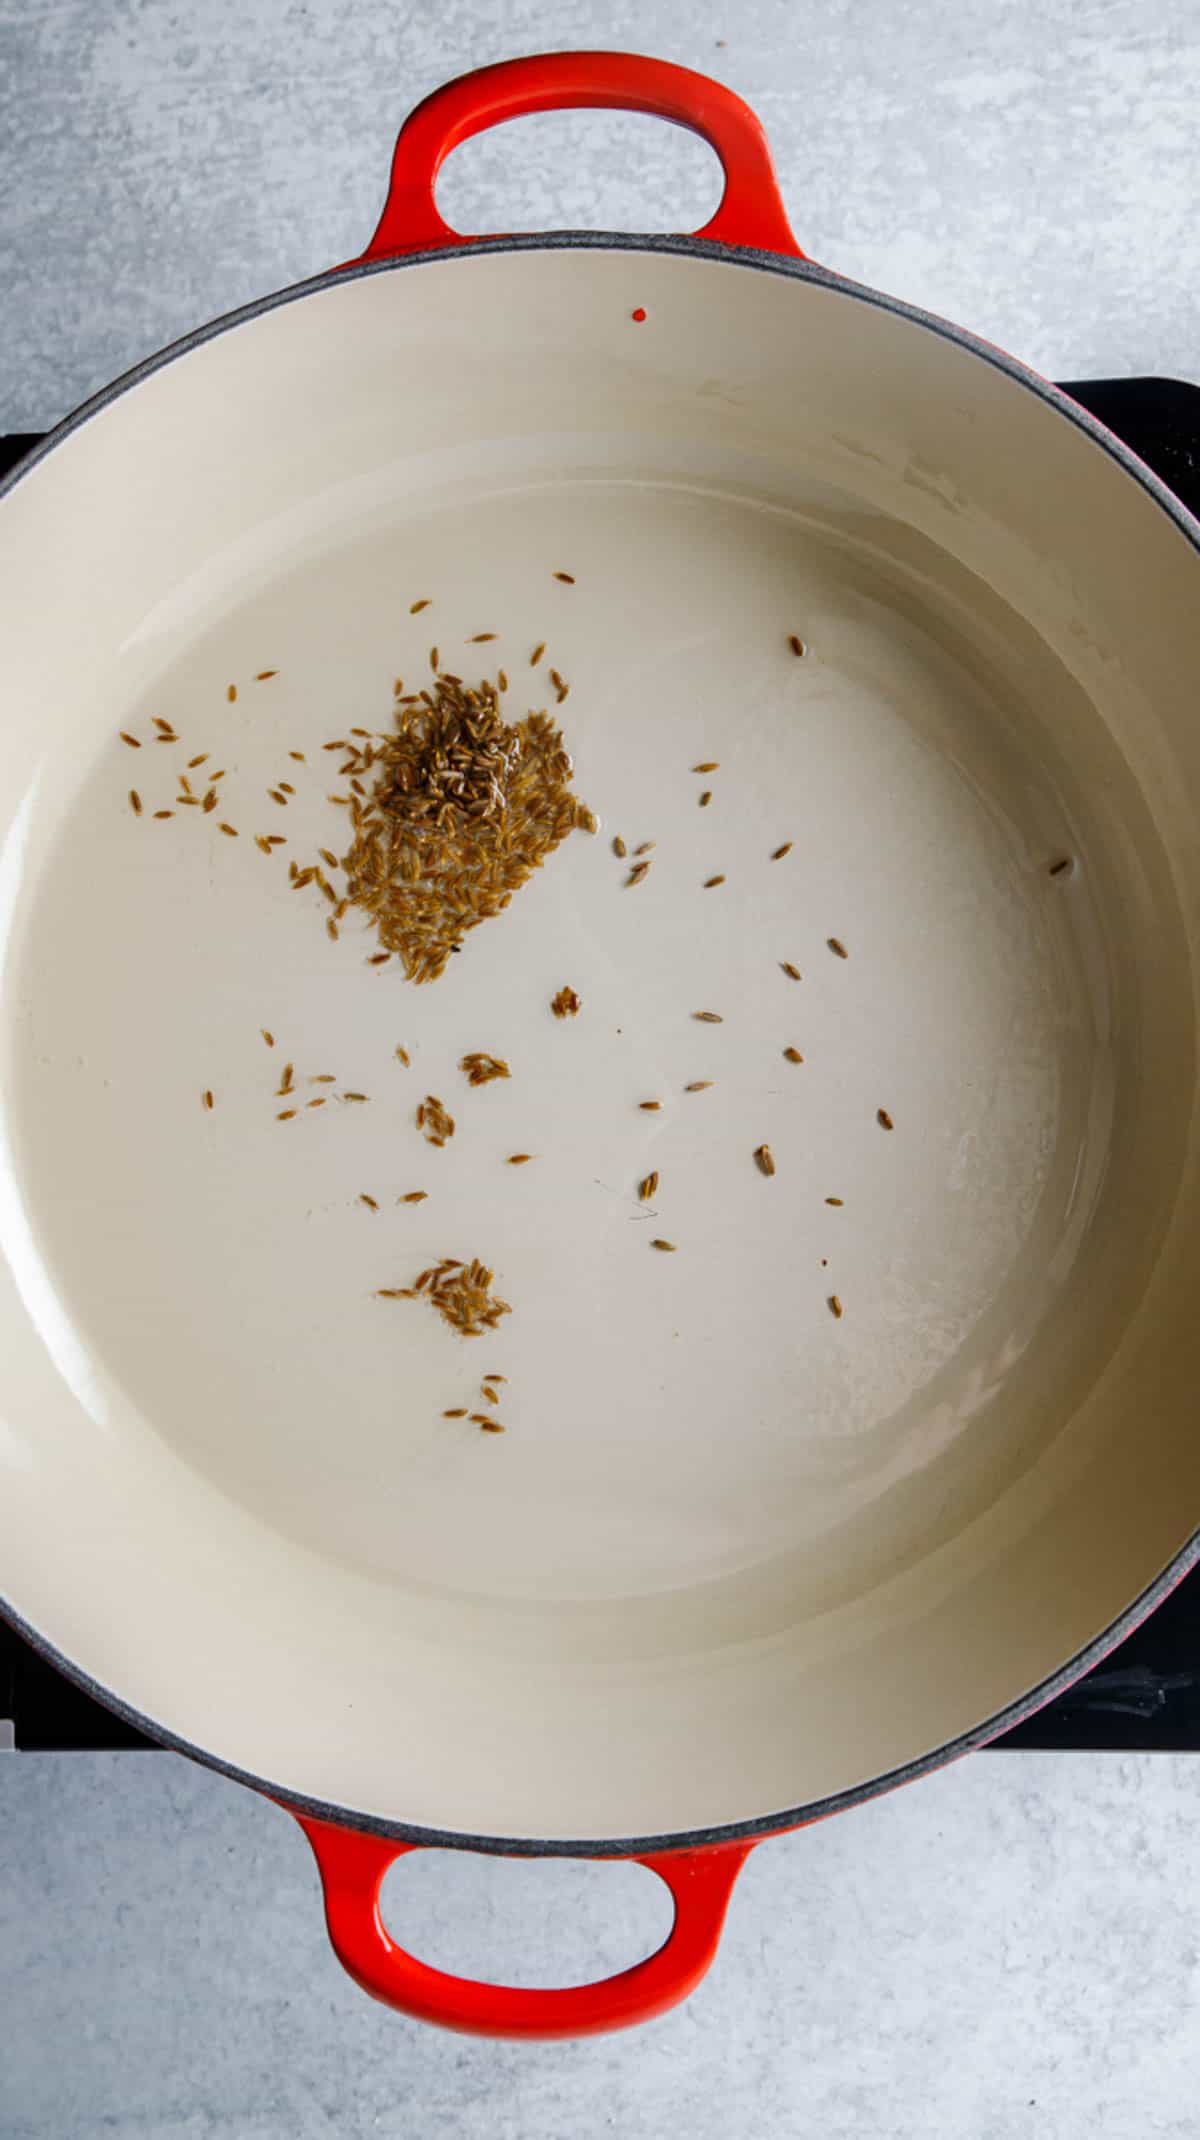
Saute The Spices: When the lentils are about done, I heat oil in a medium pot over medium-high heat. I add a couple of cumin seeds to see if it’s hot. If they pop, the oil is ready to go!

Add Cumin & Mustard Seeds: Now, I add all of the cumin seeds and mustard seeds to the pot and let them cook for 10-15 seconds until they pop).
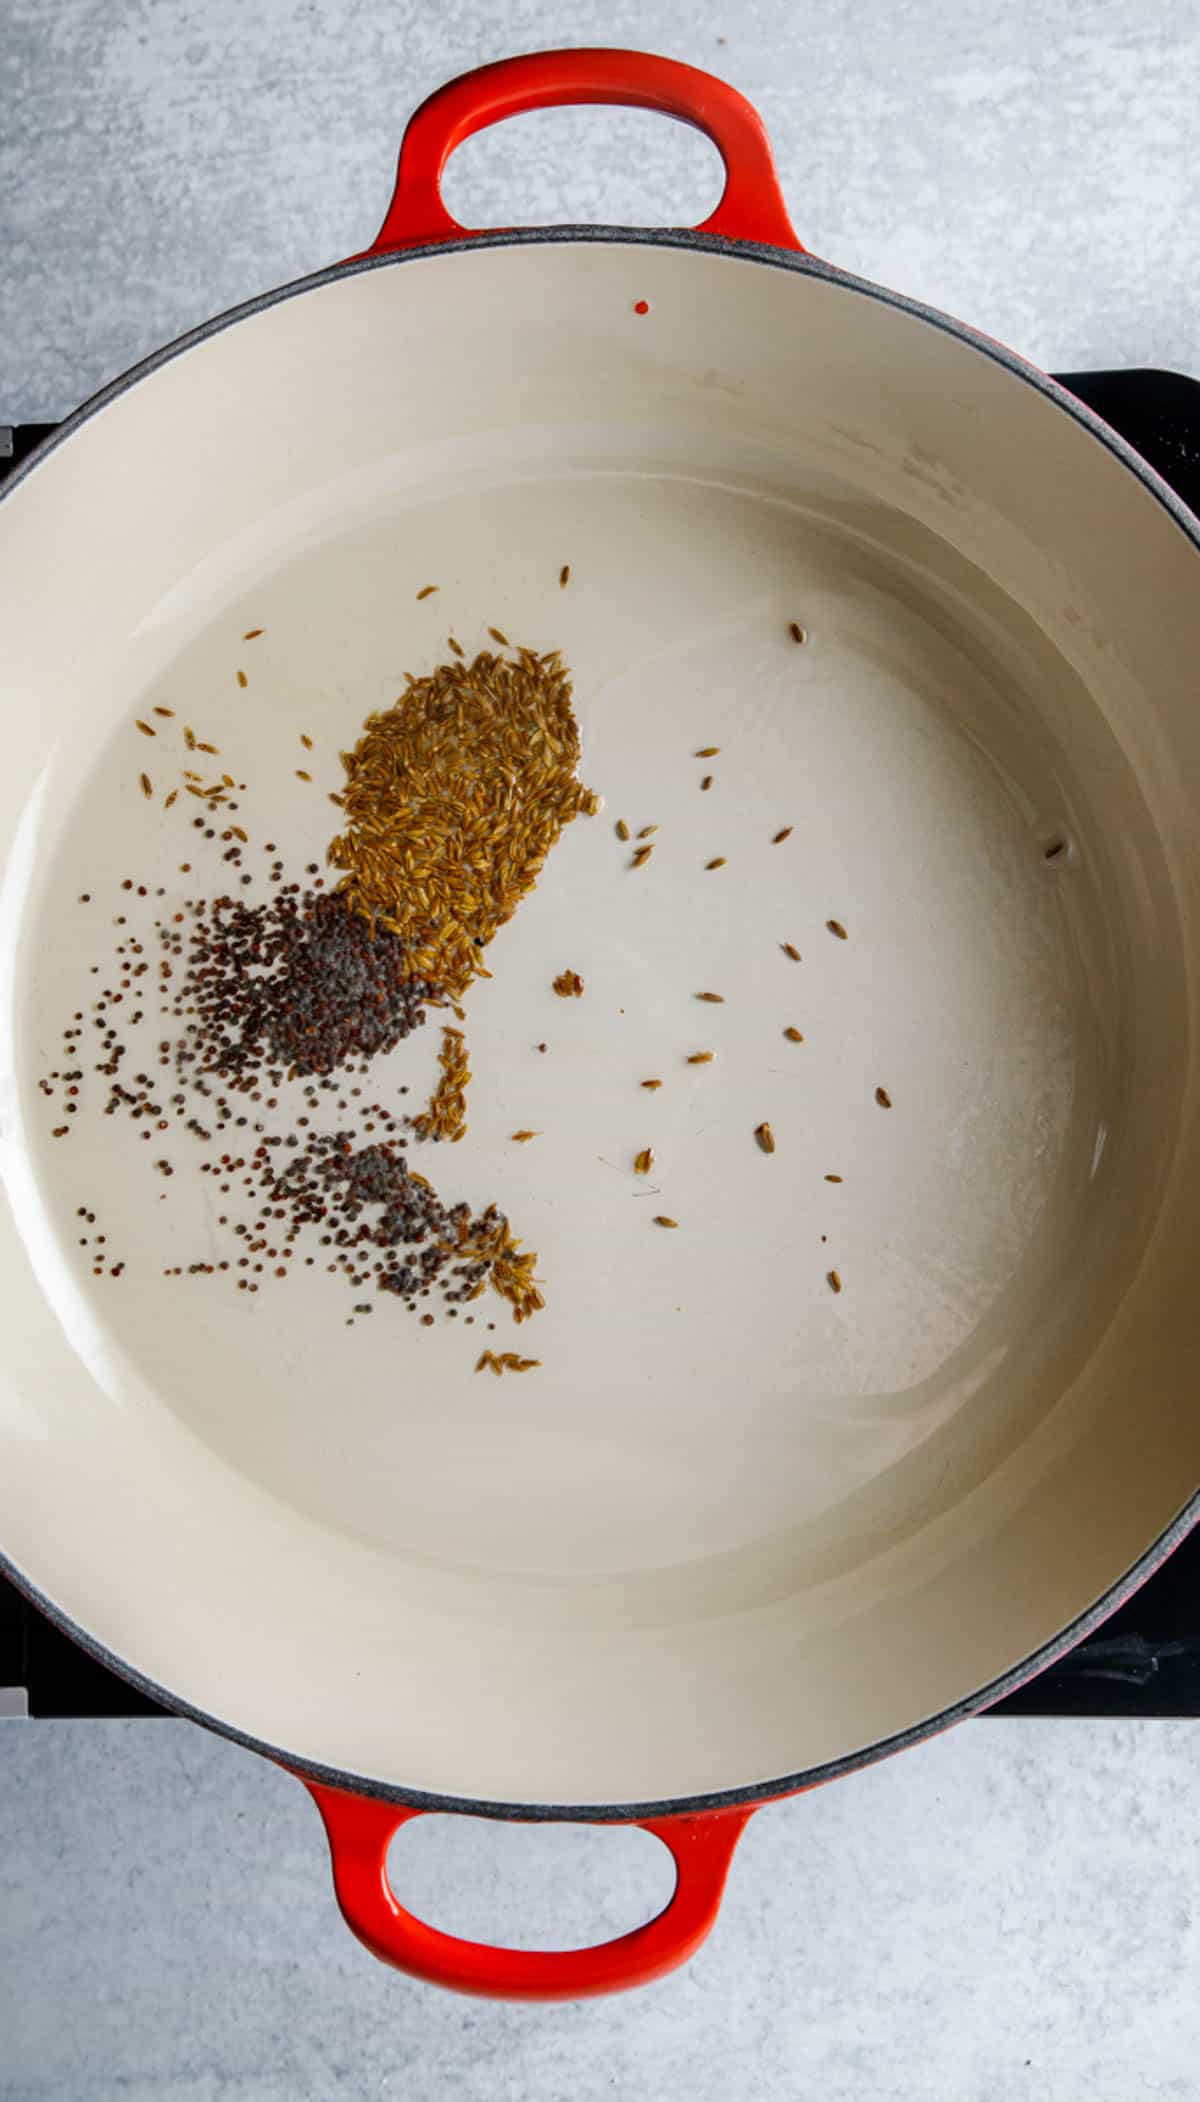

Add The Rest Of The Aromatics: Next, I add the coriander, turmeric, cayenne, onion, tomato, and garlic, and stir for 30 seconds.
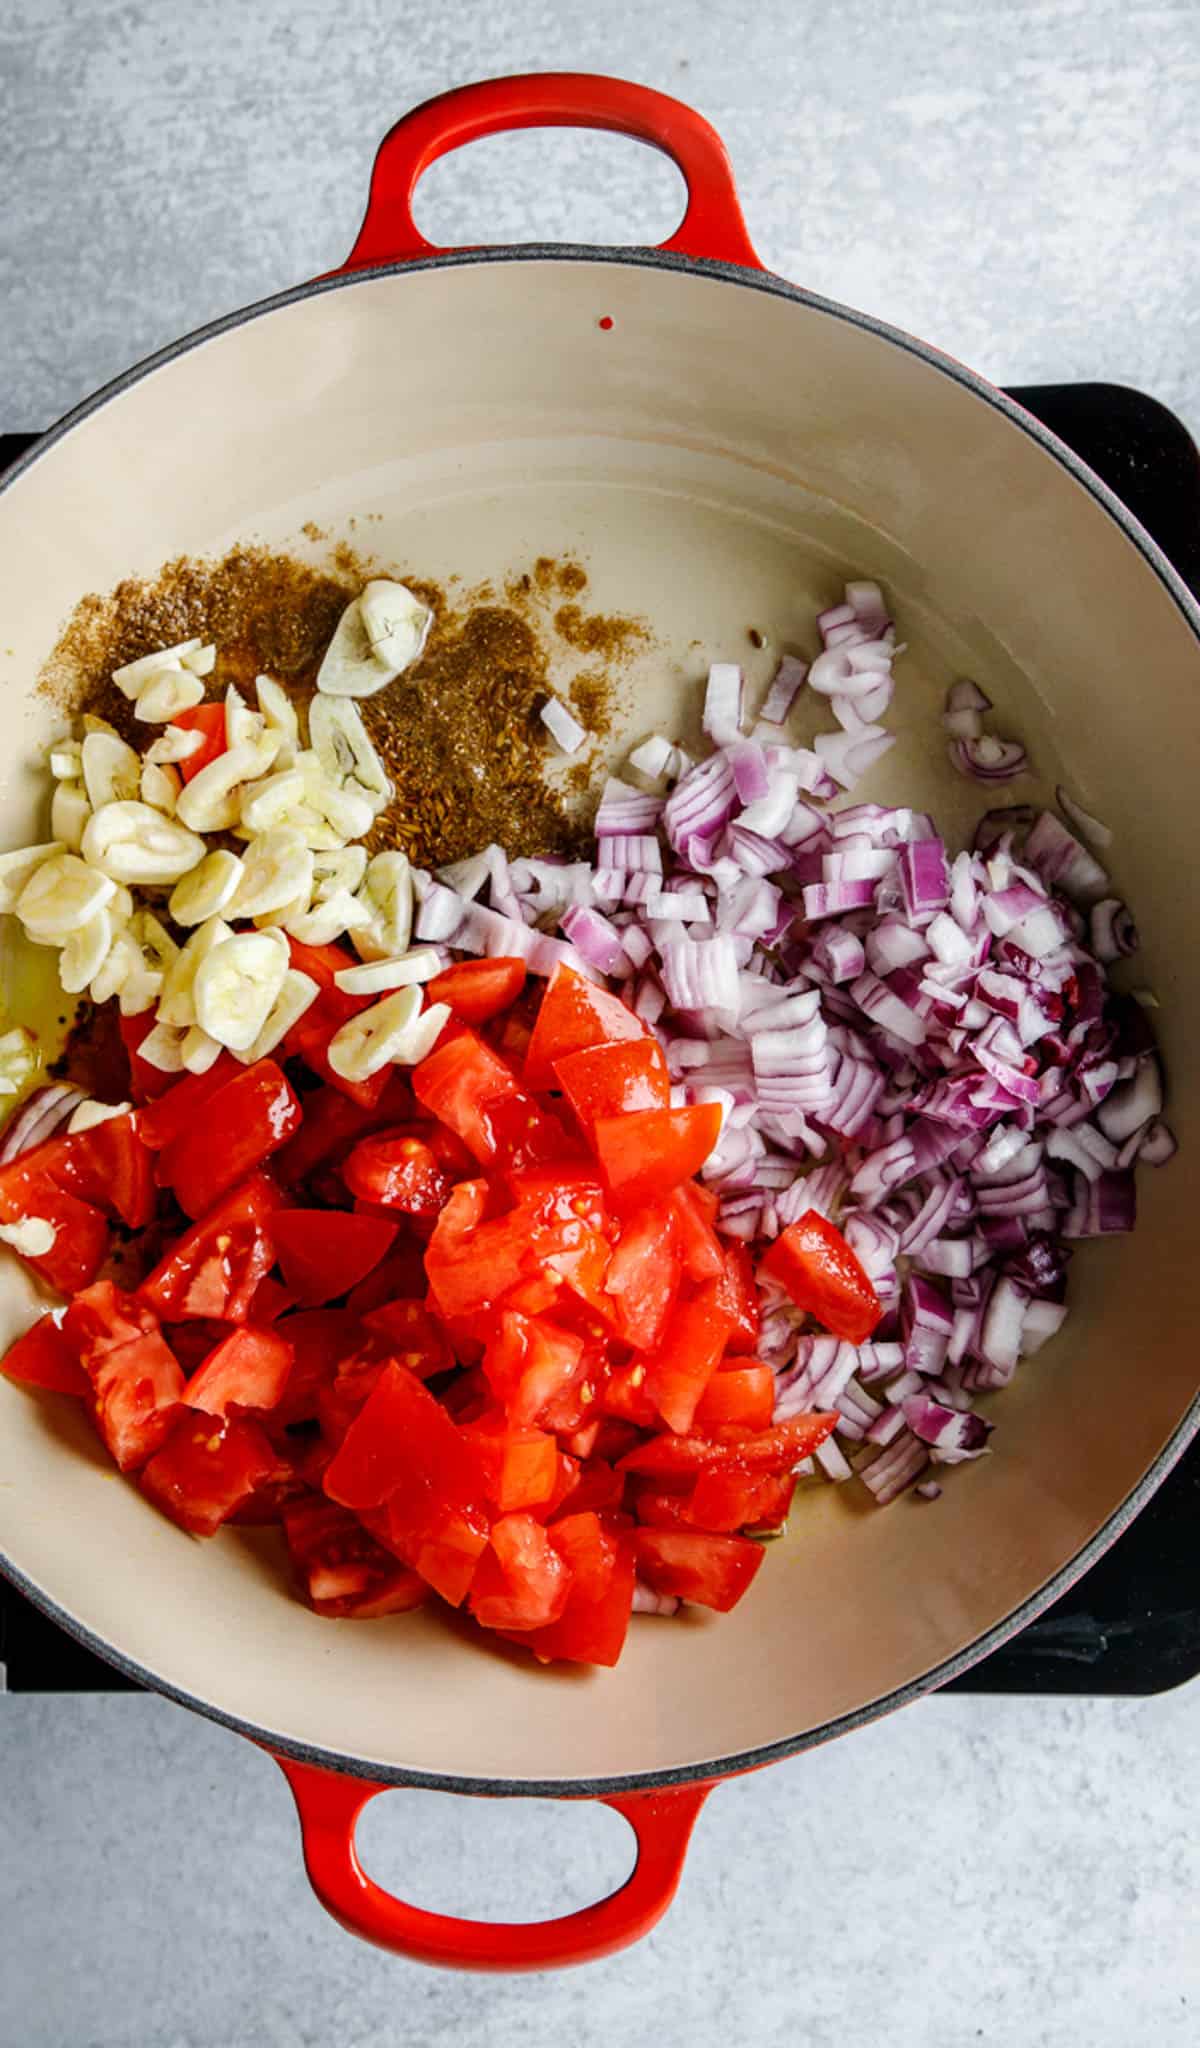

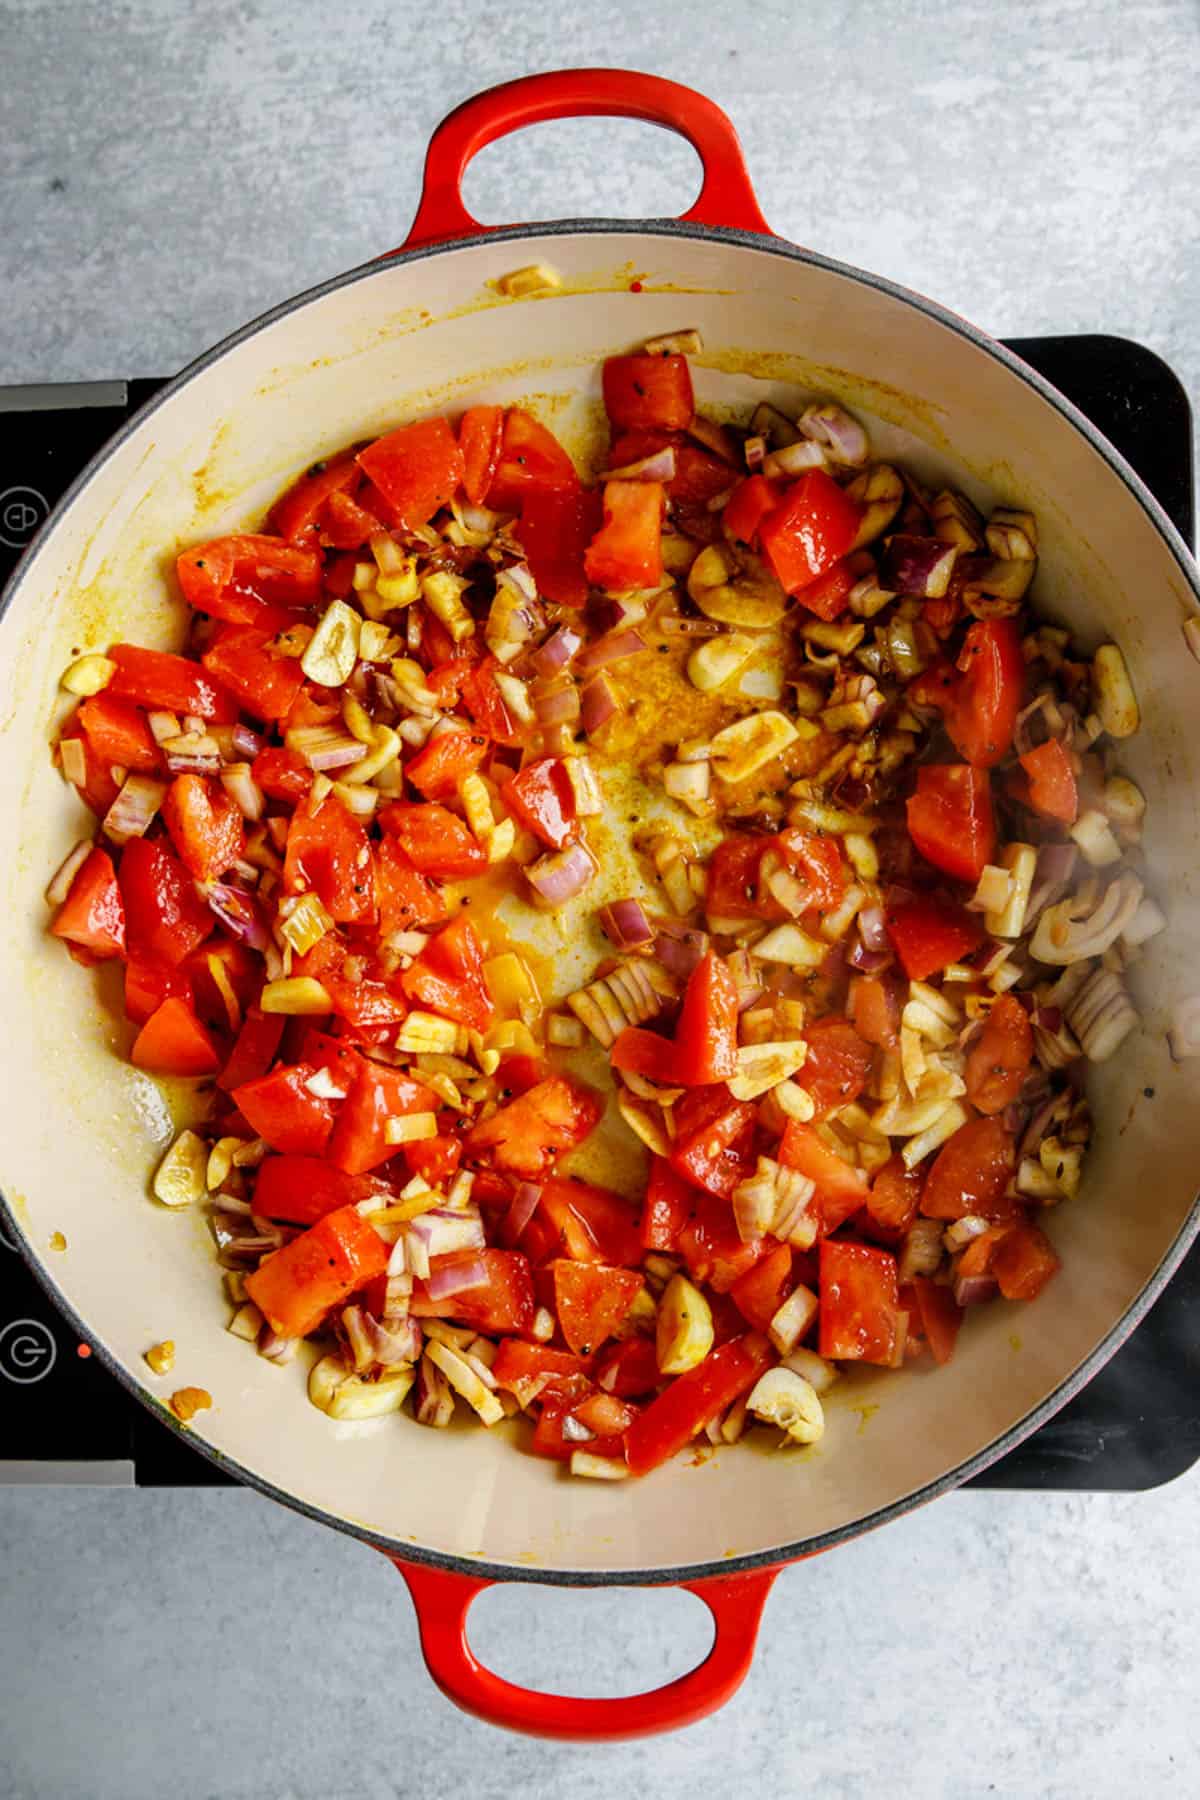
Saute: Finally, I turn the heat down to medium-low and let the mixture cook until the onions become translucent and the tomatoes break down.

Finish: When ready, I add the tomato spice mixture to the slow cooker and stir to combine. I’ll thin it out with water to achieve the consistency I want.
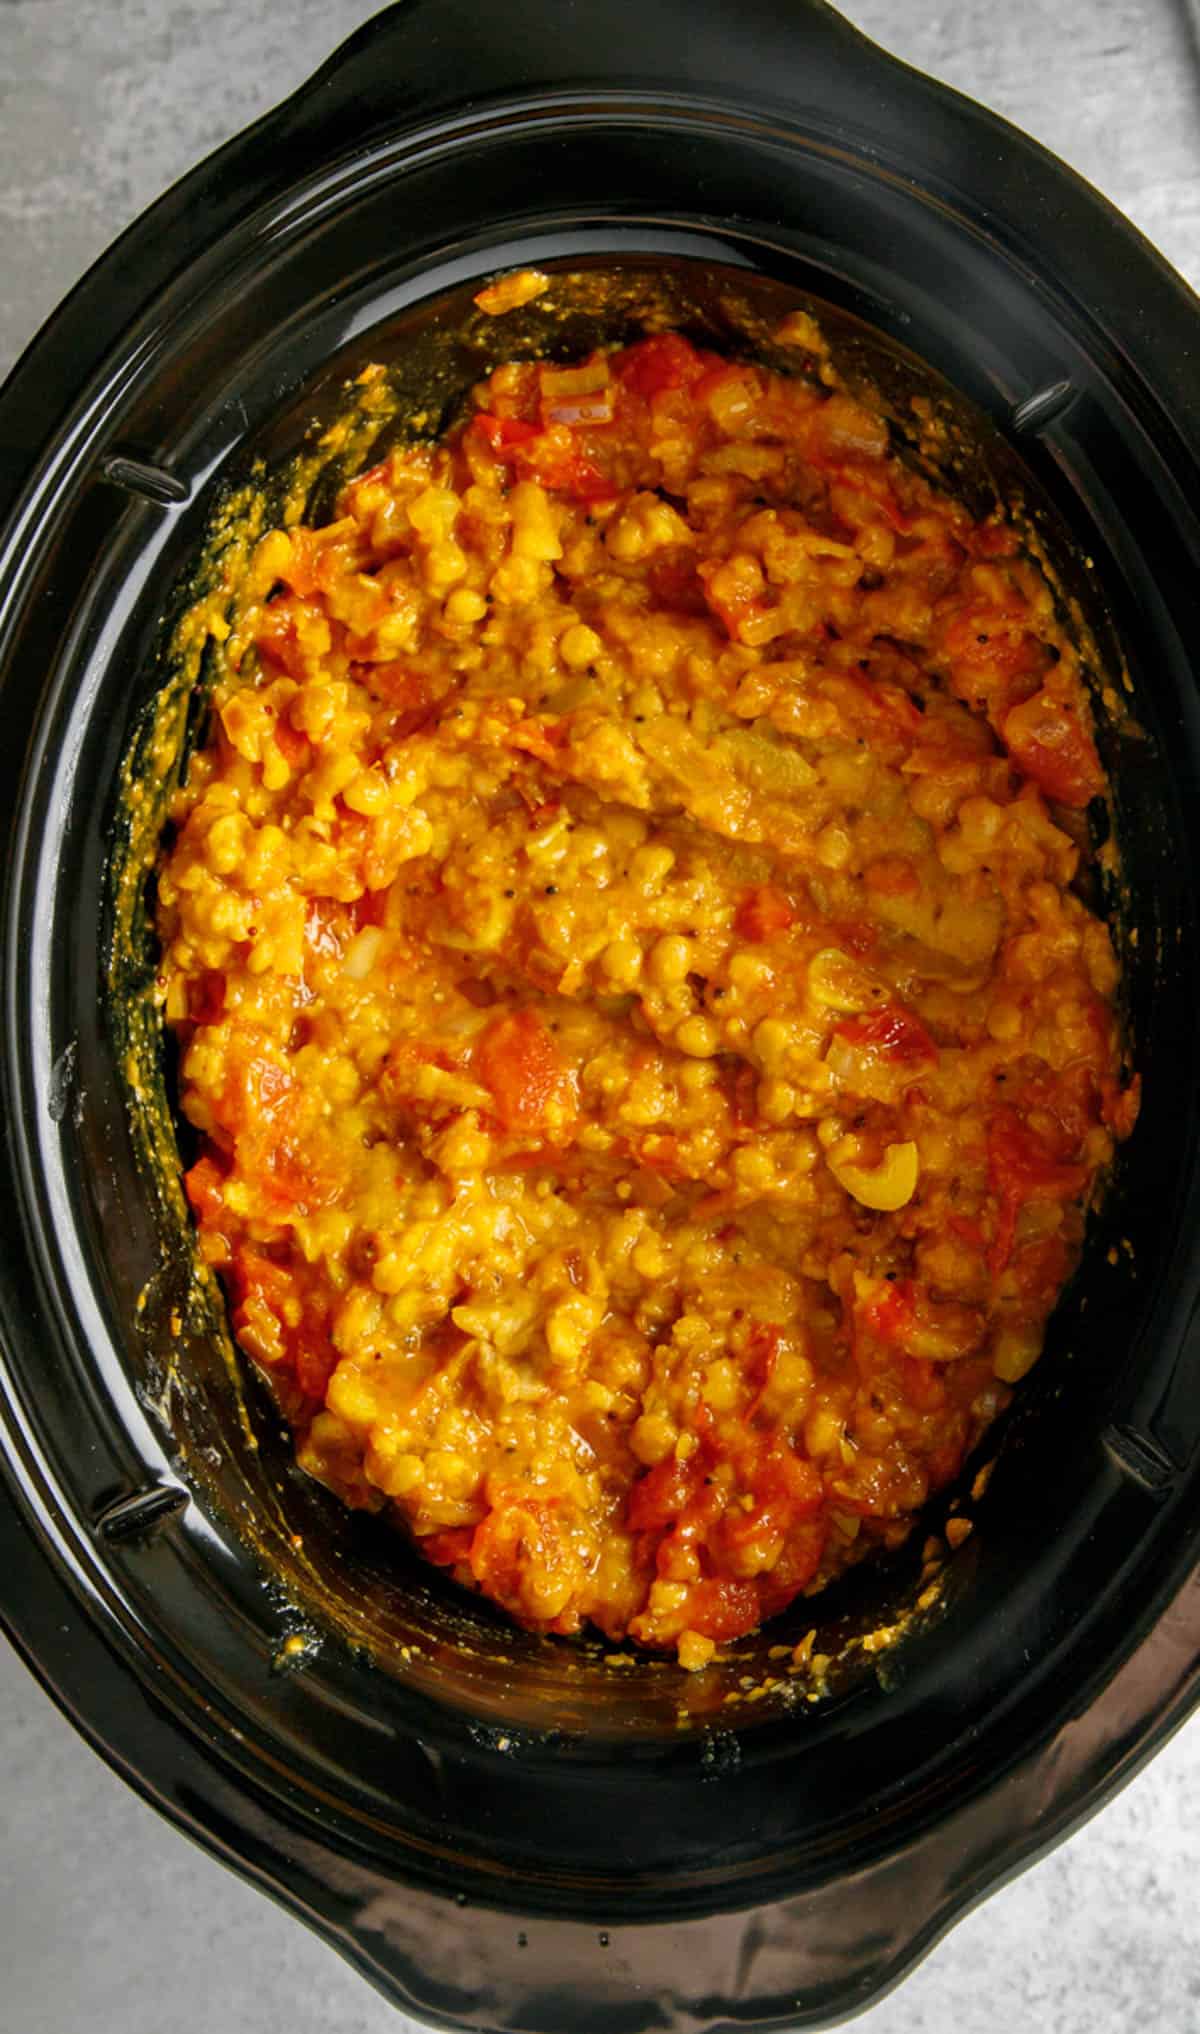

Serve: Then I top with fresh cilantro and serve my homemade slow cooker yellow dal.
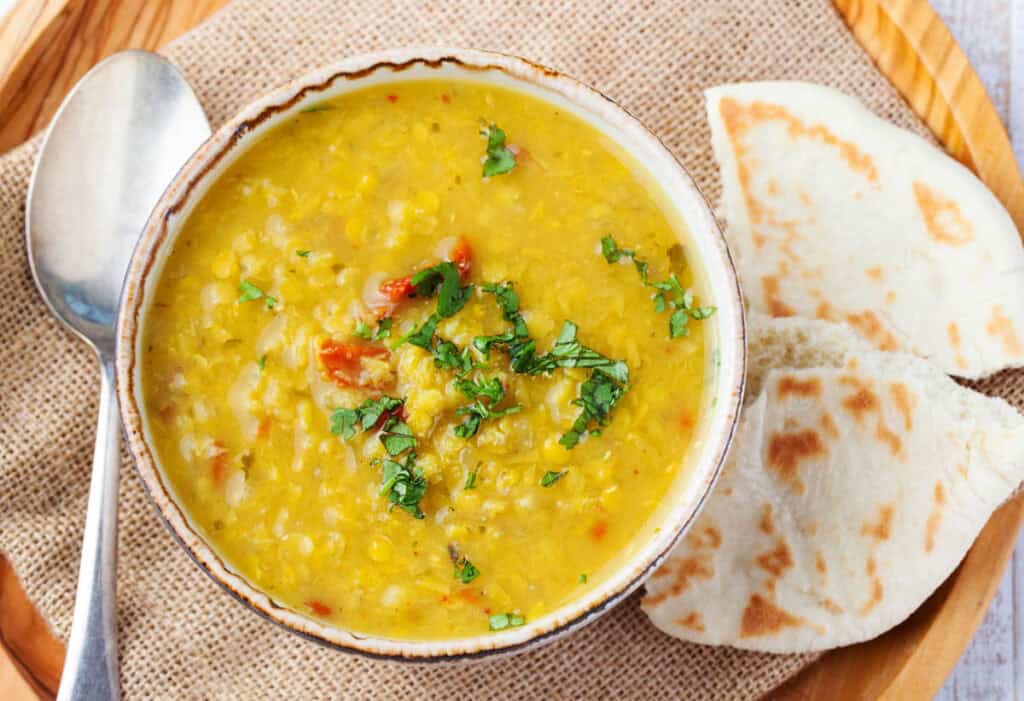

My #1 Secret Tip or making my slow cooker dahl is to toast the spices, but don’t burn them! Waiting until the cumin and black mustard seeds start to pop before adding them to the dish releases the essential oils that make this dal so delicious. You want to make sure you’re toasting them on medium-high heat only for a few seconds, stirring so that they don’t burn. Burnt spices will add a bitterness to this dish that we want to avoid!
Other Tips To Keep In Mind:
- Soak The Lentils: Soak split chickpeas (chana dal) in cold water for at least an hour. This softens the lentils, reduces cooking time, and ensures they cook evenly and become tender.
- Adjust The Heat: For a milder dal, reduce the cayenne pepper or substitute with paprika for a smoky flavor without the heat. For a spicier dish, add more cayenne or a chopped green chili.
- Control Consistency: For a thicker dal, cook with the lid off for the last 15 minutes to allow some liquid to evaporate. For a thinner consistency, add a bit more water.
- Stir Occasionally: If you’re home while the crockpot daal is cooking, give it a stir every now and then. This helps to ensure even cooking and prevents any sticking.
📖 Variations
Moong Dal: For a lighter and slightly sweeter version, make moong dal in the slow cooker. It has a delicate flavor that pairs well with a variety of spices. To make slow cooker moong dal, use mung beans and follow the same recipe but reduce the cooking time to about 3-4 hours on high.
Toor Dal: Also known as split pigeon peas, toor dal is another excellent option that will give you a dish with a creamy texture and mildly nutty flavor. To make slow cooker toor dal, you don’t need to make any changes to my recipe other than the legume.
Dal Tadka: This is a popular Indian dish where cooked dal is tempered with ghee or oil, spices, and aromatics. To make slow cooker dal tadka, follow the base recipe for the dal and, once cooked, prepare the tadka separately. Heat ghee or oil in a small pan, add cumin seeds, mustard seeds, garlic, and dried red chilies until they sizzle and become aromatic. Pour the sizzling tadka over the cooked dal just before serving for an extra burst of flavor.
Red Lentil Dal: Red lentils (masoor dal) cook quickly and have a smooth, creamy texture. They don’t require soaking. Simply add them to the slow cooker with the same spices and cook on high for 3-4 hours.
Black Lentil Dal: Also known as urad dal, black lentils have a rich, earthy flavor and a thicker texture. They take longer to cook, so soak them overnight and then cook on high for 6-8 hours.
Mixed Lentil Dal: Combine different types of lentils for a unique texture and flavor. Try mixing chana dal, toor dal, and red lentils. Adjust the cooking time based on the lentil that takes the longest to cook, usually 4-6 hours on high.
Vegetable Dal: Try adding carrots, spinach, zucchini, or bell peppers. Chop them into small pieces and add them to the slow cooker with the lentils.
Curry Coconut Dal: For a creamier, richer crock pot dal, add some curry powder and stir in a can of coconut milk during the last hour of cooking.
🍽 Serving Suggestions
My yellow dal in the slow cooker is a versatile dish that can be paired with a variety of breads, sides, and sauces. These are just a few of my favorites:
With Sides: Serve the dal over a bed of fluffy basmati rice or my instant pot quinoa. It’s also wonderful with my Indian asparagus stir fry or Indian spiced bok choy.
With Breads: I’ll often serve dal with my warm, soft vegan naan bread or flaky Guyanese roti. It’s perfect for soaking up the delicious, spiced lentil stew. For a gluten-free option, I also like it with my homemade gluten free bread.
With Sauces: Mint chutney or tamarind chutney pairs perfectly with the dal, adding a sweet and tangy contrast. A side of yogurt raita is also a refreshing complement to the warm, spiced dal.
With Indian Dishes: Pair it with other classic Indian dishes like my vegan palak paneer or cauliflower sabji. For a larger spread, feel free to add classic Indian appetizers like my samosas or tandoori cauliflower.
🧊 Storage Directions
Fridge: Once the dal in crock pot has cooled, I put it in an airtight container. It keeps well in the fridge for up to 5 days, making it perfect for meal prepping.
Freezer: For longer storage, I always freeze the dal. Let it cool completely, then transfer it to a freezer-safe container or heavy-duty freezer bag, leaving a bit of space at the top for expansion. Dal will stay good in the freezer for up to 3 months.
Reheating: For the best results, I warm it up on the stovetop over medium heat, stirring occasionally until it’s heated through. If it has thickened too much, just add a splash of water or vegetable broth to get it back to the right consistency.
For a quick reheat, I will also use the microwave. I’ll place an individual portion of dal in a microwave-safe bowl, cover it with a damp paper towel to keep it moist, and heat on high for 2-3 minutes. If you choose this method, make sure to give it a stir halfway through to make sure it heats evenly.
❓Recipe FAQs
Yes, use the sauté function to toast the cumin and mustard seeds, then add the onions, garlic, tomatoes, and other spices. Once fragrant, add the soaked split chickpeas and water. Seal the Instant Pot and cook on high pressure for 15 minutes. Allow for a natural pressure release for 10 minutes, then manually release any remaining pressure. Add the cilantro before serving.
Yes, just simmer the soaked lentils on the stove for until they’re cooked through. If you’ve soaked them long enough, they should take about 1-2 hours to cook. Then saute the spices, make the tomato mixture, and complete the recipe as stated in the instructions.
Crock pot dal can burn if there isn’t enough liquid in the slow cooker, or if the appliance was set to too high a temperature. Ensure you use at least the recommended amount of water. Also, avoid adding dairy products like yogurt or cream during the initial cooking process as they can thicken and cause burning; add them at the end instead.
If your lentils aren’t cooked, it could be due to insufficient soaking time or incorrect cooking time and temperature. Make sure to soak the split chickpeas for at least one hour before cooking. If using a slow cooker, ensure it is set to high and the cooking time is sufficient (4-6 hours). How long to cook dal in slow cookers can vary, but it will always take at least 4 hours for chana dal.
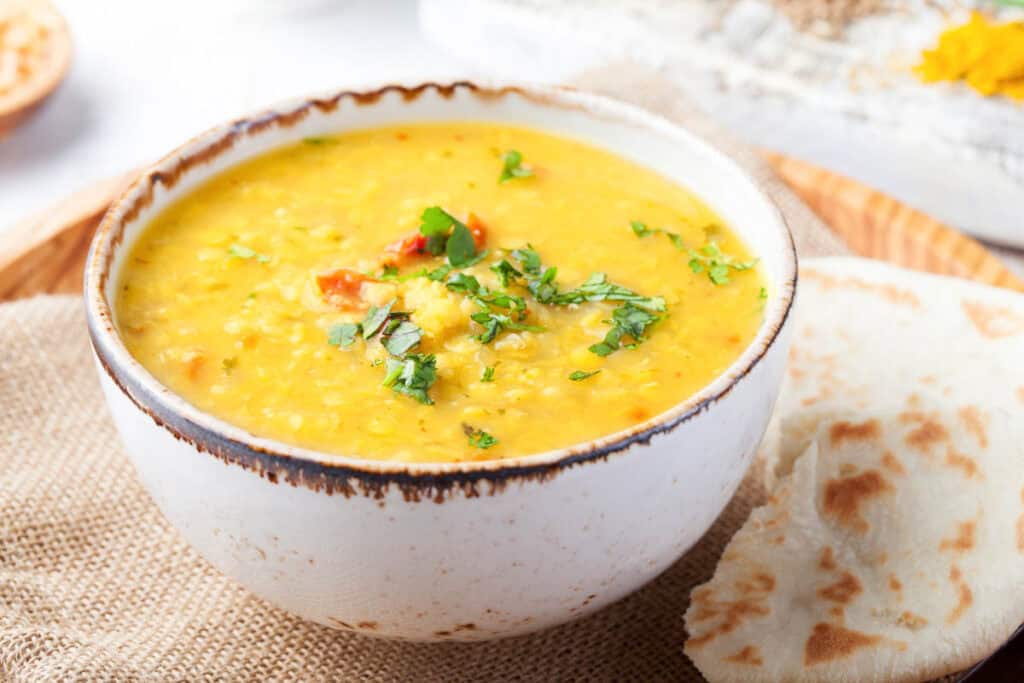

Want to Save This Recipe?
Enter your email & I’ll send it to your inbox. Plus, get great new recipes from me every week!
By submitting this form, you consent to receive emails from The Picky Eater.
Love this vegetarian indian recipe? Please leave a 5-star rating 🌟 in the recipe below and/or a review in the comment section further down the page!
You can also FOLLOW ME on FACEBOOK, INSTAGRAM, and PINTEREST to see more delicious, healthy, family-friendly food, and if you have any questions, I’m here to help!
📋 Recipe Card
Easy Crock Pot Dal (Slow Cooker Yellow Dal)
My crock pot dal recipe is an absolute staple in our house! Made with protein rich split chickpeas and a combination of rich, warm spices like turmeric, cumin, and coriander, this slow cooker yellow dal is pure and simple Indian comfort food. Ideal for anyone looking to make a flavor-packed one-pot dinner, or a make-ahead meal!
Servings: 4 servings
Calories: 210kcal
Shop Ingredients on JupiterAdd the lentils, salt, and 3 cups of water to a slow cooker. Cook on high for 4-6 hours.
When your lentils are close to done, heat oil in a medium pot over medium-high heat. Add a couple cumin seeds to test out the heat of the oil. If they pop, the oil is ready to go!
Add all of your cumin seeds and mustard seeds and let cook for 10-15 seconds (until the seeds pop).
Then add your coriander, turmeric, cayenne, onion, tomato, and garlic, stir for 30 seconds, and turn the heat down to medium low. Let it cook until the onions become translucent and the tomatoes break down.
Add the onion/tomato/spice mixture to the slow cooker and stir to combine. Top with cilantro and serve!
- Soak The Lentils: Soak split chickpeas (chana dal) in cold water for at least an hour. This softens the lentils, reduces cooking time, and ensures they cook evenly and become tender.
- Adjust The Heat: For a milder dal, reduce the cayenne pepper or substitute with paprika for a smoky flavor without the heat. For a spicier dish, add more cayenne or a chopped green chili.
- Control Consistency: For a thicker dal, cook with the lid off for the last 15 minutes to allow some liquid to evaporate. For a thinner consistency, add a bit more water.
- Stir Occasionally: If you’re home while the crockpot daal is cooking, give it a stir every now and then. This helps to ensure even cooking and prevents any sticking.
Calories: 210kcal | Carbohydrates: 31g | Protein: 13g | Fat: 3.4g | Saturated Fat: 2.9g | Sodium: 581mg | Fiber: 13g | Sugar: 4g


Source link
Health
Zucchini Baby Food Puree | The Picky Eater

This post may contain affiliate links. As an Amazon Associate, I earn from qualifying purchases. Please read my disclosure.
Perfect for busy parents looking to make their own baby food, my easy zucchini baby food with apples and carrots is a delicious combination your baby will love! Both zucchini and carrots are sweeter veggies, and when paired with apples, it turns a simple zucchini puree into a healthy sweet treat for your little one.

Veggies mixed with fruit are always a hit in my household, and this zucchini carrot and apple puree is a favorite. When my kids were young, I used to mix this zucchini baby food with their oatmeal in the morning and they loved it!
While you can easily take zucchini and make a one ingredient puree, I always loved experimenting with different zucchini combination baby food to see what my baby enjoyed most. I find that mixing it with a couple of other fruits and veggies makes babies love it even more!
So if you haven’t tried making a zucchini carrot puree for your little one, my simple recipe is easy to prepare, nutritious, and delicious. I guarantee you will have one happy baby after giving them this smooth puree!
My zucchini baby food recipe is a great first food! Babies can enjoy zucchini as young as 6 months old when they begin to try other solid foods (source). I gave my kids this courgette baby puree when they were both 6 months old, and they totally loved it!
Baby food recipes with zucchini are packed with vitamins and minerals. Zucchini is a great source of beta-carotene, which converts to vitamin A, supporting the immune system and improving eyesight. Additionally, it’s rich in vitamin C, aiding in iron absorption, which is crucial as babies begin to lose iron around 5 months old. It also contains vitamin B6, essential for brain development (source).
My zucchini and carrot puree for baby is not only healthy but also delicious. It combines the natural sweetness of fresh zucchini, carrots, and apples, creating a flavor that your little one will love with every spoonful.
I’ve also found that using zucchini can be of the best stage 1 baby food recipes because it’s so mild and typically not on the list of common food allergies.
Plus, it’s the most versatile and easiest baby food zucchini recipe ever! You don’t need any fancy equipment or expensive ingredients to make this – just a pot and a blender or potato masher and you’re all set.
My zucchini puree is a simple baby food recipe you can use in a variety of ways – it’s super customizable based on your baby’s needs and preferences.
Not only that, but baby food with zucchini keeps well in the fridge and freezer! My recipe makes 16 servings, so I would often make it in big batches to have on hand, making meal planning for my kids much easier and more efficient!
Latest Recipe Video!
🥘 Ingredients
My homemade baby puree with zucchini is ready in minutes with minimal effort. All you need is a handful of simple ingredients and a good blender! Scroll down to the recipe card at the bottom of the post for more details.

Organic Zucchini: This mild flavored veggie forms the base of my zucchini carrot baby food! I prefer to use the smaller, skinnier zucchini for baby food because they have fewer seeds. You could also make this recipe with yellow squash or summer squash if you don’t have zucchini.
Organic Carrots: They add sweetness and a smooth texture to the puree. You can use either large carrots or baby carrots.
Organic Fuji Apples: I love using Fuji apples for their sweet and crisp flavor. They are excellent for baby food puree as they easily cook down and add natural sweetness.
Water: You need liquid to help the fruits and veggies cook down. I use 12 ounces of water so that the puree ends up with a smooth and easy-to-consume consistency.
🔪 How To Make Zucchini Baby Food
Learning how to puree zucchini for baby food is really easy! It only takes a few simple steps and the blender does all the hard work for you.
Watch my video below to see the step-by-step process of making zucchini puree for baby.
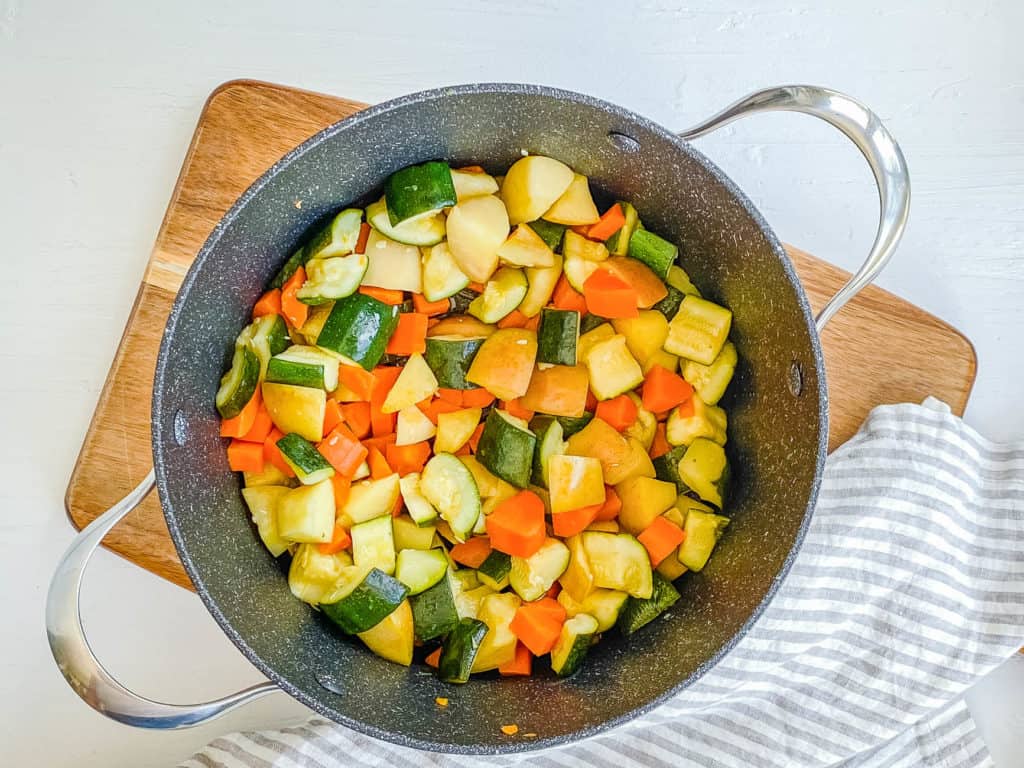
Prep Your Ingredients: To begin I wash all the produce. Then I cut the zucchini in half lengthwise and cut each half into 8 pieces. Next, I peel the carrots, cut them in half lengthwise, and then cut each half into 8 pieces. For the apples, I cut them in half, remove the seeds and stem, and cut each half into 8 pieces.
Cook The Produce: In a large pot, I add the carrots and water. Then I turn the heat to high and cook for 8 minutes, stirring occasionally. Next, I add the zucchini and apples and cook for another 3-5 minutes.
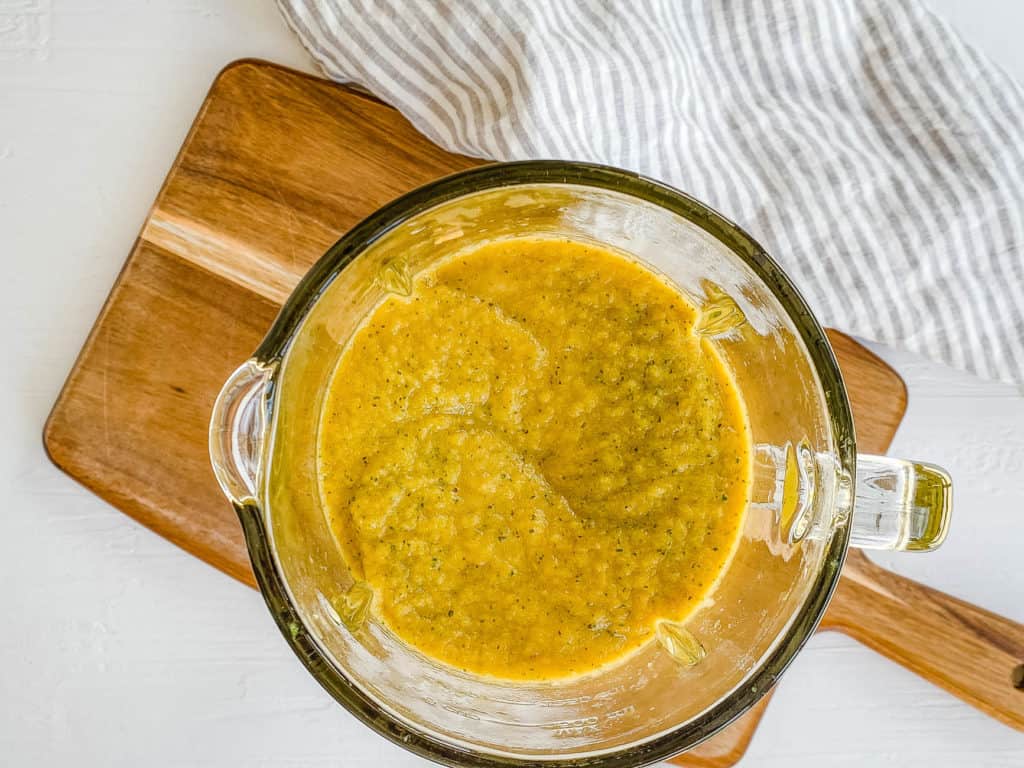
Puree The Mixture: When done I pour the cooked produce and water into a blender. Then I blend everything until smooth or the desired consistency.
Serve or Store: After blending, if I’m not serving the pureeright away or using it all within a week, I pour it into ice cube trays. Then I let it cool, wrap or cover the trays, and put them in the freezer.
Note: Thaw in the fridge the night before use, or thaw by putting the small cubes in a bowl over a bowl of hot water on the counter to defrost.
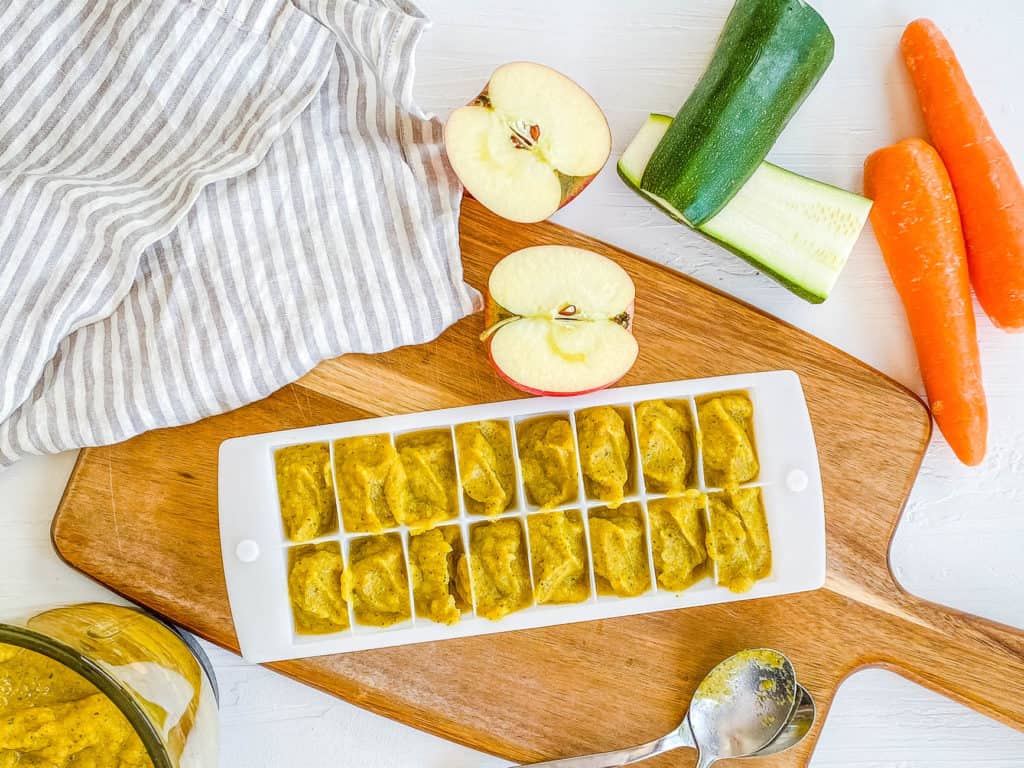
My #1 Secret Tip or making my zucchini baby food is to use a high-speed blender, not a food processor. A high-speed blender will pulverize all the ingredients into a super smooth consistency. A food processor might leave the puree slightly chunky or grainy.
Other Tips To Keep In Mind:
- Use Organic Produce If You Can: When making your own homemade baby food recipes, I highly recommend using organic produce to reduce pesticide exposure for your baby. No matter how thoroughly you wash your fruits and vegetables, there will still be some pesticide residue (source).
- Proper Storage: Before using the zucchini, make sure it’s completely dry. Then place them in a paper bag and store them in the vegetable drawer of your fridge. Don’t put them in a plastic bag – it will cause your courgette to become slimy.
- Steaming Option: Instead of boiling, you can also use a steamer basket or slow cooker. To steam zucchini for baby food first dice everything into small chunks. Next, bring 1 inch of water to boil in a pot with a steamer basket, add the produce, cover, and steam for 5 minutes until soft. Then put the steamed zucchini and veggies into a blender with a little water and puree.
- Speed Up Cooking: For quicker cooking time, cut the vegetables and fruit into small pieces to help them cook down more quickly.
- First-Time Feeding: If this is your first time serving zucchini to your baby, monitor for any allergic reactions over the first 1-3 days. Once you confirm there are no allergies, you can start mixing zucchini with other purees.
✔️ How To Choose Zucchini
Zucchini, also known as courgette in some countries, is the exact same vegetable. When selecting zucchini, you want to look for vibrant, bright green ones that are firm and free of bruises or blemishes.
Size is important too. I prefer smaller, skinnier zucchini for baby food because they have fewer seeds in the center. Choose small to medium-sized zucchini, as they have less water content and more flavor compared to larger ones. Larger zucchinis tend to be watery, less flavorful, and full of seeds.
📖 Variations
One of the best things about this recipe is how customizable it is. When creating your own variations choosing what to mix with zucchini for baby food is fun. Here are some of my favorite zucchini baby food combinations:
Use Different Veggies: This is just a short list of some other vegetables that would taste great with my zucchini puree.
Change The Fruit: Use a different type of apple in this delicious puree, or add one of these other fruits for a fun way to change things up!
Add Spices Or Herbs: All zucchini puree combinations for baby are delicious with the addition of herbs and spices such as basil, thyme, rosemary, parsley, garlic, or lemon. If you want a sweeter flavor, try a pinch of cinnamon or nutmeg. It’s a great way to expose babies to new flavors.
Add Breast Milk or Formula: When considering what to mix zucchini with for baby, it can be as simple as just mixing in some breast milk or organic baby formula to thin out the consistency of the puree right before serving. Do not add breastmilk or formula before freezing the baby food as formula is not meant to be frozen, and breastmilk has a different shelf life in the freezer.
Make A Single Ingredient Puree: If you don’t have everything on hand to make carrot zucchini and apple puree, no problem! You can make plain zucchini puree! Just add the zucchini and a few tablespoons of water to a pot, boil, and then puree. Keep in mind that zucchini has a lot of water, so if you don’t add the carrots and apples, you may need less water.
Make Baby Finger Foods: Turn my courgette puree for baby recipe into finger food instead. For older babies, or babies who are using baby led weaning foods, you can cut the zucchini into match-sized sticks, and roast them in the oven with a little bit of olive oil. They turn into zucchini “fries” and are a great way for your baby to experiment with gumming soft foods.
🧊 Storage Directions
Fridge: If you plan to use the entire batch of zucchini baby puree within a week, I recommend just transferring it to an airtight container and storing it in the refrigerator. Simply scoop out individual servings as needed.
Freezer: For longer storage, pour the cooled puree into ice cube trays, cover, and freeze until solid. Once frozen, I always transfer the cubes to a ziplock freezer bag and label it with the date. The cubes can be stored in the freezer for up to 3 months.
Thawing: To thaw, I normally place the desired number of cubes in the fridge overnight. Alternatively, for quicker thawing, you can place the cubes in a bowl over another bowl of hot water on the counter.
Reheating: Gently warm the thawed puree in a saucepan over low heat or in a microwave-safe dish in the microwave. Stir well and test the temperature before serving to ensure it’s not too hot for your baby.
❓Recipe FAQs
No, do not give your baby raw zucchini. They cannot mash it with their gums, and the small pieces can be a choking hazard.
You don’t need to remove the seeds – it is fine for baby to eat zucchini seeds when they are pureed with the rest of the zucchini.
You might be wondering whether you need to peel the zucchini skin before cooking it. The answer is no – you definitely don’t need to peel the zucchini. The zucchini skin has a ton of nutrients and becomes super soft when cooked, which means it’s ideal for pureeing.

Want to Save This Recipe?
Enter your email & I’ll send it to your inbox. Plus, get great new recipes from me every week!
By submitting this form, you consent to receive emails from The Picky Eater.
Love this plant based baby food recipe? Please leave a 5-star rating 🌟 in the recipe below and/or a review in the comments section further down the page!
You can also FOLLOW ME on FACEBOOK, INSTAGRAM, and PINTEREST to see more delicious, healthy, family-friendly food, and if you have any questions, I’m here to help!
📋 Recipe Card
Zucchini Baby Food Puree
My zucchini baby food puree with apples and carrots is a delicious combination your baby will enjoy! Zucchini and carrots are on the sweeter side in the vegetable category, and when paired with apples it becomes a healthy sweet treat for your little one!
Servings: 16 ounces
Calories: 22kcal
- Store zucchini in a paper bag in the fridge to keep fresh.
- If you don’t want to boil everything in a pot, you can also use a steamer basket or slow cooker to cook down the vegetables and fruit.
- Cut the vegetables and fruit into small pieces to help them cook down more quickly.
- If you plan to use this entire batch of zucchini baby food within 1 week, you can transfer the entire puree into one airtight container and place it in the fridge. Then, just scoop out individual servings when you’re ready to feed your baby.
- 1 ice cube = 1 oz of food
Adapted from BabyLove
Calories: 22kcal | Carbohydrates: 5g | Protein: 1g | Fat: 1g | Saturated Fat: 1g | Sodium: 13mg | Potassium: 144mg | Fiber: 1g | Sugar: 4g
Health
The Hidden Time Bomb That Will Destroy Your Marriage and The Secret for Defusing It

Too many marriages are failing today and even trained marriage counselors don’t know why. I have been a marriage and family therapist for more than fifty years and the headline on my website “Confessions of a Twice-Divorced Marriage Counselor” introduces you to what I’ve learned in my own life and what I have done to help thousands of men and women recognize that divorce is not the answer. Spoiler alert: My present wife Carlin and I have been married for 45 years now and our love grows stronger every year.
I could write a lot and tell you the full story, but I’m guessing you’d appreciate my getting right to the point and telling you what the time bomb is and the secret for defusing it.
The hidden bomb causes changes in our brains when we grow up with a “father wound” and the secret for defusing it is to change the false beliefs that were planted in our brains that undermine our relationships.
Although this deadly time bomb can explode at any time in a marriage, mid-life couples are particularly vulnerable. Susan L. Brown is Director of The National Center for Family & Marriage Research. In a recent article, “The Graying of Divorce: A Half Century of Change,” she offers the following facts:
- People over 50 are divorcing in record-breaking numbers, and three to four-family generations feel the effects.
- 1 in 4 persons who divorce in the U.S. is over 50, contrasted to less than
1 in 10 in 1990.
- As the divorce rate for adults over 50 soars, so does the number of adult children experiencing parental divorce.
- In their book Second Chances: Men, Women and Children a Decade After Divorce, Sandra Blakeslee and Judith S. Wallerstein tell us, “Divorce is deceptive. Legally it is a single event, but psychologically it is a chain – sometimes a never-ending chain – of events, relocations, and radically shifting relationships strung through time, a process that forever changes the lives of the people involved.”
Understanding and Healing The Family Father Wound
Although I had written a number of books that helped me understand what causes relationships to fall apart, including international best-sellers including Looking for Love in All the Wrong Places, Surviving Male Menopause, The Irritable Male Syndrome, and The Enlightened Marriage: The 5 Transformative Stages of Relationships and Why the Best is Still to Come, it wasn’t until I tackled the “father wound” that the final pieces of the puzzle fell into place.
In my book, My Distant Dad: Healing the Family Father Wound, I say,
“There is one problem that surpasses all others in its impact on men, women, and society. It is the father wound. We focus on the importance of mothers in determining the well-being of children. Without the support of their fathers, men become disconnected from their true selves, feeling that others are controlling their lives. The father wound may be the most pervasive, most important, and least recognized problem facing men and their families today. The father wound isn’t restricted to men. Women also suffer from the father wound.”
As I recount in the book, my father wound began early. Like many men, my mid-life father had become increasingly depressed when he couldn’t make a living to support his family. Although there were many system problems that led to his losing his job, he blamed himself and felt like he was a failure as a husband and a father. When I was five years old, he took an overdose of sleeping pills.
Fortunately, he didn’t die. He was committed to the state mental hospital, where the “treatment” of the time was inadequate at best and his condition worsened. I grew up wondering what happened to my father, when it would happen to me, and what I could do to prevent it from happening to other families.
According to the National Center for Fathering,
“More than 20 million children live in a home without the physical presence of a father. Millions more have dads who are physically present, but emotionally absent. If it were classified as a disease, fatherlessness would be an epidemic worthy of attention as a national emergency.”
I grew up believing that there was something wrong with me, that somehow I was responsible for my father’s depression and suicide attempt. We now know that “Adverse Childhood Experiences (ACEs)” including the loss of parental support can impact our brain chemistry and the ways we perceive ourselves and our world.
As I was writing the book, My Distant Dad, I thought I had healed my own father wound and could now share what I learned with others. One of those who found my book helpful was Iyanla Vanzant, the world-renowned spiritual teacher and thought leader, and host of Iyanla Fix My Life on the Oprah Winfrey Network. She said,
“Millions of us grew in a home with a father who was distant, absent, rejecting, or dysfunctional. Jed Diamond’s magnificent healing journey offers us a story of hope, reconciliation, and redemption where we can finally come to peace with our father wound and find real lasting love in our lives.”
It wasn’t until the book was nearly complete that I realized there was another father wound that was missing. I knew my mother’s father, John, had died when she was five years old (the same age I was when my father went into the mental hospital, but she never talked about when happened or how it impacted her life.
The wound she never dealt with caused her to marry and divorce three times. I believe, like many, she was “looking for love in all the wrong places,” always searching for the father she had lost, but never realizing it. Like many women she had an unhealthy emotional attachment to me, her son, and was never able to have a successful, long-term marriage.”
I realized that all the women I had loved the most had suffered from having a father wound: My first wife’s father died when she was seven years old. My second wife’s father couldn’t handle her developing womanhood and totally distanced from her when she moved into puberty. Even my present wife, Carlin, lost her father through divorce.
Whether you’re a man or a woman I think we all can resonate with the words of fatherhood expert Roland Warren. “Kids have a hole in their soul in the shape of their dad. And if a father is unwilling or unable to fill that role, it can leave a wound that is not easily healed.”
Of course the healing and defusing of the bomb takes time. I have developed a program that I use with my private clients. You can learn about it and get the course here.
There is another course that is excellent called “How to Diffuse the Divorce Bomb,” developed by Steve Horsmon, founder of Good Guys to Great Men. You can check out that course here.
I write a new article every week for those who are part of our MenAlive community. If you are not a subscriber, you can become one here.
Health
Ticks and kids: What parents should know – CHOC

How to protect against ticks – and what to do if you spot one on your child
Enjoy the great outdoors, but don’t forget about the threat of ticks. Ticks can carry diseases, including Lyme disease.
The good news is that, according to the Orange County Mosquito and Vector Control District, the county has not had a confirmed case of Lyme disease acquired from local ticks. The district also routinely tests for Lyme disease in local tick populations.
Just the same, it’s good to remain vigilant – especially when traveling to places with more risk. Here, Dr. Olga Guijon, a CHOC pediatrician, answers common questions about kids and ticks.
How can I protect against ticks?
Ticks don’t have to become a problem if you follow some basic tips.
Wardrobe and accessories matter
- Wear light-colored clothing to help you see ticks more easily.
- Wear closed shoes or boots, long-sleeve shirts, and pants.
- Tuck pant legs into socks or shoes for extra protection.
- Pull long hair back or wear a hat.
- Clothes also can be treated with a specific insecticide (like permethrin) to help prevent bites.
Choose locations wisely
- When hiking, stay on trails and avoid bushy areas with tall grass and leaf litter.
Take post-hike measures
- Wash kids’ skin with soap and water when they come back inside. If you’ve been in an area with ticks, wash all clothes in hot water and tumble dry on high heat before they’re worn again.
- Check your kids each day for ticks — look in and behind ears, in the groin area, behind the knees, in hair, in eyebrows and eyelashes, and under the arms.
- Also remember to inspect pets, clothing, and camping gear, including backpacks and sleeping bags.
- If you find a tick, remove it right away.
Are bug sprays with DEET safe for kids?
Insect repellents containing DEET have been tested and approved as safe for kids older than age 2 months. In addition to ticks, DEET helps protect against mosquitoes, biting flies, chiggers, and fleas.
However, while DEET is approved for babies 2 months and older, parents ought to apply sparingly in children under 2 years of age as their skin is different compared to older children.
But be sure to read all labels and take care when you use them:
- Choose a repellent with a 10% to 30% concentration of DEET (look for N,N-diethyl-m-toluamide on the label). The higher the concentration, the longer it lasts.
- Use lower concentrations (10%) if kids will be outside only for an hour or two.
- If they’re outside longer, consider using a repellent with up to 30% DEET, which lasts around five hours.
- Do not apply a repellent with DEET more than once a day.
DEET can be put on exposed skin, as well as clothing, socks and shoes. But don’t use it on your child’s face, under clothing, on cuts or irritated skin, or on the hands of young children. Here are some other tips for applying DEET:
- Do not use a single product containing both sunscreen and DEET. Sunscreen needs to be reapplied often, while DEET should not be used more than once a day.
- DEET concentrations higher than 30% are not more effective and the chemical (which is absorbed through the skin) in high amounts can be toxic. Follow the directions on the label.
- Do not apply repellent to kids’ hands because they could swallow it if they put their hands in their mouth. It also can irritate the eyes if they touch them.
- Don’t spray the repellent anywhere near the mouth.
- Apply the repellent in an open area so that you and your child don’t breathe it in.
- Wash kids’ skin with soap and water when they come back inside, and wash all clothes before they’re worn again.
Other bug repellents don’t contain DEET. The US Environmental Protection Agency has a list of approved repellents. Their tool can help you choose the right one for your family.
What to do if you find a tick on your child
First, don’t panic. It’s true that Lyme disease is the most common tick-borne disease in the United States. But your child’s risk of developing Lyme disease after being bitten by a tick is very low.
To be safe, though, you’ll want to remove the tick as soon as possible. The risk of infection rises 24 to 48 hours after the tick attaches to the skin.
Tick removal steps
- Step 1: Use tweezers to grasp the tick firmly at its head or mouth, next to the skin. Use a magnifying glass, if you have one, to see the tick clearly.
- Step 2: Pull firmly and steadily until the tick lets go of the skin. Do not twist the tick or rock it from side to side. Be careful not to compress the ticks body. If part of the tick stays in the skin, don’t worry. It will eventually come out on its own.
- Step 3: Release the tick into a jar or zip-locked bag.
- Step 4: Wash your hands and the site of the bite with soap and water.
Never use petroleum jelly or a hot match to kill and remove a tick. These methods don’t get the tick off the skin, and can make it burrow deeper and release more saliva, which makes it more likely to pass a disease.
What are the signs of tick-related diseases?
Most tick bites are harmless and don’t need medical treatment – especially in Orange County, CA. But some ticks (like the deer tick, wood tick and others) can carry harmful germs that cause diseases like Rocky Mountain spotted fever and Lyme disease.
Here are some things to look for:
- a red bump ringed by an expanding red rash, which looks like a bull’s-eye (Lyme disease);
- red dots on the ankles and wrists (Rocky Mountain spotted fever); or
- flu-like symptoms such as fever, headache, tiredness, vomiting and muscle and joint aches.
When should I call the doctor about tick bites?
Call your doctor if:
- Your child has had a tick bite, especially if the tick might have been on the skin for more than 24 hours. Sometimes, doctors prescribe a preventive dose of antibiotics for kids at high risk for Lyme disease.
- Part of the tick remains in the skin.
- A rash of any kind develops (especially a red-ringed bull’s-eye rash or red dots on wrists and ankles).
- The bite area looks infected (increasing warmth, swelling, pain, or oozing pus).
- Your child gets symptoms like a fever, headache, tiredness, stiff neck or back, joint swelling, or muscle or joint aches.
- Your child has facial paralysis (can’t move areas of the face).
What do doctors do if you have Lyme disease?
A pediatrician may be able to diagnose Lyme disease based on a child’s bull’s-eye rash, or they might order a blood test.
If Lyme disease is confirmed, the doctor will prescribe an antibiotic, a medicine that kills the spirochetes, the bacteria carried by some ticks.
-

 African History5 years ago
A Closer Look: Afro-Mexicans 🇲🇽
-

 African History5 months ago
Black History Facts I had to Learn on My Own pt.6 📜
-

 African History5 years ago
A Closer Look: Afro-Mexicans 🇲🇽
-

 African History1 year ago
Major African Tribes taken away during the Atlantic Slave Trade🌍 #slavetrade #africanamericanhistory
-

 African History1 year ago
PROOF AFRICAN AMERICANS AIN'T FROM AFRICA DOCUMENTED EVIDENCE
-

 African History1 year ago
Cameroon 🇨🇲 World Cup History (1962-2022) #football #realmadrid #shorts
-

 African History5 months ago
Black History Inventors: Mary Kenner 🩸
-

 African History4 months ago
Mr Incredible Becoming Canny/Uncanny Mapping (You live in Paraguay 🇵🇾)


