Connect with us

Lifestyle

Spicy Tuna Tostadas Recipe Inspired by Contramar in Mexico City

Published

on


Last month, Adam and I visited Mexico City for the first time. It’s a place that’s long been on my list, and I couldn’t wait to experience its vibrant art scene, beautiful parks, and (of course) the food. 

Mexico City has established itself as arguably the most exciting food city in the world, and the restaurants we experienced during our quick 48-hour trip did not disappoint. Thankfully, our pilgrimage-worthy meal at Contramar was every bit as special as I’d imagined. The vibe is warm and bustling—every lunch service feels like a party at a cool friend’s house. And the perfect seafood dishes turned out by renowned chef Gabriela Cámara most definitely live up to the hype. 

Of course, we had to order the famous red and green grilled snapper (and yes, it was as amazing as I’d heard), but the raw tuna tostadas made us swoon. So much so, that we were determined to make our own version back home. 

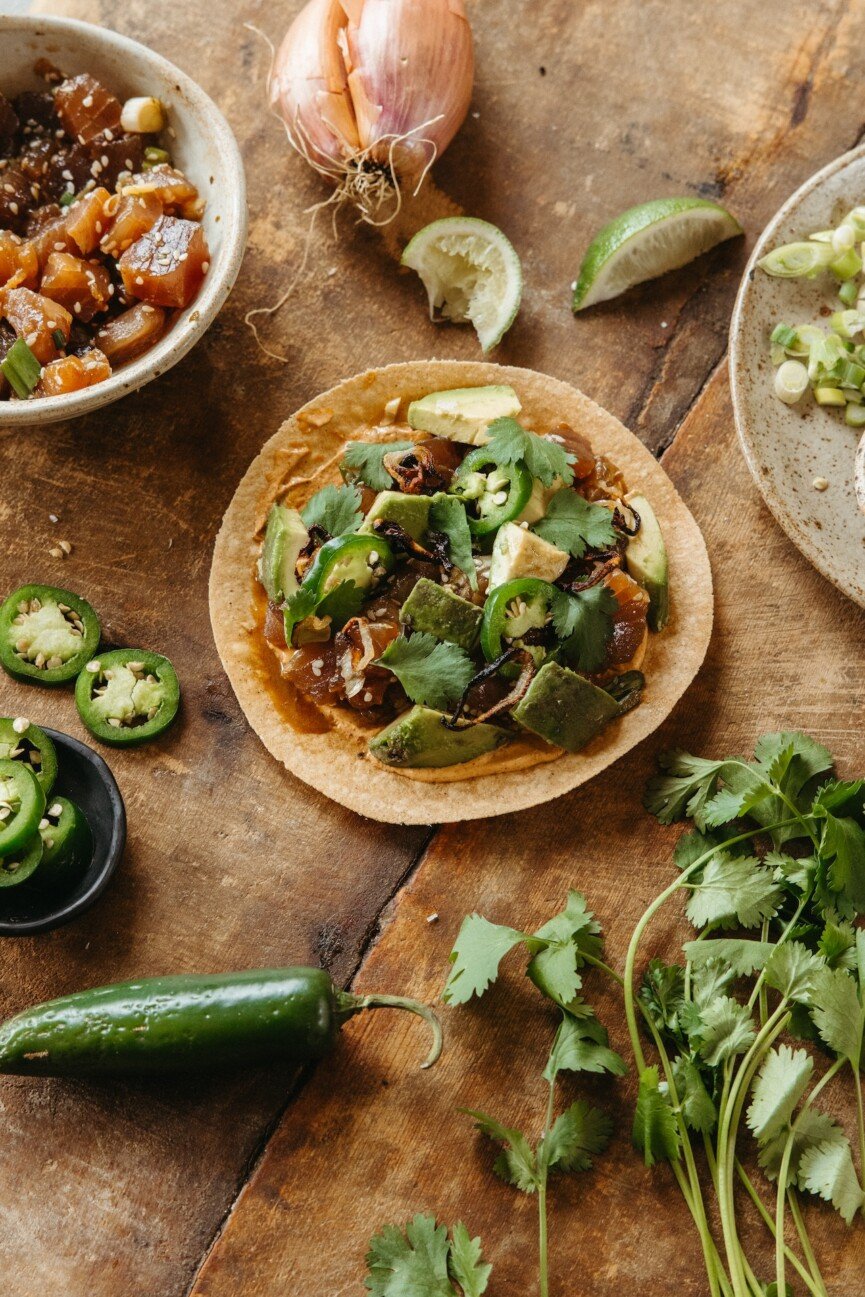
Spicy Tuna Tostada With Avocado and Crispy Shallots

I’ll be honest, the mezcal paloma made my exact recollection of this dish a tad fuzzy. Consider this my very loose (but still delicious) adaptation of the tuna tostadas from Contramar. We’ve been making these on repeat, and they’re destined to become our go-to weekend lunch this summer, preferably enjoyed with our feet in the pool. (And yes, mezcal paloma in hand.)

One added bonus to this dish is that the components can be quickly prepped in advance. That way, when it’s time to eat, you can set out the tostadas and toppings and let everyone build their own. Scroll on for a few tips on making these tuna tostadas. And if you tend to steer away from serving raw fish at home, I got you.

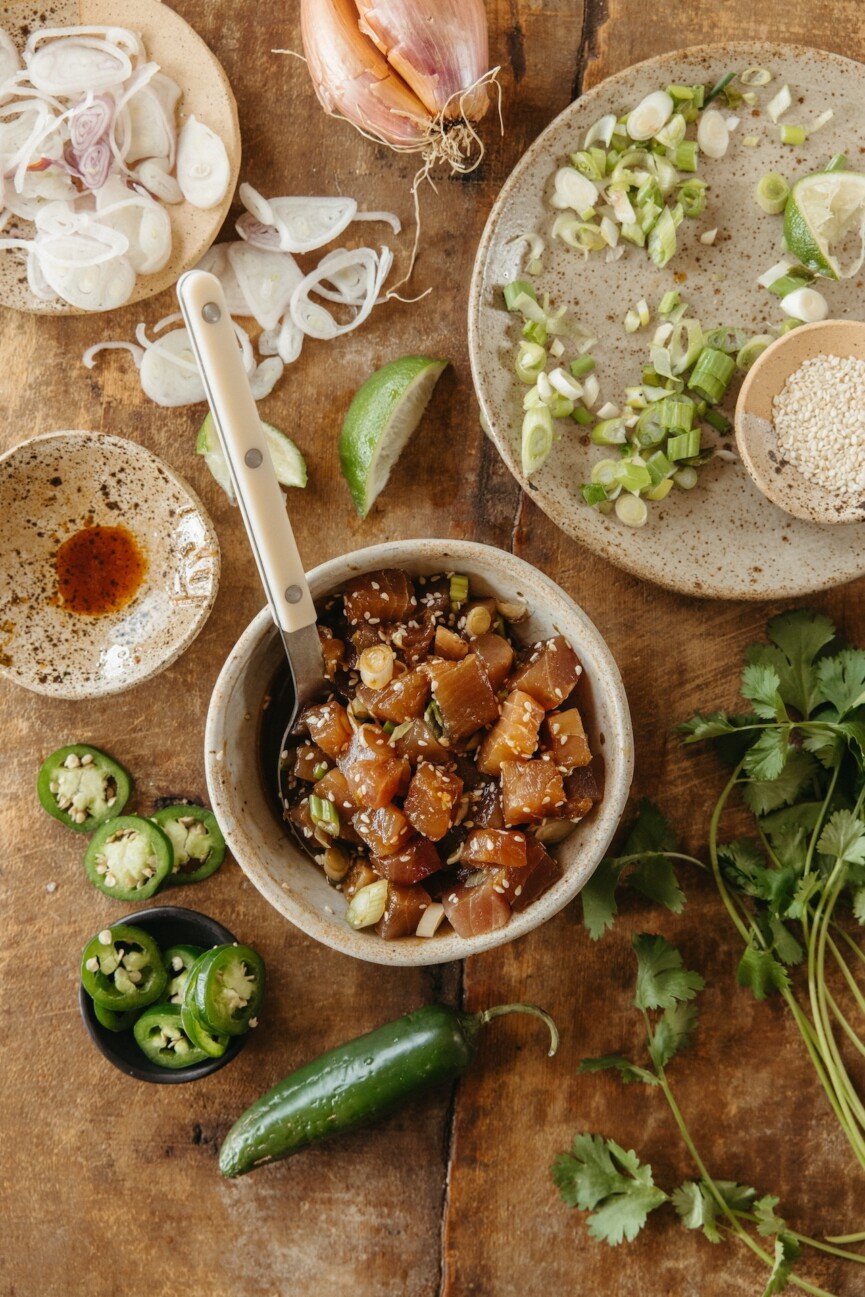
tuna-tostadas-0517

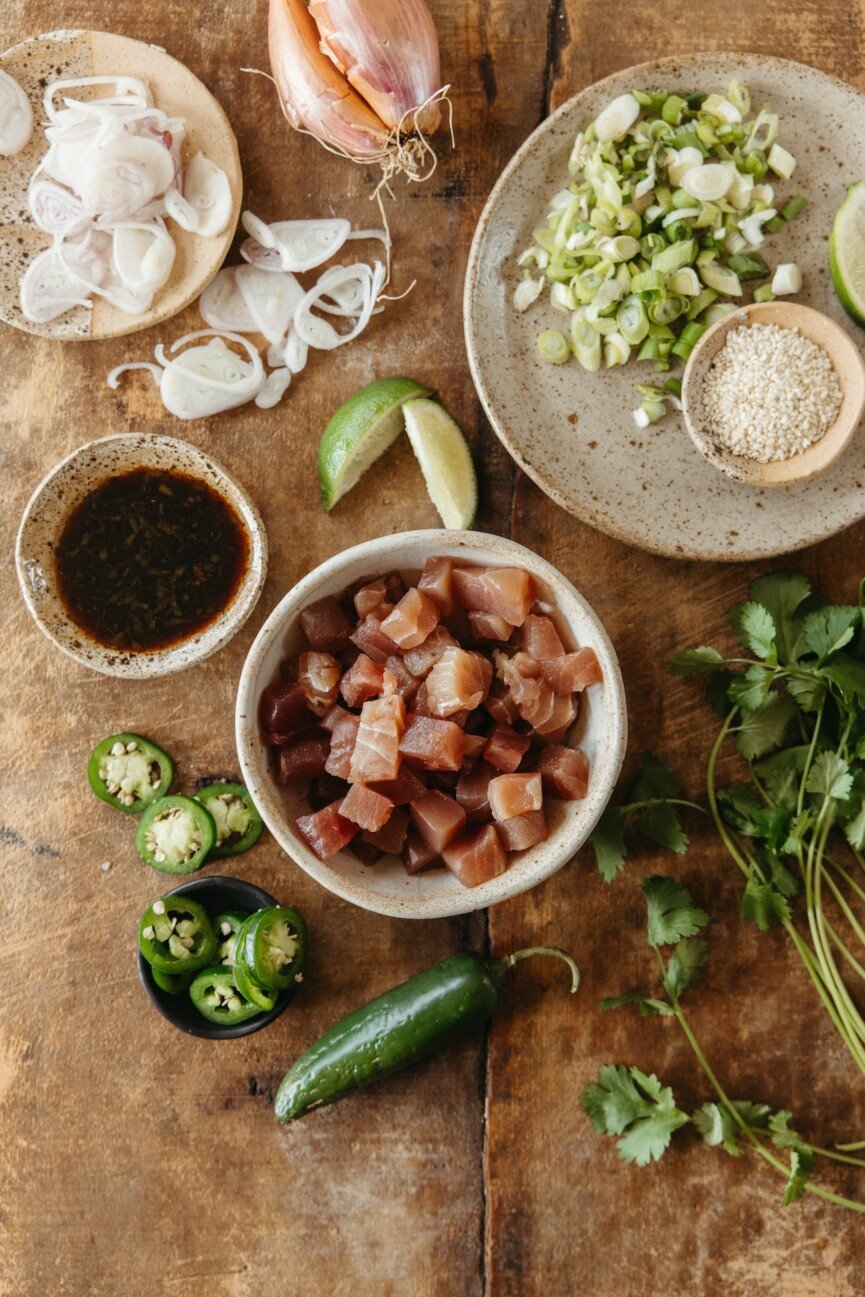
Ingredients for Tuna Tostadas

Sushi-Grade Tuna

The star of these tostadas is sushi-grade tuna, selected for its superior quality and freshness. Tuna’s vibrant color and buttery texture make it the perfect candidate for raw preparation. 

Soy-Sesame Marinade

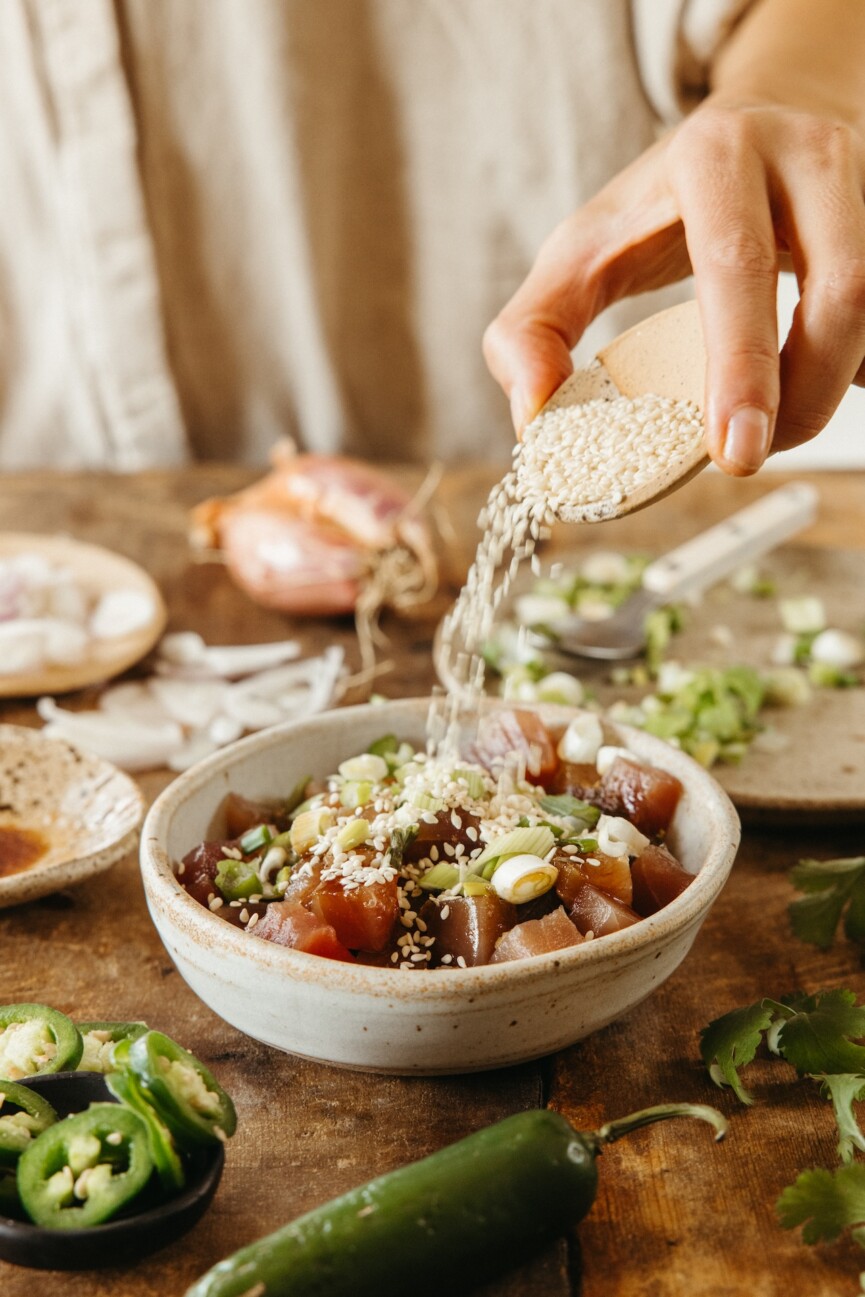
A mixture of soy sauce, a dash of sugar, sesame oil, and sesame seeds, finished with finely chopped green onions. It’s a savory, sweet, and umami combo that infuses the tuna with so much flavor.

Tostada Chips OR Sieté Cassava Tortillas

Opt for your favorite crispy corn tostadas or (do as I do) bake a Siete tortilla in the oven until crisp for a grain-free and gluten-free tostada. 

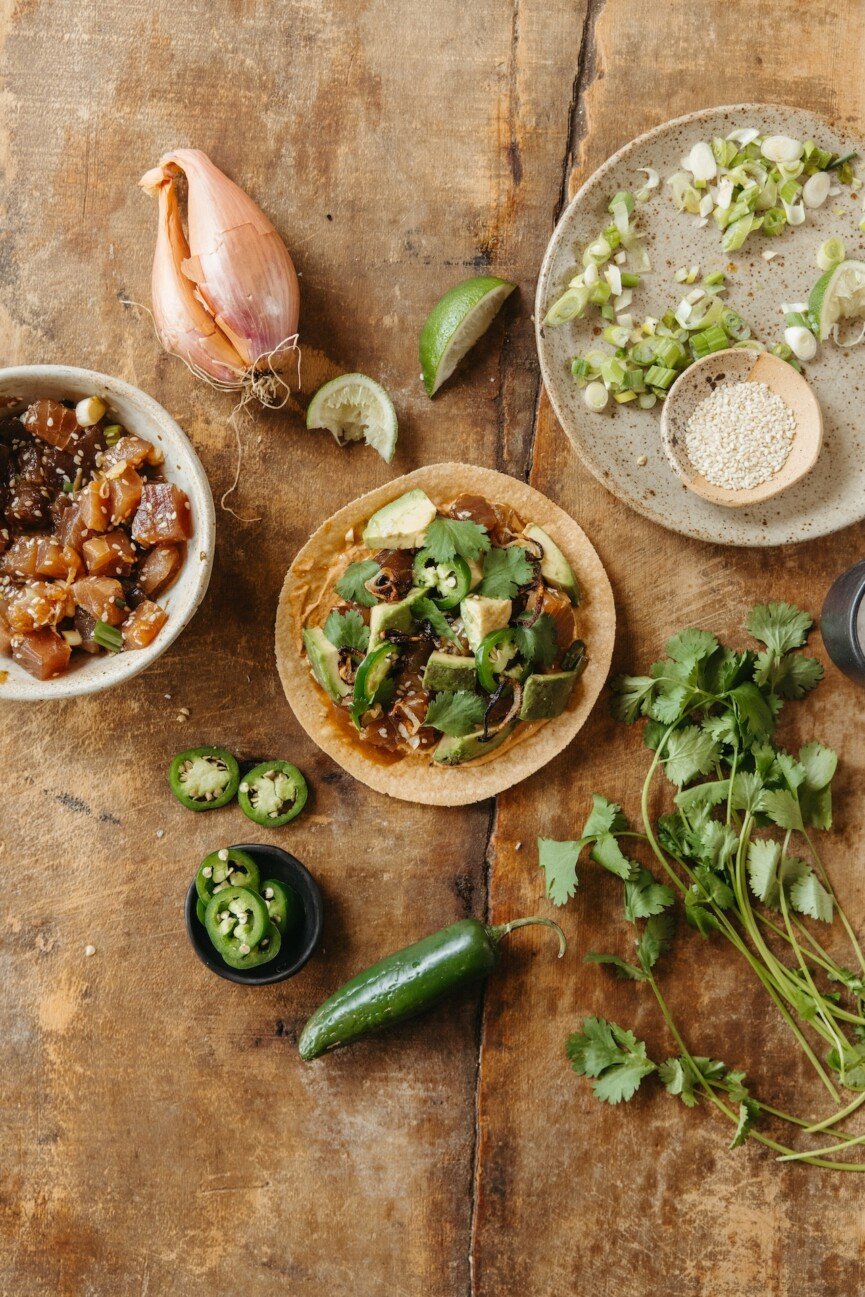
tuna-tostadas-0535
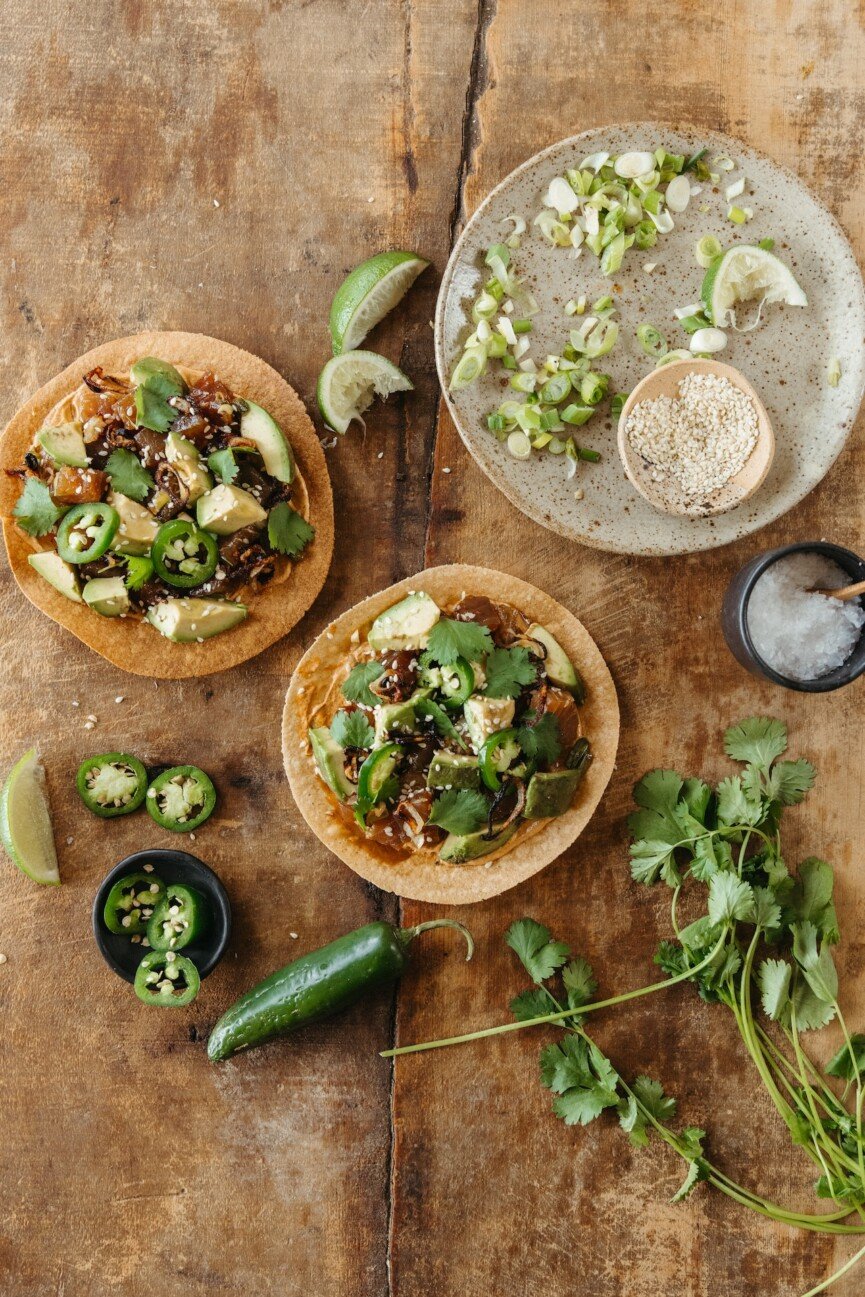
tuna-tostadas-0461

Chipotle Aioli

A creamy element that’s simply mayonnaise blended with chipotle powder, lime juice, and a pinch of salt and pepper. This sauce adds a smoky, tangy layer that beautifully complements the tuna’s richness.

Avocado

Chopped avocado adds a creamy, lush texture that rounds out this dish.

Our Toppings: Cilantro & Crispy Shallots

Finish it off with the crunch and freshness of cilantro and crispy shallots—they also add an artful element to the visual presentation.

tuna-tostadas-0468

How to Buy and Prepare Raw Seafood at Home

If you typically leave the raw seafood to your favorite sushi restaurant, you’re not alone. I used to be intimidated to make raw fish dishes at home—or afraid that I might give us all food poisoning! With a little research and experience, I soon discovered that it’s simple with just a little know-how. 

When selecting sushi-grade tuna, visit a reputable fishmonger. I usually get mine from the fish department at Whole Foods or Central Market. That way, I can also chat with the fishmonger to check that it’s been handled and stored properly for raw consumption. This ensures the fish has been frozen to the proper temperature to kill any parasites, making it safe to eat raw. You can simply ask the fishmonger whether they have “sushi grade tuna.” And if the answer is yes? It’s all good to thaw and eat, no cooking required.

tuna-tostadas-0479
tuna-tostadas-0514

Tips for Tuna Tostadas Success

Marinate Your Tuna

The sweet soy-sesame marinade infuses the tuna with all that good flavor, so allow the tuna to marinate for at least 30 minutes.

Crisp Your Shallots

Crispy shallots are one of those finishing touches that feel restaurant-worthy, but they’re so worth making at home. All you have to do is thinly slice the shallots (I like to use a mandoline to make it easy on myself), then quickly fry them, and drain off the oil. You’re left with the most delicious little crispies that are soooo good on these tuna tostadas.

Assemble With Care

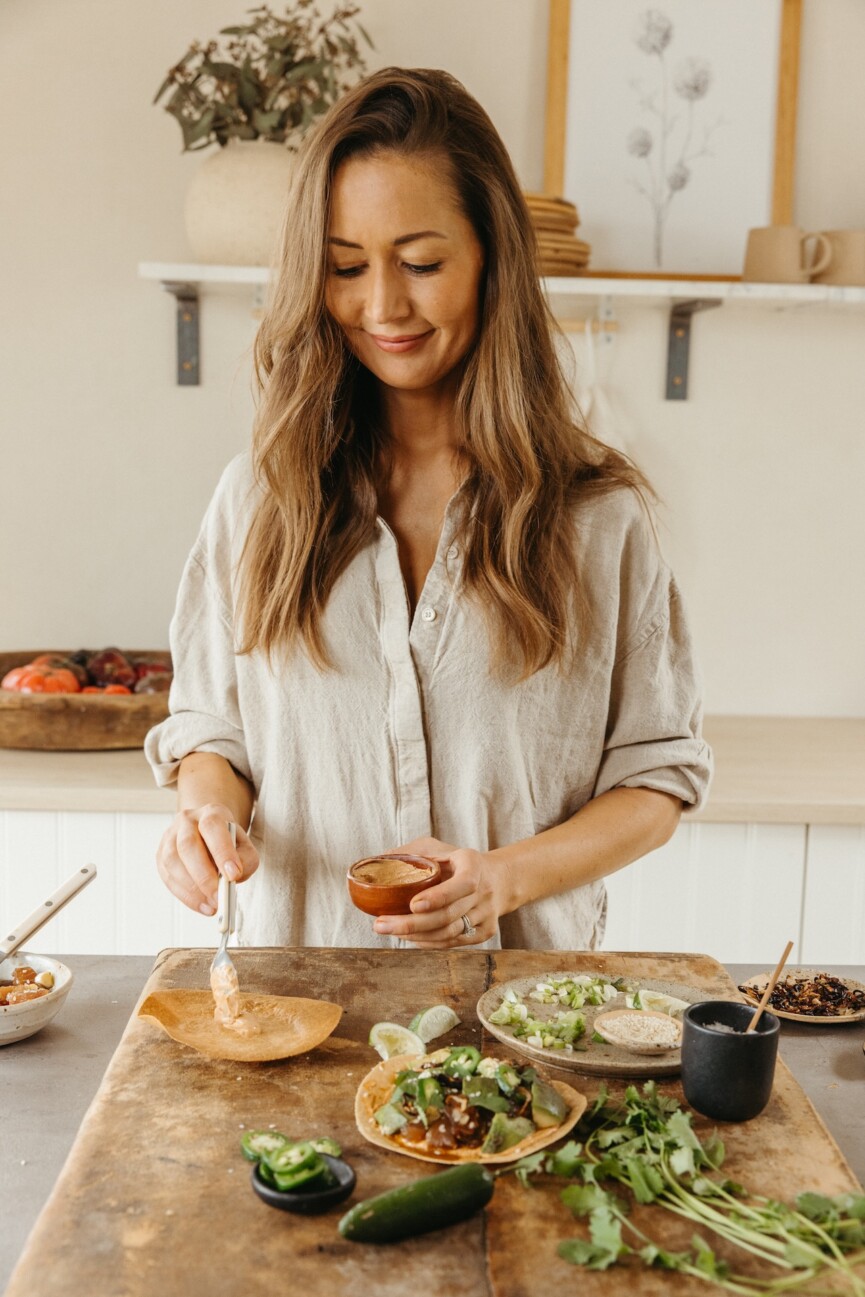
The beauty of this dish lies in its symphony of flavor and texture, so I like to be thoughtful in the order that I add the toppings. I spread a bit of the aioli over the tostada base, followed by the marinated tuna and avocado (chopped in similarly-sized pieces for the prettiest presentation). Add the crispy shallots and a few fresh cilantro leaves. Remember, you eat with your eyes first!

Tuna Tostadas

Print

clock clock iconcutlery cutlery iconflag flag iconfolder folder iconinstagram instagram iconpinterest pinterest iconfacebook facebook iconprint print iconsquares squares iconheart heart iconheart solid heart solid icon

Description

With Mexican-inspired flavors and a restaurant-worthy presentation, these tuna tostadas will bring the wow-factor to any dinner or gathering.


  • 8 ounces sushi-grade tuna, chopped into 1” pieces
  • 1/4 cup soy sauce
  • 1 tablespoon sugar
  • 2 teaspoons sesame oil
  • 1 teaspoon sesame seeds (I like to toast them first)
  • 2 green onions, thinly sliced
  • 4 tostada chips OR 4 Sieté grain-free tortillas
  • 1/4 cup mayonnaise
  • 1 teaspoon chipotle powder (more or less, depending on how spicy you like it)
  • juice of 1 lime
  • kosher salt to taste
  • 1 shallot, peeled and thinly sliced
  • olive oil or avocado oil, for frying
  • 1 avocado, pitted and chopped into 1” pieces
  • fresh cilantro leaves for garnish

  1. Marinate the tuna. In a small saucepan, combine the soy sauce and sugar. Warm over medium heat until just beginning to simmer, whisk together until the sugar dissolves, then turn the heat off and transfer to a medium bowl. Add the sesame oil, seeds, and green onions and whisk to combine. When the mixture is room temperature, add the tuna, toss well in the marinade, then cover and put in the refrigerator for at least 30 minutes.
  2. Make the chipotle aioli. In a small bowl, whisk together the mayonnaise, chipotle powder, lime juice, and a pinch of salt. Set aside.
  3. Fry the shallots. In a small sauté pan, coat the bottom with about ¼” of your frying oil. Heat over medium-high until a drop of water sizzles in it, then add your sliced shallot. Fry until golden, then stir the shallots around the pan until they’re all golden brown. Transfer to a paper towel-lined plate.
  4. If using grain-free tortillas, place on a baking sheet and bake in a 400 F oven for about 8 minutes, until crisp. 
  5. When ready to serve, spread a small spoonful of aioli over each tostada base. Top with your marinated tuna, evenly distribute the chopped avocado between the tuna pieces, then garnish with crispy shallots and cilantro leaves. Eat!


Source link

Continue Reading
Click to comment

Leave a Reply

Your email address will not be published. Required fields are marked *

Lifestyle

10 Built-In Shelves That Pair Function and Style

Published

on


I grew up in a modest home. The open floor plan encouraged us to spend our days in the kitchen, both during and outside of meal times. My family would gather around the table—doing homework, chatting idly, and simply sitting in each other’s company. The space—despite its size—boasted a certain organic flow and openness, one that flooded the room with an aura of calm. There was a lot that contributed to this, but for me, the built-in shelves that wrapped their way around the walls put even my childhood self at ease.

Built-in shelves encourage creativity, inviting us to display both sentimental objects and things we want within reach. They lend themselves well to our increasingly visual world—the subject of design content across Instagram and TikTok. But no matter how relevant they seem now, built-in shelves also hold a timelessness surpassing the whims of micro-trends.

10 Built-In Shelves That Prove the Timelessness of the Trend

The past decade of design has seen the first whispers of a move away from floating shelves and free-standing armoires in the direction of a new kind of built-in—one that’s modern, minimal, and not necessarily symmetrical. (Though an air of balance remains a priority.) Utilizing natural materials and organic edges, today’s designers are creating storage solutions that go beyond chic, instead putting weight on visual storytelling that’s elegantly executed and thoughtfully curated.

Need to see it to believe it? Take a look at these 10 spaces.

Contemporary Coziness

Camille has perfected her living room built-in shelves over the years, and the most recent iteration is pure, uncomplicated comfort. I love how she keeps the styling intentionally pared down. The impact is decidedly minimalist but with a warmth and visual interest that keeps the eyes moving about.

Read more: My Best Bookshelf Styling Tips Ever—Just in Time for Fall

Color Pop

The Yves Klein blue gives this built-in bookshelf the contrast needed to make it pop. By keeping the shelves’ elements relatively minimalist and the colors surrounding them neutral, the effect is impactful without going overboard.

Warm Minimalist

Sometimes, second-hand purchases are best, leaning into the pieces’ time-worn narratives. I love this curation of vintage finds and the reliance on textural variation to create interest in an otherwise neutral color palette.

Sumptuous Simplicity

This neutral approach to built-in shelves strikes the perfect balance between minimalism and warmth, creating a space that feels both curated and lived-in. By opting for a muted color palette of creams, soft taupes, and natural wood accents, the shelves act as an understated backdrop that allows carefully chosen objects to shine.

Classic Farmhouse

Here, the styling emphasizes organic textures—think ceramic vases, woven baskets, and gilded frames—that add depth without overwhelming the eye. It’s a thoughtful, intentional display where every piece tells a story, yet nothing competes for attention. This approach to neutral design highlights how subtlety can create a sense of calm and sophistication in any room.

Cohesive Minimalist

This chic, monochromatic approach to styling built-in shelves showcases the power of layering tones and textures within a single color palette. With soft whites, muted grays, and natural wood accents as the foundation, the space feels cohesive yet dynamic. The interplay of hard and soft elements—crisp lines juxtaposed with touches of greenery—creates a room that feels both polished and inviting.

Library Vibes

This inviting, English-style home strikes a perfect balance between functionality and warmth, curating found objects for a cozy, lived-in feel. The colorful array of books (that have clearly been read and aren’t just meant for display) add warmth and texture within the open cabinetry. The stoneware vase, ornate chandelier, and floral rug lend a touch of time-worn beauty, making the room feel more personal and approachable. It’s a space where simplicity meets sophistication, ideal for both casual gatherings and quieter moments.

Effortless Elegance

This serene living room embodies design-driven ease, with a harmonious mix of natural materials and modern touches. The soft, neutral palette creates a calming backdrop, while the textured rug and plush seating invite relaxation. Minimalist furniture with clean lines enhances the sense of spaciousness, and the carefully curated decor—ranging from earthy ceramics to organic greenery—adds subtle warmth and personality. It’s a space that feels both refined and inviting, proving that simplicity and comfort can beautifully coexist.

Rustic Charm Meets Modern Sophistication

This space is all about contrast and depth. The color palette remains pared down while thoughtful touches of textural ground the room in comfort. There’s a natural warmth communicated through the bouclé ottoman and velvet couch that’s met with a contemporary edge. Soft lighting casts a cozy glow, enhancing the intimate atmosphere. Subtle details—like the simple ceramic tableware and understated greenery—add an organic touch.

Light and Bright

White is a solid choice to ground your built-ins, allowing you to weave color and texture through styling pieces and personal touches. Here, the effect is perfectly balanced, allowing found objects and photographs to add depth without overwhelming the senses. With its layered textures and thoughtful design, these built-in shelves are a perfect example of how minimalism can still feel warm and welcoming.


Source link

Continue Reading

Lifestyle

An Expert on the Truth Behind the Trend

Published

on


We may receive a portion of sales if you purchase a product through a link in this article.

As you read this, you’re losing collagen. After the age of 25, your body loses 1-1.5% of its collagen reserves every year. And when collagen—the primary protein that keeps skin firm, lifted, and smooth—is gone, it’s gone for good. “Imagine a wool sweater that you’ve had for years. With each wash, the fibers of the sweater can break down and lose their original structure,” says Heather Hickman, VP of Education at Dermalogica. “Similarly, as collagen production declines, the skin loses its firmness and begins to sag.”

As we lose collagen, wrinkles set in, and fine lines develop. And while you can’t get that lost collagen back (depressing, I know), there are strategies to prevent collagen loss in the first place. To maximize your collagen reserves, a new trend has emerged: collagen banking. It’s a buzzy new beauty trend that encourages optimizing your lifestyle and skincare routine to “bank” as much collagen as possible.

Featured image from our interview with Roti Brown by Michelle Nash.

Woman applying skin serum and practicing collagen banking beauty trend.

Collagen Banking: Why the Pros Recommend This Skin-Plumping Practice

From collagen skincare products to collagen supplements and collagen-promoting wellness habits, I spoke with Hickmans about how to make collagen banking part of your daily routine. If you’re past your quarter-life crisis and looking for ways to keep your collagen stores strong, read on.


Heather Hickman


Heather Hickman is the Vice President of Education at Dermalogica, where she has spent over 20 years contributing to the brand’s advanced education of skin therapists. She began her journey with Dermalogica and The International Dermal Institute as a licensed skin therapist and educator.

What is collagen banking?

Collagen banking is a proactive skincare approach where you try to keep as much of your collagen as possible, while helping promote collagen production. “We know the rate and quality of collagen production begins to slow as we age and is accelerated by environmental and lifestyle factors,” says Hickman. “The aim, therefore, is to protect and preserve the skin’s collagen today, so you have more for tomorrow, just like storing it in a bank for future use.”

Unlike many buzzy beauty trends, this one is expert-approved. There are many ways to stimulate collagen, but Hickman recommends focusing on the three Ps:

  • Promote: From supplements to collagen-based skincare, you can promote collagen by ingesting it or using ingredients that accelerate cell turnover. According to Hickman, “Incorporating active ingredients into a daily skin health product that encourages the production of new collagen and protects existing collagen from degeneration will effectively slow down the signs of aging associated with collagen loss such as loss of structure, skin sagging, and wrinkles.”
  • Preserve: Reduce “external factors and lifestyle choices such as sun exposure, pollution, stress, and poor diet. I like to refer to these as ‘collagen thieves’ that can further reduce our collagen production,” says Hickman. Preserve collagen by avoiding lifestyle factors that break down collagen.
  • Protect: Nourish your skin to protect your skin barrier and your existing collagen reserves.
Odette Annable actress.

5 Ways to Make Collagen Banking a Part of Your Routine

As with many wellness and beauty practices, the key to collagen banking is making it a part of your routine. The idea is that if you stack your day with collagen-friendly habits, you can retain as much collagen as possible. Don’t worry: it’s not as intimidating as may sound. By optimizing things you already do—like your skincare routine or daily nutrition habits—you can promote collagen production and prevent collagen loss.

Explore collagen supplements

Collagen products are everywhere for a reason—they promise glowing, youthful skin. But they do more than give you a superficial boost, they also stimulate collagen production and might even help stimulate elastin and other vital proteins. Designed to be easily integrated into your routine, collagen supplements are a low-effort way to start collagen banking.

You can also supplement your collagen intake with what you eat. Start your day with bone broth or incorporate collagen-rich foods into your diet. Try these nutritionist-approved picks:

  • Foods high in vitamin C like citrus fruits, tomatoes, bell peppers, leafy greens, and broccoli. 
  • Prioritize omega-3s with fatty fish (tinned fish girlies get it), avocados, walnuts, chia seeds, flax seeds, and eggs.
  • Foods rich in zinc and copper like shellfish, grass-fed beef, nuts, and beans.
Woman washing face in mirror.

Add collagen to your skincare routine

Good news: you don’t need to adopt a complicated skincare routine to try collagen banking. You can optimize even the most streamlined skincare routine to both prevent collagen loss and protect the collagen you already have.

“Daily use of at-home products designed to bank collagen and promote natural collagen production is a must for anyone looking to combat the signs of aging,” says Hickman. “Easy-use products such as serums are a great way to incorporate collagen banking ingredients as this allows you to still layer protective SPF over the top and use day and night.”

Use antioxidant-rich skincare

Adding collagen-based products to your skin is one thing, but here’s the secret: it’s even more effective to use ingredients that help stimulate natural collagen production and prevent further collagen breakdown.

Antioxidants are some of the most effective ingredients for collagen banking. They combat oxidative stress—a major factor in premature signs of aging and collagen loss—and are even said to help boost the efficacy of collagen. Vitamin C and trehalose are some of the best antioxidants to look for.

This is especially important at night, when the day’s impurities are wreaking havoc on your skin. “Have a good double cleansing routine night and day to remove pollution and impurities from the skin that trigger enzymes to degrade your collagen,” Hickman notes.

Try non-invasive skin treatments

Consider trying treatments that promote collagen by making your skin heal itself. “Your skin is always going to get the best result if you partner your homecare use with skin services provided by a licensed professional,” says Hickman. “One of the most impactful services for collagen banking is microneedling. Microneedling causes controlled micro-injuries to the skin promoting the skin’s fibroblast cells to produce collagen to repair itself.”

She also recommends “treatments involving LED, Nanoinfusion, Gua Sha massage, and microcurrent, which can also be highly impactful on stimulating blood flow.” In turn, this stimulates “the production of fresh collagen in the skin.”

Audit your lifestyle

Lifestyle factors are some of the biggest contributors to collagen stores. Here are some simple lifestyle habits that can make or break your collagen reserves.

  • Sleep. Beauty sleep is more than a nice-to-have—it’s a collagen-banking essential. Read our tips on increasing your beauty sleep routine.
  • Stress. “Find ways to manage your stress,” Hickman encourages. “Stress can cause an inflammatory response leading to the acceleration of collagen degeneration.” Try some of our favorite products to destress.
  • Caffeine. Caffeine raises cortisol, and if timed incorrectly, it could sabotage your sleep. While you don’t have to cut caffeine out entirely, consider how it could be harming your collagen banking efforts.
  • Sugar. The results of too much sugar aren’t so sweet. According to Hickman, “excess sugar consumption can cause a reaction in the body called glycation that triggers the breakdown of skin proteins including collagen.”
  • Gut health. Everything comes back to your gut. The link between gut health and skin largely revolves around its effect on collagen production. Address your gut health for an overall healthier glow.
  • SPF. SPF keeps skin protected against premature fine lines and sunspots—which come from, you guessed it, collagen loss.


Source link

Continue Reading

Lifestyle

Stuffed Portobello Mushrooms: Your 5-Ingredient Fix

Published

on


It’s unfortunate but true: stuffed portobello mushrooms used to get a bad rap. Being a vegetarian in the early aughts, I was often left with very few meatless mains to choose from when it came to eating out. Having selected my only option from the menu, a waiter would inevitably appear with a large portobello cap centered on the plate. No accompaniments or garnishes—just a giant baked mushroom. I’d be lucky if I could swallow a single rubbery, bland bite. Needless to say, when it came to portobellos, I was scarred. So what’s a recipe developer to do but create stuffed portobello mushrooms that are actually palatable, and dare I say, delicious.

The last few years have seen a mushroom renaissance. From King Oyster to Hen of the Woods, mushrooms have become a part of the culinary zeitgeist and are a joy to eat. In many kitchens (my own included), mushrooms are lauded as a functional superfood and treated like a powerhouse ingredient.

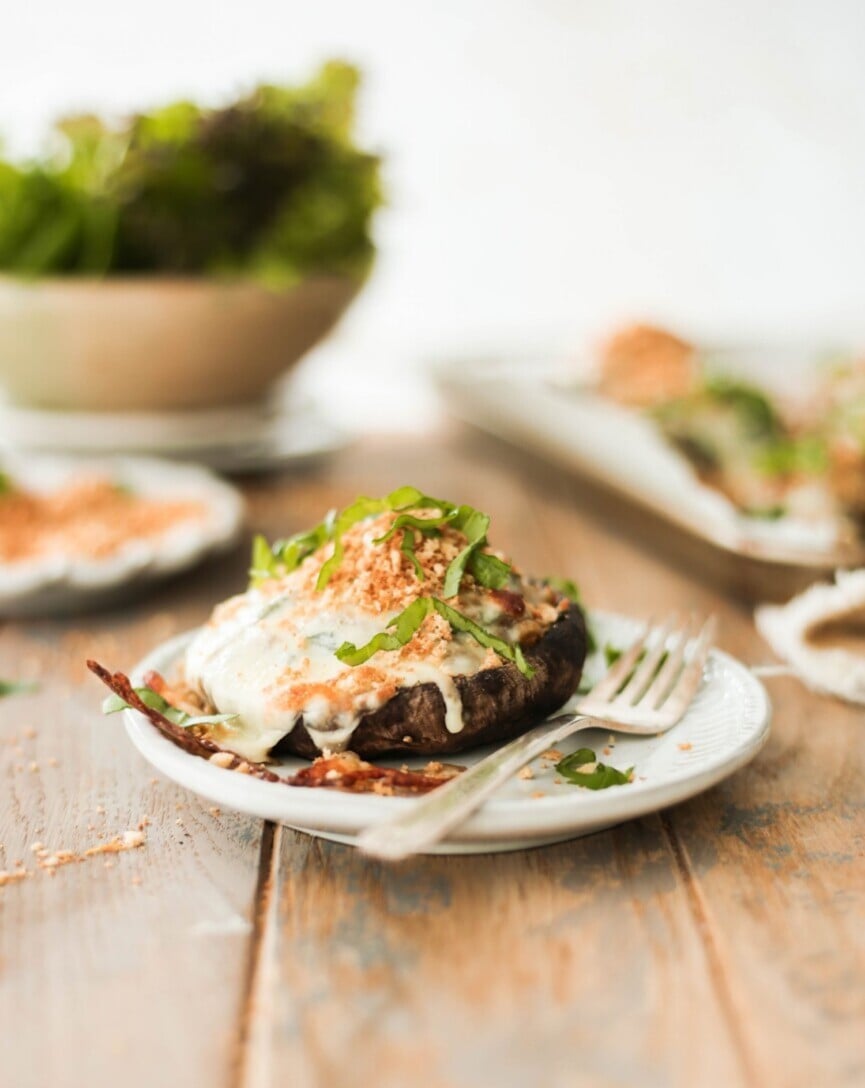
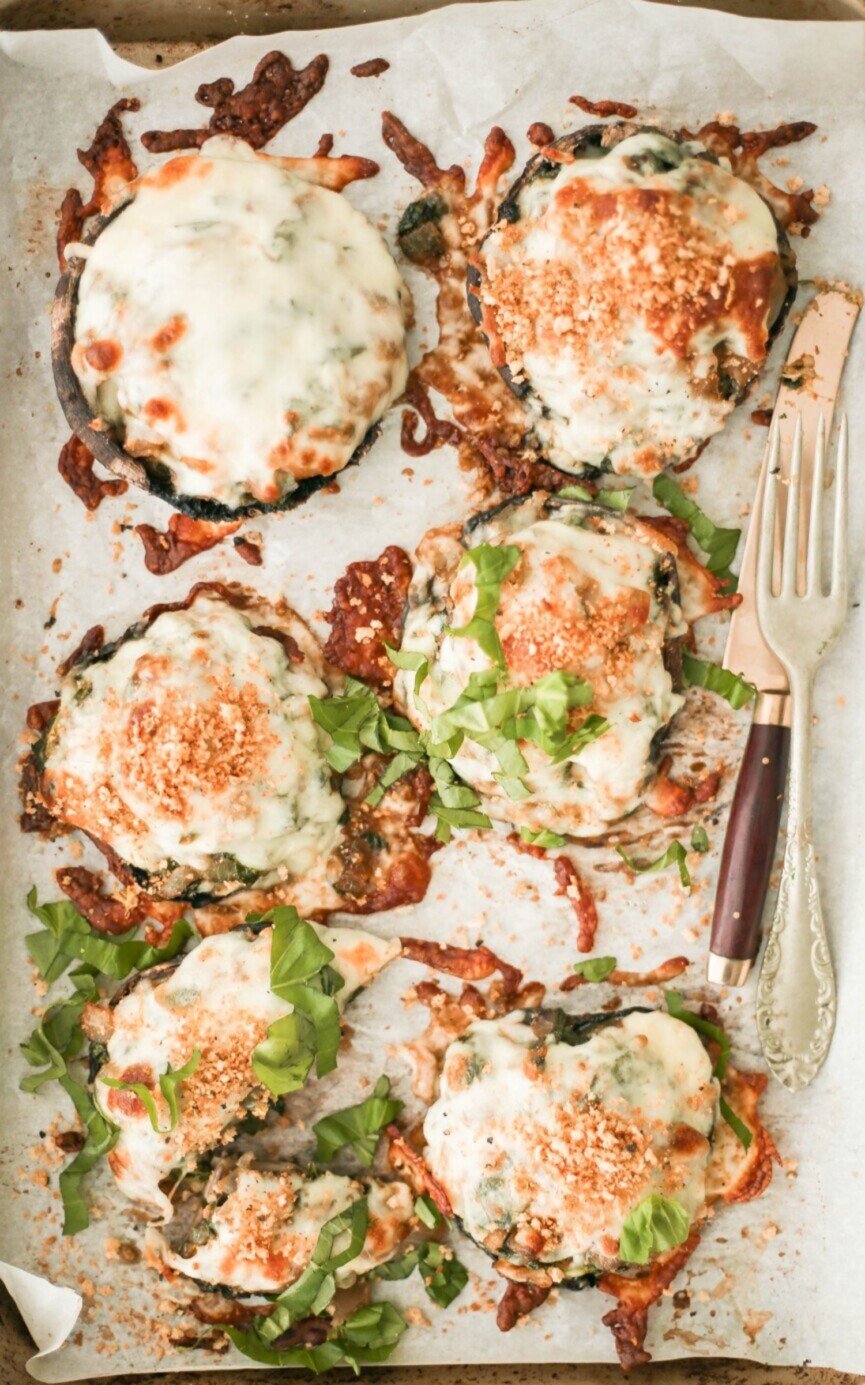
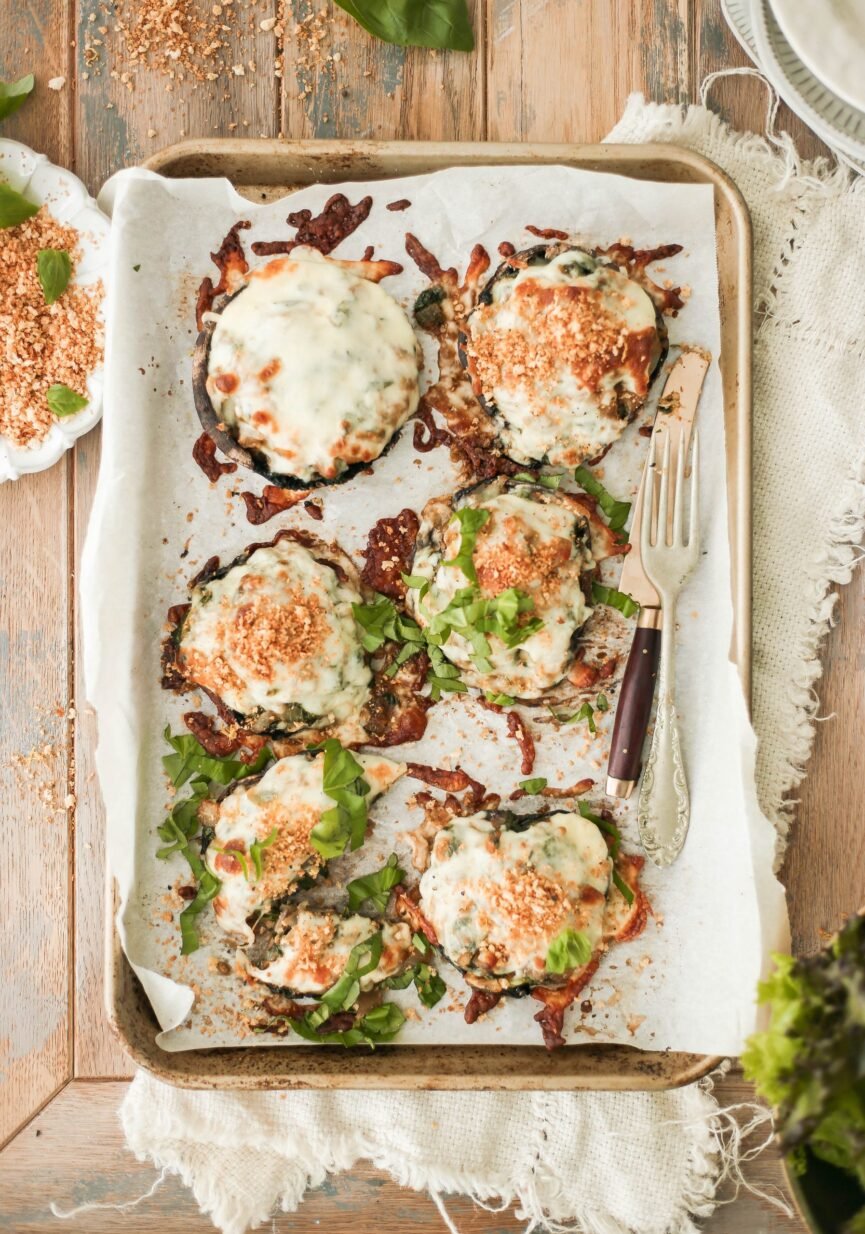
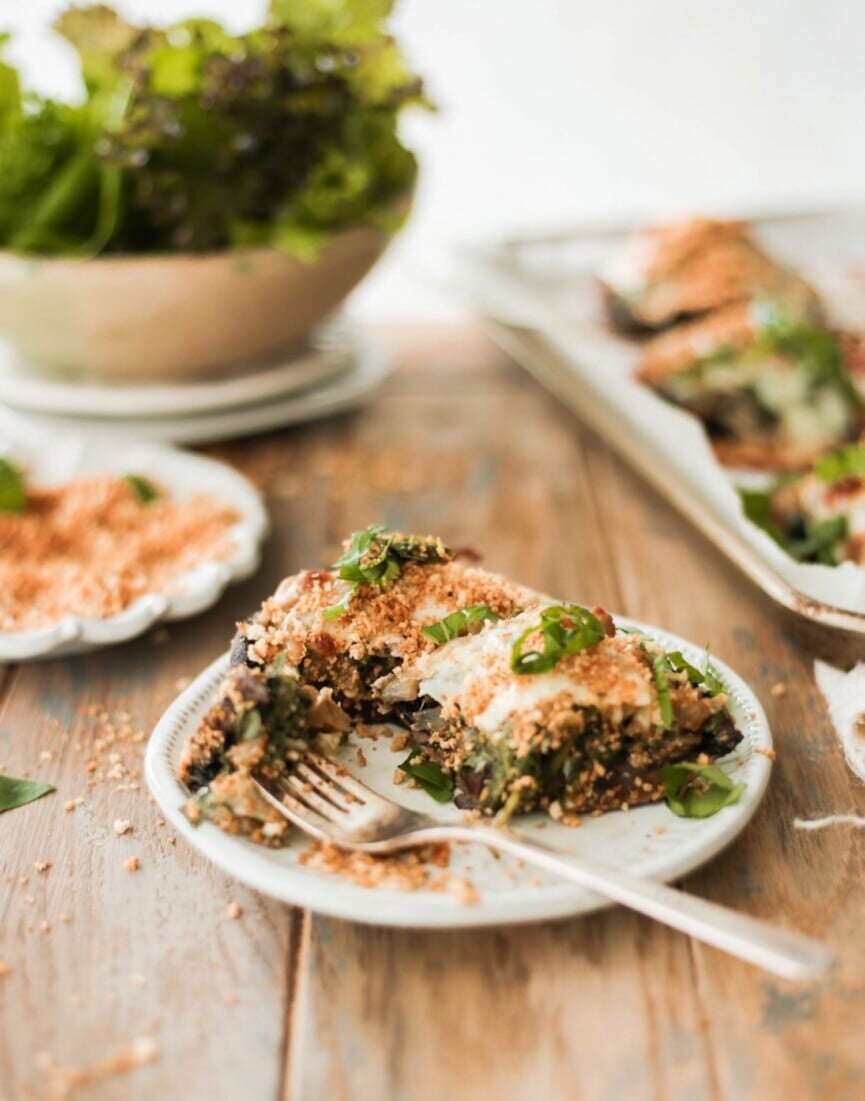
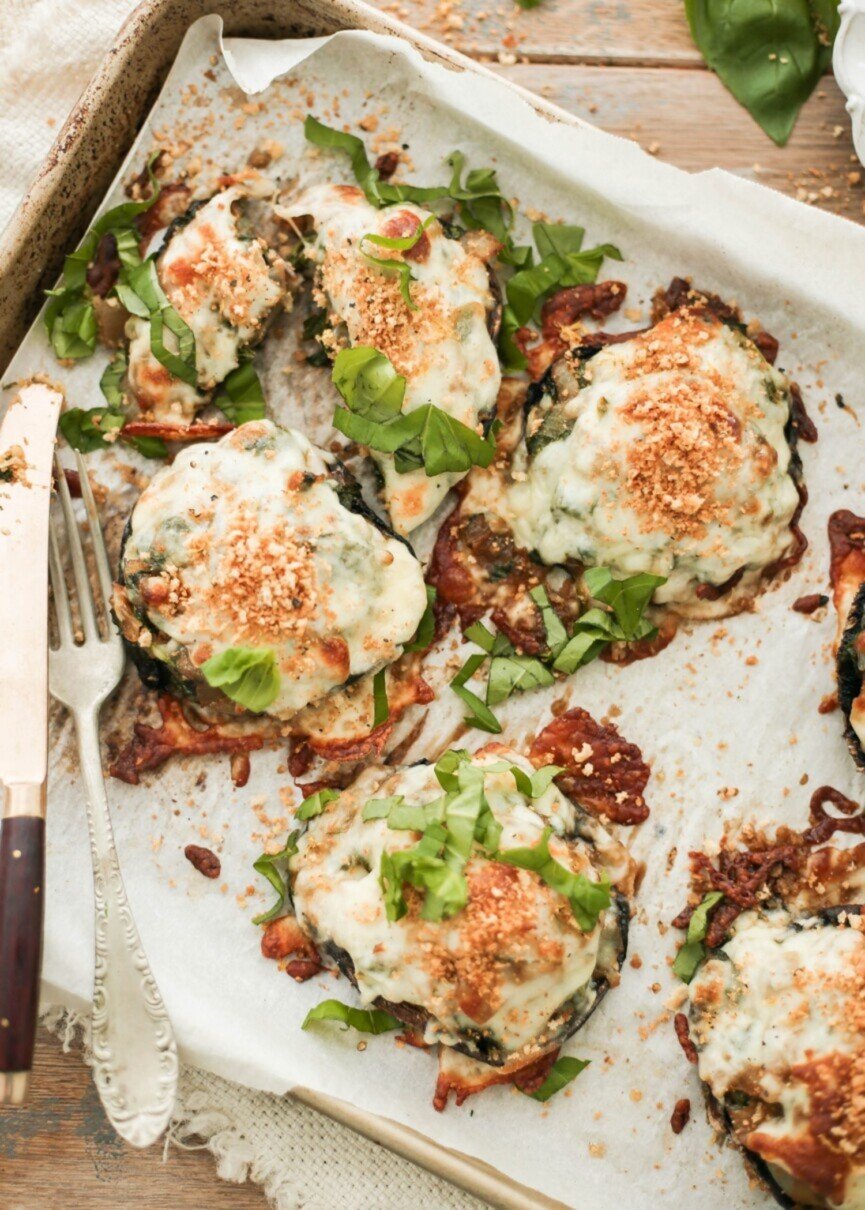
Stuffed portobello mushrooms
Stuffed Portobello Mushrooms Recipe

A Stuffed Portobello Mushrooms Recipe You’ll Actually Love

I’ll eat mushrooms any and every way I can. While I’m partial to shiitake or maitake, I’ve recently fallen in love with the earthiness of portobello mushrooms. They’re great on their own, adding a meaty heft to omelets and pasta, but I’ve converted to stuffed portobello mushrooms, enjoying all the deliciousness I can. Nothing inspires like incorporating new ingredients into a staple dish, and many iterations of stuffed portbello mushrooms later, I’ve found the combination I’ll make now until forever. The best part? You only need five ingredients to cook up a little mushroom magic.

How to Cook Stuffed Portobello Mushrooms

I can’t take credit for this trick, but one thing I discovered while making this recipe a few times was that mushrooms, when roasted, release a lot of water. I’m used to sautéing mushrooms in a pan, so I never gave this issue much thought. But when baked on a sheet tray, the mushrooms sit in their liquid and turn soggy.

After doing a little research, I found this method that lets the mushrooms breathe while baking on an oven-safe cooling rack. This allows the extra liquid to drain off, helping the mushrooms cook through. Game changer.

Don’t have an oven-safe cooling rack? I’ve also done this by cooking the mushrooms first stem-side up and then flipping them so they cook all the way around. Worst-case scenario, sop up the liquid with a kitchen towel before stuffing the mushrooms. Trust me: Trying any of these simple tricks will make all the difference.

The Filling: How to Caramelize Onions

Caramelized onions are truly one of the gems of the recipe world—scratch that, the food world in general. The magic that happens when onions cook down, getting golden and sweet, is a total treasure. But I won’t lie, I’ve burned my fair share of pans in the process and been left with a few sticky, unpleasant results. But after countless batches, I’ve found a method that gets caramelized onions, in all their sweet and jammy glory, just right.

  1. Start with chopped and diced onions. In lieu of long strands, chopped and diced onions give your stuffing a tastier texture.
  2. Use a large pan. Larger than you think you need! The onions need room to cook over direct heat. If you pile them in a small pan, they’ll steam and get soggy. No thanks.
  3. The more oil, the better. Starting with a few extra glugs helps keep everything smooth and glossy in the early stages of cooking. If your pan feels dry while cooking the onions, add more oil as needed.
  4. Cook low and slow. Avoid high heat at all costs! Cooking your onions at a higher temperature will dry the pan and burn your onions. I keep the heat on low to medium-low and adjust as needed. It might take a minute to find the right balance between constantly stirring and letting the onions sit against the heat, but it’s well worth the effort.
  5. Deglaze with vinegar. I love balsamic or apple cider vinegar to deglaze the pan once your onions are almost done cooking. A little splash at the end will pick up all the golden bits sitting on the pan. Plus, the vinegar will add a nice bite of acidity to the onions that complements the sweetness perfectly.

Caramelized onions take a little babysitting and a bit of time. But when cooked this way, the final result yields so much flavor.

Cheese Portobello Mushrooms
Portobello Mushrooms with Cheese

Tips for Next-Level Stuffed Portobello Mushrooms

So you have your tray of stuffed mushrooms. Now what?

I like serving my stuffed portobello mushrooms with a really bright and acidic salad. Crisp greens with a zingy lemon dressing make for a perfect pairing. If you think your plate could use some carbs, serve a pot of rice alongside. Bread is always a delicious option, too.

Once you’ve wrapped up your meal, don’t worry about leftovers. Personally, I find that stuffed portobello mushrooms don’t keep very well, but I have found a tasty solution for next-day deliciousness. If you have a few mushroom caps left, place them on a cutting board, chop, and dice them into small cubes. This includes the filling, too. Store in the fridge in an airtight container.

The next day, sauté the leftovers in a pan and toss them into an omelet or frittata. Or, make a big pot of pasta while you sauté the mushrooms in butter. Add the cooked pasta to the mushrooms with a little of the pasta water plus Parmesan for added decadence. With leftover stuffed portobello mushrooms, anything is possible.

Print

clock clock iconcutlery cutlery iconflag flag iconfolder folder iconinstagram instagram iconpinterest pinterest iconfacebook facebook iconprint print iconsquares squares iconheart heart iconheart solid heart solid icon

Description

An *actually* delicious recipe for the vegetarian classic: flavor-packed and caramelized onion-stuffed. Even the carnivores among us will love it.


  • 34 tablespoons of olive oil
  • 2 large yellow onions, diced
  • splash of vinegar
  • 6 large portobello mushrooms
  • 15-ounce box of fresh spinach, chopped (if using frozen, thaw and drain completely)
  • 2 tablespoons of grated parmesan
  • 4 ounces shredded mozzarella
  • for topping: toasted breadcrumbs, chopped basil, lemon juice, etc.

  1. Preheat oven to 425 F.
  2. In a large stovetop pan, add the olive oil. Bring to medium heat and add the onions with a large pinch of salt. Begin to sweat the onions and cook for 30-40 minutes until fully caramelized.
  3. Prep the mushrooms. Remove the stems of the portobellos. With a spoon, remove the dark gills under the cap. Place on a parchment-lined sheet tray or an oven-safe cooling rack over a sheet tray and drizzle with olive oil. Place in oven to bake for 10-12 minutes. Remove when done and set aside until ready to stuff.
  4. Continue stirring the onions while the mushrooms cook. The onions will go from translucent to light golden to darker golden. Stir every couple of minutes to make sure the onions don’t stick and burn. If the pan feels dry, add a little more oil as needed.
  5. Once the onions reach the caramelized stage, add a splash of balsamic or apple cider vinegar to deglaze the pan.
  6. Add the spinach and stir until the leaves are just wilted. Remove from heat and add the parmesan. Stir to combine.
  7. Stuff the mushrooms. Spoon the onion mixture into the mushroom caps and sprinkle over mozzarella cheese.
  8. Place mushrooms back into oven and bake for another 10 minutes or until the cheese is melted and golden.
  9. Serve mushrooms hot with toppings of choice. Enjoy!


Source link

Continue Reading
Advertisement

Trending

paribahis bahsegel bahsegel bahsegel bahsegel resmi adresi

Copyright © 2024 World Daily Info. Powered by Columba Ventures Co. Ltd.