Health
These 5 Simple Surfing Steps Will Help You Ride Your First Wave

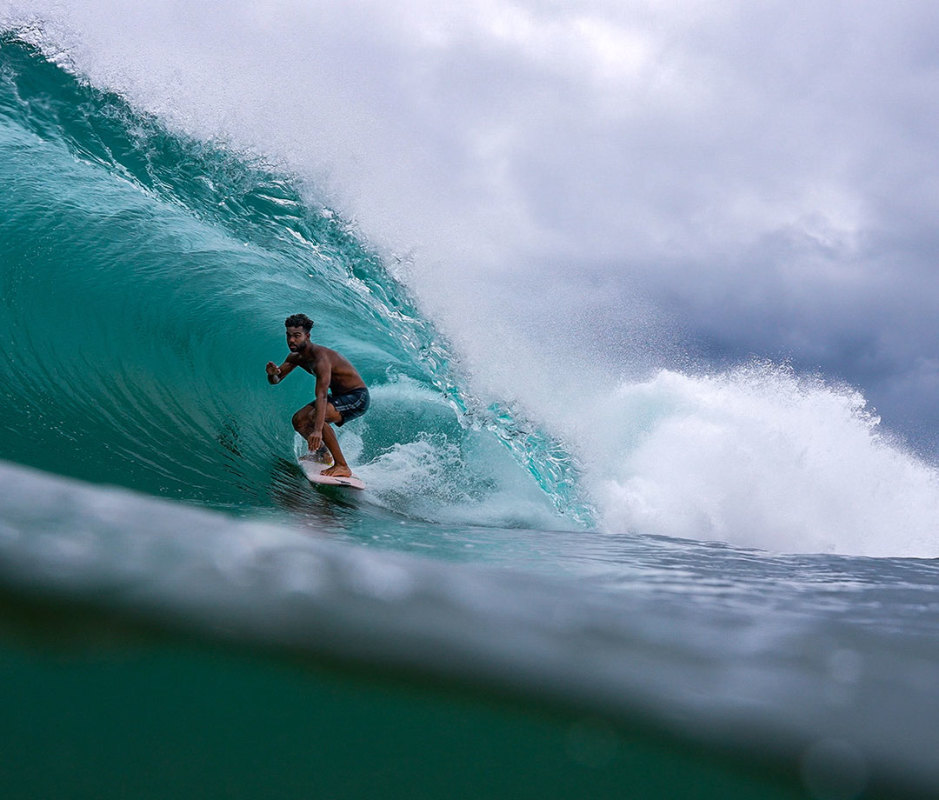
From the beach or your TV tuned into the Olympics, you’ve no doubt watched surfers riding waves and thought, “Now that would be fun.” But actually doing it—getting to the best surf destinations and up on a board is a whole other intimidating matter. How do you time the waves just right? How do you know when it’s your turn to catch one that’s rolling in? Plus, what gear do you need to get started? These are just a few of the pressing questions beginners have when venturing out into the waves with a surfboard. Our five-step, expert-led primer on how to surf is just what newbies (or rippers of all levels) need to get started or take it to the next level.
The beauty of surfing is that no two days on the water are the same. Wind, swells, and tide can all affect surf conditions, so you can be a continual student. If you’re breaking into the sport, or it’s been ages since you’ve caught a wave, it’s a great idea to sign up for a surf lesson.
With wave pools becoming a major trend across the U.S., a quick search will lead to surfing programs that may be closer than you think, even if you’re not an easy commute to Malibu or Cocoa Beach. Whether you’re at the shore or a surf facility, a solid instructor can help you learn how to time the waves and even push you into your first one, so you can feel the thrill and build some momentum. After you gain some confidence, going out with friends or more experienced surfers will help you level up.
Related: 10 Best Wave Pools Worldwide for Stellar Surfing on Demand
Be patient. It can take at least two or three lessons before you pop up and ride your first wave—and several more before you’re ready to get out on the water on your own, says Stephen “Cruz” Morales, founder of Encinatas, CA-based Buenas Olas Surf School.
To break down how to get started surfing, we gathered tips from experts in the sport, including pro surfer and filmmaker Hunter Jones (see video above). Also weighing in is Jono Halstead, a lead surf instructor at Everyday California, a San Diego, CA-based Ocean Adventure Company.
From the ground rules of surf etiquette to catching your first wave, here’s how to get started surfing.
Men’s Journal aims to feature only the best products and services. We update when possible, but deals expire and prices can change. If you buy something via one of our links, we may earn a commission.
Courtesy image
Step 1: Learn Ocean Safety and Surf Etiquette
When you’re new to the sport, research beginner-friendly surf spots online, advises Halstead. The Surfline app provides helpful insights about the friendliness of areas and appropriate skill levels required for various breaks. “Beginner-friendly spots typically have a welcoming vibe, and the surfers in the water are often willing to help teach you the ropes,” he says.
Learn about rip currents, tides, and check the surf forecast before heading out in the water, he adds. You can also call or pop into a local surf shop to get the scoop. You might need to postpone if there’s been a heavy rainstorm, because urban runoff can increase water pollution.
Those who are new to the sport should watch the water before paddling out to make sure they’re comfortable with specific types of breaks and waves sizes. Morales recommends one- to three-foot waves for beginners.
When you do get in the water, do the “stingray shuffle” to avoid stepping on the underwater creatures and getting stung, Morales says, who has also traveled as a private surf guide to help clients explore other countries.
Before you join a surf lineup (the queue of surfers waiting to catch waves), master the art of controlling your board. “If you’re not confident in your ability to manage your board in the water, practice paddling and maneuvering in a calm, empty spot of the water first to avoid being a hazard to others,” Halstead says.
Once you’re in the surf lineup, give way to more advanced surfers. If it’s your turn to catch a wave, they’ll often encourage you to go for it. “It’s often helpful to introduce yourself and mention you’re new to the sport,” Halstead says.
A golden rule: “It’s one surfer per wave,” Jones explains. The right of way is given to the person who’s closest to where the wave is breaking. “Snaking” is when you cut ahead of someone, and you won’t make any new friends by doing this.

Courtesy image
Step 2: Master the Language of Surfing
The more time you spend in the water and around other surfers, the more lingo you’ll pick up. Here’s a handful of terms your instructor might introduce you to during your first surf lesson, and worth knowing before you catch your first wave.
Regular vs. Goofy Foot
Regular foot surfers ride with their left foot forward, while goofy foot surfers ride with their right foot forward.
Surfboard Parts
Get to know the anatomy of your surfboard.
- Fins are attached on the bottom of your board and help control and steer the board.
- The nose is the board’s front tip and the tail is the back part of your board—which come in different shapes that can factor into speed and control.
- A leash attaches to the surfboard deck near the tail and your ankle, preventing you from losing your board during a wipeout.
- Surfboard rails are the edges of the board, running from the nose to the fin, affecting things like turning, stability, and speed.
Types of Boards
- Foamies (soft-top boards) and longboards are great for beginners because they’re wider, longer, and more stable, notes Jones. They’re the ones to grab for smooth rides and to perfect your pop-ups.
- Shortboards maneuver better and are built for speed and tricks, but require more advanced skills .
Ocean Terms
Impact zone is where a wave first breaks. Whitewash is the broken white water of a wave that’s moving towards the shore—and great for beginners to learn on.
Courtesy image
Step 3: Master Basic Surfing Moves
If you take a lesson, your instructor will likely show you how to paddle and pop up while you’re on the shore. Ahead, Morales shares his steps for both basic maneuvers. Note: you’ll spend more time paddling than riding waves—especially in the beginning—so part one here is a key skill to master.
Paddling Instructions
- Lie on the board with your toes to the tail.
- Keep your feet together at all times.
- Keep your torso, hips, and legs centered on the board.
- Slightly cup your hand while keeping all fingers close together.
- Spear the water’s edge while pushing and reaching forward.
- Pull your cupped hand back parallel to the rail of your board until your hand reaches your shoulder, creating a sharp-bent elbow (chicken wing)—all while keeping your hand no deeper than half of your forearm’s depth under the surface.
- Start to push backwards toward the tail and downward until your full arm reach has been extended back.
- Flick your hand downward, trying to leave the water you cupped behind you. Make sure you don’t flick the water out of the water surface, but rather keep this movement underwater.
Pop-Up Instructions
- Lie on the center of your board with your toes to the tail with your feet together.
- Arch your back with your head up, looking forward.
- Put your hands flat on the top deck of the board with the knuckle of your thumb touching the edge of your armpits. You don’t want to hold the rails.
- Do a pushup and use your back foot to plant down above the fin plugs on the tail of your foam board.
- In the same motion, lift your front foot and place it in between your two hands, bringing up your knee to your chest. Ultimately you want to be standing with your toes and chest facing the rail, while looking up and forward toward the direction of the nose. Note: Steps 4 and 5 happen at the same time, creating the actual pop-up.
- Stabilize yourself. Check if your feet are aligned with the center of the board, then bend your knees, but keep your back straight for better control and balance.
- Wherever you look is where you’re going. Start by looking forward, not down. Once you’re more comfortable, looking to the left or right will make you start to turn.
Courtesy image
Step 4: Catch Your First Wave
You’ve graduated from surfing lessons and are ready to catch your first wave on your own. It’s time to start putting everything together.
Gain confidence by catching whitewash, which is the wave that’s already broken—basically the foam that will catapult you toward shore, Jones says. It’s softer, less technical, and allows for more repetition.
When you’re ready to go out farther, start by watching the water. “Observe the waves and other surfers to understand the rhythm of the ocean,” Halstead says. While you’re doing this, you can stretch and apply wax to your board for better grip.
Then, it’s showtime: Paddle out to the lineup, where the waves start to break. Face your board toward the shore when you see a wave approaching. When it’s your turn, paddle to match the speed of the oncoming wave. Arch into a “cobra position” to prepare for the pop-up. Quickly pop to your feet, with your dominant foot naturally landing at the back of the board.
Keep your hands up for balance and look in the direction you want to go. Pro tip: “Once you’re out in the water, identify a lineup marker like a house, palm tree, or lifeguard tower that’s on land,” Jones says. “Once you catch a wave, you can just paddle right back out and be like, ‘Okay, I’m in the right spot to catch the best waves that are coming in.’ ”
Courtesy image
Step 5: Hone Your Technique
Looking to level up from beginner to intermediate? “Get comfortable on a longboard before you switch to a shorter board,” advises Jones. “Eventually, you can start bringing a couple boards down to the beach with you to assess the conditions and choose the right one to ride.”
After you’re well-versed in catching waves, you can start experimenting with turns, Halstead adds. “Point your hands and turn your head to guide your turns.” You can also start riding the top third of the wave to gain better control.
The best tip of all for getting better?
“Clock as much time as you can in the water,” Jones says. “Get out with friends who surf and who know more than you, or an actual trainer, and it’ll help build your skills.”
Best Surf Gear to Get Started
Odysea Log, 9 ft

Courtesy image
A big board is best for beginners. Odysea Log from Laguna, CA-based Catch Surf is equipped with sturdy rails and a slightly more defined rocker (curvature at the bottom of the board) for superior soft-top performance, Morales says. It’s also a great pick to help prevent nosediving in the waves due to excess weight in the front of the board—probably the biggest frustration for newbie surfers. The 8-foot model works well for most beginners, but for a little more stability, go with the Odysea 9-foot Log, designed by California surfers for riders of all levels.
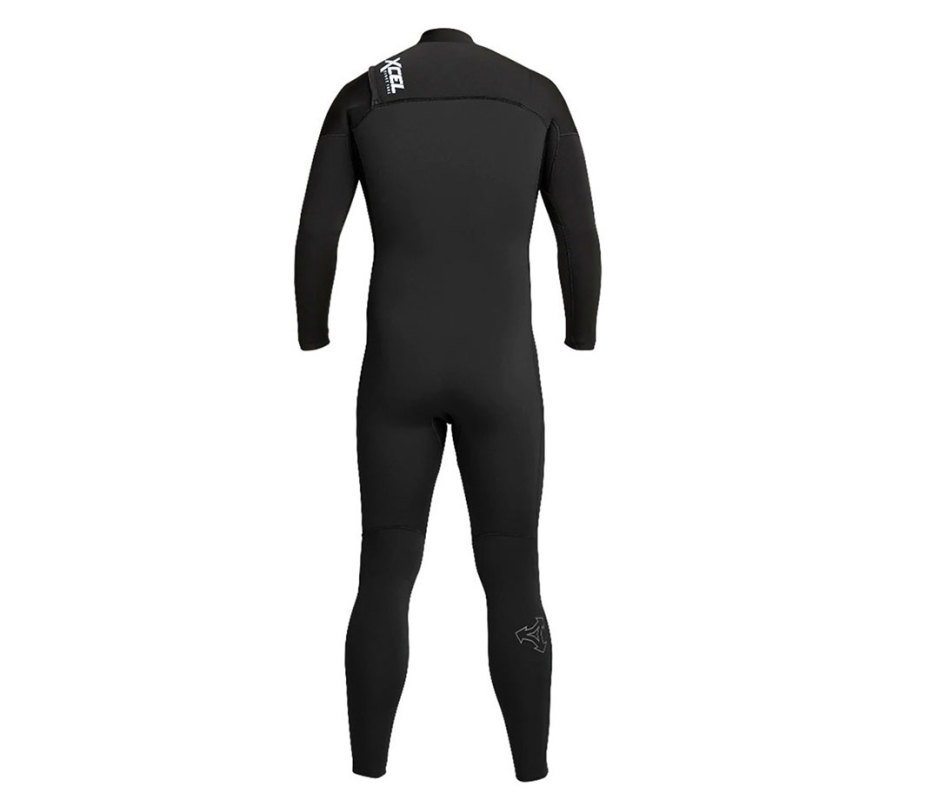
XCEL Comp 4/3mm Full Wetsuit
Courtesy image
If the water is under 70 degrees, you’ll want a wetsuit to keep the cold from spoiling the fun. XCEL Comp wetsuits are prized among top surfers for their durability and comfort to keep you warm for the entire season. XCEL’s Comp 4/3mm full wetsuit is the brand’s lightest and stretchiest, reinforced with a Thermolite IR core and critically taped seams. Consult local surf shops to get recommendations on suitable wetsuit thickness for the area you’re in, suggests Morales. Remember, when trying on a wetsuit, it’s supposed to fit tight to provide adequate insulation from cold water. Also, to get the most life out of your wetsuit, always thoroughly rinse it afterwards with clean, fresh water. After, hang it in a shaded area, turning it inside out to let each side completely dry. “This will not only eliminate sand and salt, but most importantly prevent bacterial or fungal growth,” Morales says.
Creatures of Leisure Icon 9 Leash
![]()
Courtesy image
Almost any brand of leash will be good enough for a starter. Oftentimes, surf shops carry their own line, so why not help support a small local business by purchasing one of theirs? Morales’ go-to leash from Creatures of Leisure is straightforward and designed for small to medium waves. Make sure to match your leash according to board length. A 9-foot leash, for example, goes with a 9-foot board.
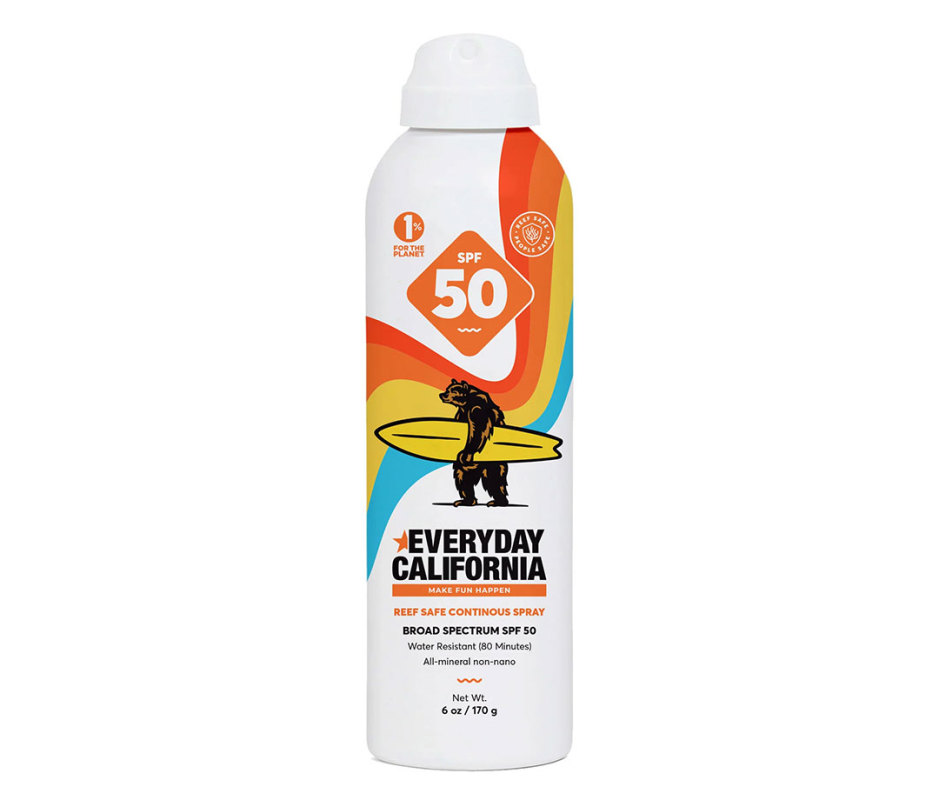
Everyday California Reef-Safe Continuous Spray Sunscreen
Courtesy image
Protect your skin—and the underwater creatures sharing your fragile playground—with a reliable (and responsible) sunscreen. Halstead recommends the mineral, reef-safe sunscreen from Everyday California. This water-resistant product sprays on with a non-aerosol mist and is formulated with ingredients that are safe for endangered coral reefs.
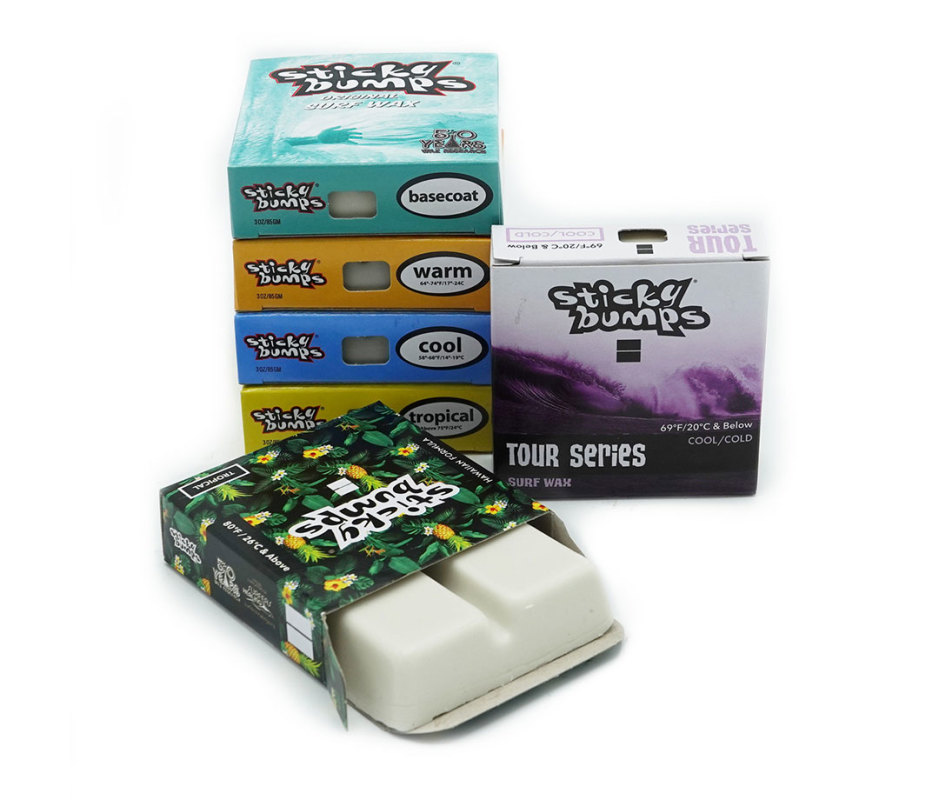
Sticky Bumps’ Custom 6-Pack Surf Wax
Courtesy image
Surf wax is a must for every beginner because it provides traction and grip to help you stay planted on your board. Surfers tend to gravitate toward their favorite type of surf wax. Jones’ favorites are from Sticky Bumps, which cater to a range of surfing conditions and work well when surfing waves that require walking on slippery rocks. “I always wax the top of my feet,” he advises. “While in the water, you can rub one foot on top of the other, creating extra grip and removing any dirt or dust from your feet.”
Pro tip: Know the water temp or conditions where you’re surfing, because surf wax has varying levels of stickiness to correlate with different temperatures. Sticky Bumps’ custom 6-pack lets you mix and match accordingly.


By Brett Goldhawk
UBC professor Dr. Michael Koehle explains why it’s important to adapt your exercise routine to the weather conditions
For many people, summer is an opportunity to bring their exercise routine out of the gym and into the great outdoors.
But as heat waves, wildfires and smoke-choked skies become commonplace for more communities, it’s important to safely adjust your outdoor exercise to the new realities of climate change.
Dr. Michael Koehle, a professor of sport and exercise medicine at the UBC faculty of medicine, discusses how to tell if it’s safe to exercise outside and what to do when conditions become extreme.
What are the health risks of exercising in extreme heat or forest fire smoke?
Exercising in hot conditions can put us at risk of exertional heat illnesses, including heat exhaustion at the mild end of the spectrum, or the more severe variant, heatstroke, which can be life-threatening.
By contrast, living in areas affected by wildfire smoke—whether we’re resting or exercising—exposes us to long periods of very high levels of particulate matter in the air. This can lead to long-term consequences such as heart and lung disease, as well as diabetes and dementia. The harmful effects of air pollution may be compounded during exercise, because the rate and depth of our breathing increases.
Some people are more at risk than others, and this includes older adults, pregnant people, young children, and people with pre-existing health concerns like lung or heart conditions, cancer, diabetes and mental illness.
How do you know if it’s safe to exercise outdoors?
In Canada, we have helpful tools that give us an indication of the environmental conditions outdoors. For temperature, it’s important to consider the humidex, since we have more difficulty managing our body temperature on hot days that are also humid. People will experience discomfort with a humidex above 30 and should be particularly careful with a humidex above 40.
For air pollution, in Canada we use a scale called the Air Quality Health Index (AQHI), which gives an estimate of the air quality health risk on a one-to-10 scale, and can be checked on apps like Plume Labs and AQHI Canada. Environment Canada has reasonable guidance on when it is safe to exercise, but generally speaking, people should consider modifying outdoor activities when the AQHI is above four for at-risk populations, seven for the general population, or if you experience symptoms such as coughing or throat irritation.
What precautions can people take to stay safe when exercising outdoors in these conditions?
The most important strategy is to monitor current conditions and forecasts for both weather and air quality. This allows us to choose the better times of day and locations for physical activity and exercise. Often early morning can be lower-risk for both heat and smoke, and locations like parks that benefit from optimal wind, shade and distance from smoke sources can lead to lower heat and air quality risk.
For more detailed guidance, the Canadian Academy of Sport and Exercise Medicine has helpful recommendations on exercising in air pollution. The Government of Canada also has information and advice for heat and humidity.
Why is it important to continue exercising, even during environmental extremes?
We know that in the long term, a physically active lifestyle is important in preventing and treating many chronic diseases, including those that make people more susceptible to the effects of extreme heat and smoke, so avoiding activity altogether is not a solution.
Instead, using strategies like exercising in the early morning or indoors depending on the weather conditions, can help us to stay active, even when the AQHI or humidex are particularly high.
Although we can acclimate somewhat to high heat and humidity over a period of days to weeks, there is no indication that we can acclimate to the air pollution that comes from wildfires. So repeated exposure to wildfire smoke—during rest and exercise—only leads to increased risk of long-term health consequences. Everyone needs to assess the conditions and adapt our activities accordingly.
Interview language(s): English
Featured Researcher
Professor, Department of Family Practice, Division of Sport & Exercise Medicine
—
Previously Published on ubc.ca with Creative Commons License
***

Join The Good Men Project as a Premium Member today.
All Premium Members get to view The Good Men Project with NO ADS.
A $50 annual membership gives you an all access pass. You can be a part of every call, group, class and community.
A $25 annual membership gives you access to one class, one Social Interest group and our online communities.
A $12 annual membership gives you access to our Friday calls with the publisher, our online community.
Register New Account
Need more info? A complete list of benefits is here.
—
Photo Credit: iStock


By Kate Wells, Michigan Public
The first time Tammy and Jordan Myers held their twins, the premature babies were so fragile that their tiny faces were mostly covered by oxygen masks and tubing. Their little hands rested gently on Tammy’s chest as the machines keeping them alive in a neonatal intensive care unit in Grand Rapids, Michigan, beeped and hummed around them.
It was an incredible moment, but also a terrifying one. A court had just denied the Myers’ parental rights to the twins, who were born via surrogate using embryos made from Jordan’s sperm and Tammy’s eggs. (Tammy’s eggs had been frozen before she underwent treatment for breast cancer.)
“In the early hours of their lives, we had no lifesaving medical decision-making power for their care,” Tammy Myers told lawmakers at a Michigan Senate committee hearing in March.
Instead, the state’s surrogacy restrictions required the Myers to legally adopt their biological twins, Eames and Ellison.
“Despite finally being granted legal parenthood of our twins almost two years after they were born, our wounds from this situation remain raw, casting a long shadow over the cherished memories that we missed,” Myers told lawmakers, her voice catching.
Until this spring, Michigan was the only state that had a broad criminal ban on surrogacy. Many families say that ban left them in legal limbo: They were compelled to leave the state to have children; find strangers on Facebook who would carry their child; or, like the Myers, be forced to legally adopt their own biological children.
Gov. Gretchen Whitmer of Michigan signed legislation in April repealing the 1988 criminal ban, legalizing surrogacy contracts and compensated surrogacy after more than three decades. But the legalization is raising fears among conservatives and religious groups, who echo Pope Francis’ concerns that surrogacy exploits women and makes children “the basis of a commercial contract.”
As reproductive technology advanced in recent decades, most states passed laws permitting and regulating surrogacy. But Michigan did not, said Courtney Joslin, a professor at the University of California-Davis School of Law who specializes in family law. Still, those restrictions didn’t prevent Michiganders from having children via surrogacy.
“Criminal bans, or even civil bans, don’t end the practice,” Joslin said. “People are still engaged in surrogacy, and it’s becoming more clear that the effect of a ban is just to leave the parties without any protection. And that includes the person acting as a surrogate.”
In 2009, a couple in western Michigan had to surrender custody of twins after their surrogate decided to keep the babies. The surrogate claimed that she hadn’t been aware of an arrest and a mental health issue in the intended mother’s past. In 2013, a surrogate from Connecticut fled to Michigan to give birth, knowing state law would give her parental rights. She and the intended parents had disagreed over whether to terminate the pregnancy following the discovery of major fetal abnormalities.
The Myers family, however, thought they would be able to avoid any protracted legal fights. They had the full support of their surrogate, Lauren Vermilye, a stranger who’d volunteered to be their surrogate after seeing Tammy’s posts on Facebook. Yet even with Vermilye and her husband, Jonathan, saying that the twins belonged to the Myers, Michigan judges denied the Myers’ request for a prebirth order giving them parental rights.
“As a devoted family already raising our kind, inclusive and gentle-hearted 8-year-old daughter, Corryn, we were forced to prove our worthiness through invasive psychological testing, home visits, and endless meetings to discuss our parenting plan to prove that we were fit to raise our twins, Eames and Ellison,” Tammy Myers told lawmakers in March.
Opponents of Michigan’s repeal of its surrogacy ban distinguish altruistic surrogacy — in which the surrogate mother does not receive any compensation, including for her medical and legal expenses — from a contract for a child.
Legislators in Michigan’s House of Representatives passed bills late last year to allow courts to recognize and enforce surrogacy contracts. These bills allowed parents to compensate surrogates, including for medical and legal expenses. But as the legislation moved forward early this year, religious and conservative groups, and some Republican lawmakers, continued voicing their opposition.
Michigan’s surrogacy laws were not preventing altruistic surrogacy in the state, argued Genevieve Marnon, the legislative director of Right to Life of Michigan, at a state Senate committee hearing in March.
“However, current law does require a legal adoption of a child who is born of one woman and then given to another person,” Marnon said. “That practice is child-protective, to prevent the buying and selling of children, and to ensure children are going to a safe home.”
Michigan’s ban on surrogacy is “in keeping with much of the rest of the world,” Marnon said in March. Several European countries ban or restrict surrogacy, including Italy, which is cracking down on international surrogacy, an arrangement involving a surrogate mother who lives in a different country than the biological parents.
“India, Thailand, and Cambodia had laws similar to those contemplated in these bills, but due to exploitation of their women caused by surrogacy tourism, they changed their laws to stop that,” Marnon told the senators in March.
In January, Pope Francis called for a universal ban on surrogacy, “which represents a grave violation of the dignity of the woman and the child, based on the exploitation of situations of the mother’s material needs,” he said.
Rebecca Mastee, a policy advocate with the Michigan Catholic Conference, told lawmakers that while she acknowledged the suffering of people with infertility, surrogacy can exploit women and treat babies like commodities.
“At the core of such agreements is a contract for a human being,” she said.
“That made my blood boil, hearing that,” said Eric Portenga. He and his husband, Kevin O’Neill, had traveled from their home in Ann Arbor to the Capitol in Lansing to attend the hearings in March.
If you’ve been through the surrogacy process “you know there’s no commodification at all,” Portenga said. “You want a family because you have love to give. And you want to build the love that you have, with your family.”
When Portenga and O’Neill were trying to become fathers, they reached out to surrogacy agencies in other states but were told the process would cost $200,000. “We would have had to have sold the house,” O’Neill said.
Like the Myers, the couple turned to Facebook and social media, “just putting our story out there that we wanted to become dads,” O’Neill said. A friend of a friend, Maureen Farris, reached out to the couple: She’d been wanting to help a family through surrogacy for years, she said. And Farris lived just a few hours south in Ohio, where surrogacy contracts and compensation are legal.
Farris’ contract with Portenga and O’Neill was fairly standard. Both sides had to undergo psychological background checks and have legal representation. The contract also set compensation for Farris, which covered medical and legal fees. The contract stipulated Farris couldn’t travel to Michigan beyond a certain point in her pregnancy because if she’d gone into labor and given birth in the state, she would be considered the legal parent of the child.
That contract, Portenga and O’Neill said, gave Farris more protection and agency than she would have had in Michigan at the time. “They’re carrying a human life inside of them,” O’Neill said of surrogates. “They’re not able to work. Their bodies will be changed forever. They’re getting compensated for the amazing gift they’re giving people.”
After the embryo transfer was successful, Portenga and O’Neill learned Farris was pregnant — with identical triplet girls.
“They came out and just unraveled this huge string of ultrasound photographs and, and that’s when we knew our life had changed,” Portenga said, sitting at home in the family’s kitchen. The girls were born in Ohio — where the dads could be legally named their parents — and then the family of five returned to Michigan.
Today, Sylvie, Parker, and Robin O’Neill are 2 years old, and very busy. Parker is the “leader of the pack,” while Robin is the “brains of the operation” — she can count to 10 but likes to skip the number five. Sylvie is “the most affectionate, the most sensitive, of the three of them,” O’Neill said. “But their bond is so amazing to watch. And we’re so lucky to be their dads.”
This article is from a partnership that includes Michigan Public, NPR, and KFF Health News.
KFF Health News is a national newsroom that produces in-depth journalism about health issues and is one of the core operating programs at KFF—an independent source of health policy research, polling, and journalism. Learn more about KFF.
Subscribe to KFF Health News’ free Morning Briefing.
—
Previously Published on kffhealthnews.org
***
You Might Also Like These From The Good Men Project
Join The Good Men Project as a Premium Member today.
All Premium Members get to view The Good Men Project with NO ADS. A $50 annual membership gives you an all access pass. You can be a part of every call, group, class and community. A $25 annual membership gives you access to one class, one Social Interest group and our online communities. A $12 annual membership gives you access to our Friday calls with the publisher, our online community.
Register New Account
Need more info? A complete list of benefits is here.
—
Photo credit: unsplash

This post may contain affiliate links. As an Amazon Associate, I earn from qualifying purchases. Please read my disclosure.
Packed with hidden veggies and sweetened with banana and mango, my rich and creamy broccoli smoothie is the perfect nutritious and delicious way to kickstart your day! Made with just a handful of basic ingredients, it takes just 5 minutes to make, and it also happens to be super kid-friendly too!

If you’re looking for a quick and easy pick-me-up for a healthy breakfast or post-workout snack, my broccoli smoothie with banana and mango is just what you need. It’s one of my favorite ways to sneak in some extra greens!
Now, I know what you’re thinking – a smoothie with broccoli and banana!? It sounds unusual, but trust me, you’ll be pleasantly surprised. While broccoli might not be as common in smoothies as kale or spinach, it blends beautifully with the other ingredients, creating a creamy, thick, and rich treat.
(And if you’re looking for different ways to mix things up in the morning, be sure to also try some of my other smoothie recipes! Some favorites are my arugula smoothie, tomato smoothie, and apple carrot smoothie!)
My broccoli banana mango smoothie is so good that you will barely even notice the broccoli aside from the beautiful green color. It’s a great way to add more greens to your diet as well as get picky eaters to eat more veggies.
And while broccoli does have a slightly bitter taste, I promise, it’s completely masked by the sweeter fruits in this recipe. This smoothie has sweet, tropical fruit notes from the banana and mango, and is creamy and slightly tangy thanks to the yogurt!
I love making this green smoothie when I need to use up some leftover broccoli before it goes to waste. All you need is a blender and a few minutes.
What’s even better is that it’s just as easy to customize as it is to make. My recipe is already naturally gluten free but you can make it vegan too. It’s also easy to switch up the fruits, add a handful of spinach or kale, or toss in some chia seeds or flaxseeds – see my notes below on how to do this!
But what I love most are all the broccoli smoothie benefits! It is packed with powerful antioxidants like sulforaphane, which may protect against cancer (source). Broccoli is also known to help lower blood pressure, stabilize blood sugar, and is rich in vitamins C and K, folate, potassium, iron, and fiber (source).
And to top it all off, my recipe is high in protein! Between the protein in the broccoli, milk, and Greek yogurt, each serving has 9 grams of plant-based protein. A smoothie packed with vitamins, minerals, fiber, protein and that’s healthy, low-calorie and tastes great too? That’s a drink I can get behind!
Latest Recipe Video!
🥘 Ingredients
My healthy broccoli smoothie calls for just 6 simple ingredients, all of which can be found at your local grocery store. Scroll down to the recipe card at the bottom of the post for the exact measurements and nutritional info.

Broccoli: This veggie forms the base of my superfood smoothie. You can use either raw broccoli florets or cooked broccoli. You can even make a frozen broccoli smoothie, and it will come out just as well.
Mango: Mango adds some sweetness and is naturally loaded with Vitamin C (source). I recommend using unsweetened frozen mango chunks to save prep time. Frozen ingredients also mean you don’t have to add ice.
Banana: Rich in potassium and nutrients (source), I include frozen ripe banana to add some sweetness and creaminess.
Milk: I used unsweetened almond milk, but any type of milk will work. Other plant-based options include unsweetened coconut milk, oat milk, flax milk, and rice milk. If you’re not vegan, low-fat milk or skim milk are great choices. If you don’t want to use milk, you can also use coconut water. I don’t recommend using fruit juices like orange juice or pineapple juice as that would increase the sugar content of this recipe.
Vanilla Extract: Just a pinch of vanilla extract adds natural sweetness. I like to use it instead of adding extra sugar.
Yogurt: Greek yogurt gives the smoothie its creamy texture and a good dose of calcium and protein (source). Feel free to use dairy-free yogurt (like unsweetened coconut yogurt) as a vegan option.
🔪 How To Make A Broccoli Smoothie
My simple broccoli smoothie recipe is so easy, that you’ll wonder why you haven’t been making homemade smoothies all along! It’s a 2-step process that anyone can master.
Watch my video below to see how quickly this smoothie comes together in just minutes.
Blend Ingredients: First, I place all the smoothie ingredients in a high speed blender and puree until smooth. Then I give the broccoli shake a taste and adjust the sweetness if needed.

Serve: I enjoy my smoothie immediately!

My #1 Secret Tip when making this smoothie is to use a high-speed blender. This is crucial for achieving a smooth, creamy texture without any remaining chunks of broccoli.
High-speed blenders (like a Vitamix) can fully pulverize the vegetables and fruits, ensuring that all the ingredients are well-blended. When you’ve got an ingredient like broccoli which is pretty fibrous, you really want to makes sure it gets completely blended in. This not only improves the texture but also enhances the flavor.
Other Tips To Keep In Mind:
- Add Liquid First: Pour your liquid (almond milk or any other milk) into the blender first to prevent ingredients from sticking to the blades. This helps create the smoothest consistency and saves me some blending time.
- Freeze The Banana: I like to freeze my banana ahead of time to create a thick and creamy smoothie that is already chilled and doesn’t need any ice.
- No Extra Sugar Needed: Thanks to the fresh fruit, you most likely won’t need to add sugar or coconut sugar (or any sweetener) to my recipe! I recommend tasting the smoothie before adding more sugar.
- Serve Immediately: For the best taste and texture, I serve this broccoli and banana smoothie right after blending before it begins to separate. If you do have to wait to serve, give it a good stir until fully combined again.
- Prep Ahead: For busy mornings, you can prep the ingredients the night before. I measure out the broccoli, mango, and banana and store them in the freezer. Then, in the morning, I just add the liquid and blend!
📖 Variations
Vegan: To make this banana broccoli smoothie vegan I use unsweetened coconut yogurt in place of the Greek yogurt. Any type of vegan yogurt will work; just keep in mind that thinner yogurt will produce a thinner consistency, so you may want to add a little less.
Mix-Ins: Make my already healthy broccoli and fruit smoothie even more nutritious by mixing in some omega-3 fatty acids like chia seeds, hemp hearts, flax seeds, or even nuts and nut butter.
Other Fruits: You can also change up the fruits. Instead of mango and banana, feel free to use other fruits like pears, apples, dates, and berries. Both fresh and frozen fruit work, but I do recommend freezing the fruit before making your smoothie.
Kid-Friendly Version: If your kids are sensitive to the taste of broccoli, try adding a bit more fruit to mask the flavor instead of adding sweeteners or sugar. This makes a great broccoli smoothie for toddlers.
Raw Broccoli Spinach Smoothie: If you want to add even more greens make a raw broccoli smoothie with a handful of spinach. Any leafy greens can be added. I love tossing in whatever greens happen to be in my fridge.
Additional Protein: To turn my recipe into a broccoli protein shake by adding a scoop of your favorite regular or vegan protein powder or 1 tablespoon of peanut butter or almond butter.
Broccoli Pineapple Smoothie: Instead of the mango, add ½ to ¾ cup chopped pineapple to make a broccoli banana smoothie with pineapple! My kids love this version.
Broccoli Milkshake: To make it even creamier and almost like a dessert, use some regular or vegan vanilla ice cream in place of the Greek yogurt.
Smoothie Bowl: Turn this into a smoothie bowl recipe! Pour the blended smoothie into a bowl and then top it with some of my healthy low calorie granola, nuts, and coconut. You can add any toppings you like.
🍽 Serving Suggestions
My broccoli mango smoothie with banana is delicious alone but it’s also a great accompaniment to a bigger breakfast, healthy snack, or lunch. These are just a few of my favorites.
With Breakfast: Enjoy it alongside a bowl of my cornmeal porridge or high protein overnight oats. Another great option is to pair it with my gluten-free chocolate chip banana muffins, blueberry sourdough muffins, or healthy bran muffins for a quick and easy on-the-go breakfast.
With Snacks: You can also enjoy your smoothie with snacks like my air fryer banana chips, healthy flapjacks, or no bake peanut butter bliss balls. It’s also perfect with some fresh veggies and my no garlic hummus or a piece of honey avocado toast.
With Lunch: For lunch, pair your smoothie with my vegan hummus avocado wrap or kale and caramelized onion veggie panini.
🧊 Storage Directions
Fridge: Smoothies are best enjoyed fresh, but if I have any leftovers, I pour them into an airtight container and store them in the fridge. They will stay fresh for about 24 hours. Before enjoying it again, I give it a good stir.
Freezer: Freezing will change the texture and possibly the taste, but smoothies will keep for up to 3 months when frozen. What I do is pour the smoothie into a freezer-safe container or ice cube trays. Once frozen, I put the frozen smoothie cubes in a ziplock bag. When ready to enjoy, I toss the ice cubes into my blender and puree.
❓Recipe FAQs
Yes! I often use pre-frozen broccoli, which is cheaper and sometimes even more nutritious than fresh broccoli, since it’s flash frozen right when it’s harvested. And the smoothie tastes just like if I had made it with fresh broccoli!
If you don’t drink your smoothie right after blending, it can begin to separate when the ingredients start to settle. This is natural and happens because different ingredients have different densities. To fix this, I simply give the smoothie a good stir or shake before drinking.
Broccoli smoothies can become bitter if it contains too much raw broccoli or if the fruit used is not ripe enough. If this happens, I balance the bitterness by adding a bit more sweet fruit or a little bit of a natural sweetener like honey or maple syrup.
Smoothies can sometimes curdle when acidic fruits (like citrus or pineapple) are mixed with dairy products (like milk or yogurt) and then aren’t served immediately. To prevent this, I use non-dairy alternatives such as almond milk or coconut yogurt when blending with acidic fruits. If curdling happens, it’s best to blend the smoothie again to try and recombine the ingredients.
No, in fact, I don’t recommend cooking any vegetables before adding them to smoothies because cooking veggies releases more of their water content and changes their texture, which will make your smoothie too watery and runny.

Looking for more smoothies with vegetables you can’t taste? Try some of my other delicious vegetarian smoothies!
Want to Save This Recipe?
Enter your email & I’ll send it to your inbox. Plus, get great new recipes from me every week!
By submitting this form, you consent to receive emails from The Picky Eater.

Love this vegetarian smoothie recipe? Please leave a 5-star rating 🌟 in the recipe below and/or a review in the comment section further down the page!
You can also FOLLOW ME on FACEBOOK, INSTAGRAM, and PINTEREST to see more delicious, healthy, family-friendly food, and if you have any questions, I’m here to help!
📋 Recipe Card
Easy Broccoli Smoothie
Packed with hidden veggies and sweetened with banana and mango, my rich and creamy broccoli smoothie is the perfect nutritious and delicious way to kickstart your day! Made with just a handful of basic ingredients, it takes just 5 minutes to make, and it also happens to be super kid-friendly too!
Servings: 2 servings
Calories: 173kcal
- Make sure the banana slices are frozen so the smoothie is thick, creamy, and smooth.
- Always adjust the sweetness to suit individual tastes.
- Maple syrup can be used as a substitute for coconut sugar.
- Using a high-speed blender will result in a very smooth and fluffy smoothie.
- To make this vegan, use unsweetened, plain coconut yogurt instead of Greek yogurt.
- Nutritional information includes coconut sugar.
Serving: 1smoothie | Calories: 173kcal | Carbohydrates: 30g | Protein: 9g | Fat: 3g | Saturated Fat: 1g | Polyunsaturated Fat: 1g | Monounsaturated Fat: 1g | Cholesterol: 3mg | Sodium: 165mg | Potassium: 462mg | Fiber: 4g | Sugar: 20g


Denmark gets Novo Nordisk to lower Ozempic prices

Explore Worldwide announces senior product appointments

Is It Safe to Exercise in Extreme Heat and Smoky Skies?

My favorite hybrid smartwatch has incredible battery life and a gorgeous look

Missing California mother found dead near hiking trail after partner threatened 3-year-old daughter: police

All the 2024 Olympic Controversies Shadowing the Competition in Paris

Alex Robertson: Cardiff sign Manchester City midfielder

16 Low-Carb High Protein Vegetarian Recipes

Government concerned by immigration lawyer ‘hitlist’

Weekly mortgage refinance demand soars 16% as rates sink to lowest level in over a year

A Closer Look: Afro-Mexicans 🇲🇽

Black History Facts I had to Learn on My Own pt.6 📜
A Closer Look: Afro-Mexicans 🇲🇽

Major African Tribes taken away during the Atlantic Slave Trade🌍 #slavetrade #africanamericanhistory

Cameroon 🇨🇲 World Cup History (1962-2022) #football #realmadrid #shorts

What did Columbus Find in 1493? 🤯🔥🔥 #history #civilization #mesoamerica #africa #kemet

Black History Inventors: Mary Kenner 🩸

Origin Of ‘Cameroon’ 🇨🇲😳#africa

No African pre-Columbus DNA? 🤯🤯 #history #mesoamerica #mexico #african

FEB 15TH: On This Day In Black History 📚✊🏿🖤 #bhm #shadrachminkins #each1teach1 #education #weoutchea

Evidence of African Nobility all over Medieval Europe.

african presence in mexico part 1

Did Africans Discover America Before Christopher Columbus?

The Black Presence in Renaissance Europe in 4K- Historical Paintings of Africans Brought To Life

Africans Visited the Americas Long Before Columbus | African History

Dr. Ivan Van Sertima – African Presence in Early Asia

African Presence in Early Europe – Dr Ivan Sertima – PART 1

History of Cameroon

Black History (It’s Yours) | Black History Month Rap Anthem | Animated Music Video

History of Africa from the 16th to the 20th Century
-
 African History5 years ago
A Closer Look: Afro-Mexicans 🇲🇽
-
 African History7 months ago
Black History Facts I had to Learn on My Own pt.6 📜
-
African History5 years ago
A Closer Look: Afro-Mexicans 🇲🇽
-
 African History1 year ago
Major African Tribes taken away during the Atlantic Slave Trade🌍 #slavetrade #africanamericanhistory
-
 African History1 year ago
Cameroon 🇨🇲 World Cup History (1962-2022) #football #realmadrid #shorts
-
 African History1 year ago
What did Columbus Find in 1493? 🤯🔥🔥 #history #civilization #mesoamerica #africa #kemet
-
 African History7 months ago
Black History Inventors: Mary Kenner 🩸
-
 African History1 year ago
Origin Of ‘Cameroon’ 🇨🇲😳#africa